User Management and Notifications
In the IXOPAY Payments Intelligence app, you can not only personalize your views and dashboards but also self-manage your user profile, security settings, and account access.
- Personalize your User profile and manage access through passwords and 2-Factor Authentication (refer to the detailed setup guide for 2FA in the Security document)
- Set preferences for timezone, currency, change comparison and choose between the common understanding of terms (for e.g. tracking gross sales vs. net-sales) to customize the analytics and deliver the most meaningful insights by default.
- Notifications and alerts are available on the dashboard which inform the managed Users of scheduled platform maintenance, scheduled custom alerts and other analytical updates on your payments data so that your team can be updated with the latest insights on the IXOPAY Payments Intelligence platform.
User and Notification management
-
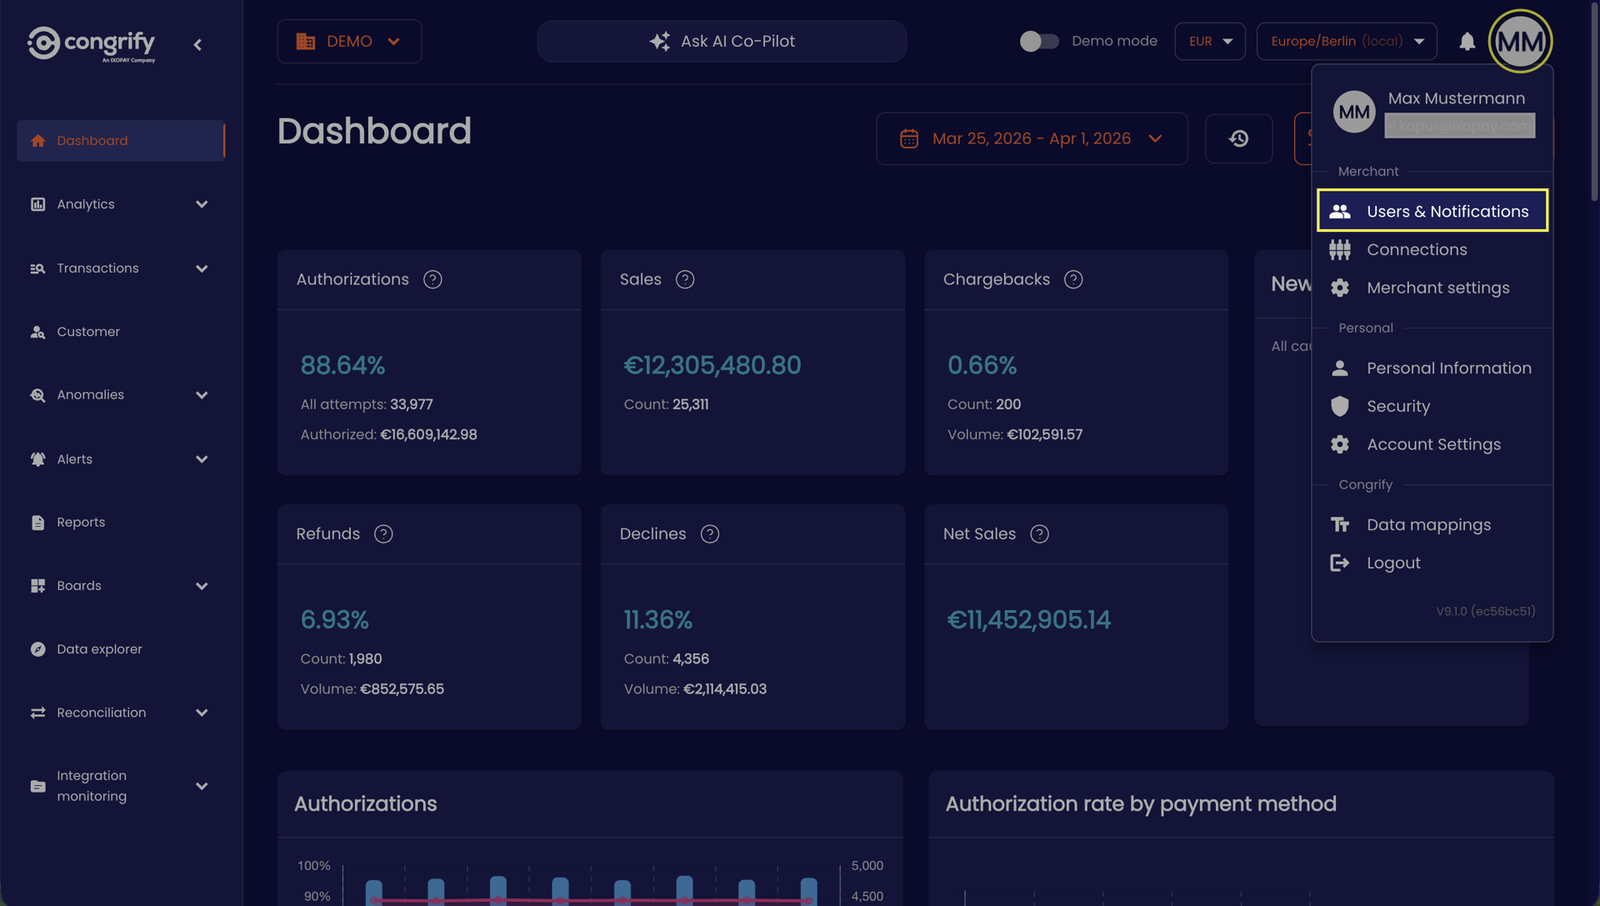
Navigate to the 'Users and Notifications' tab under your User profile as an Administrator
-
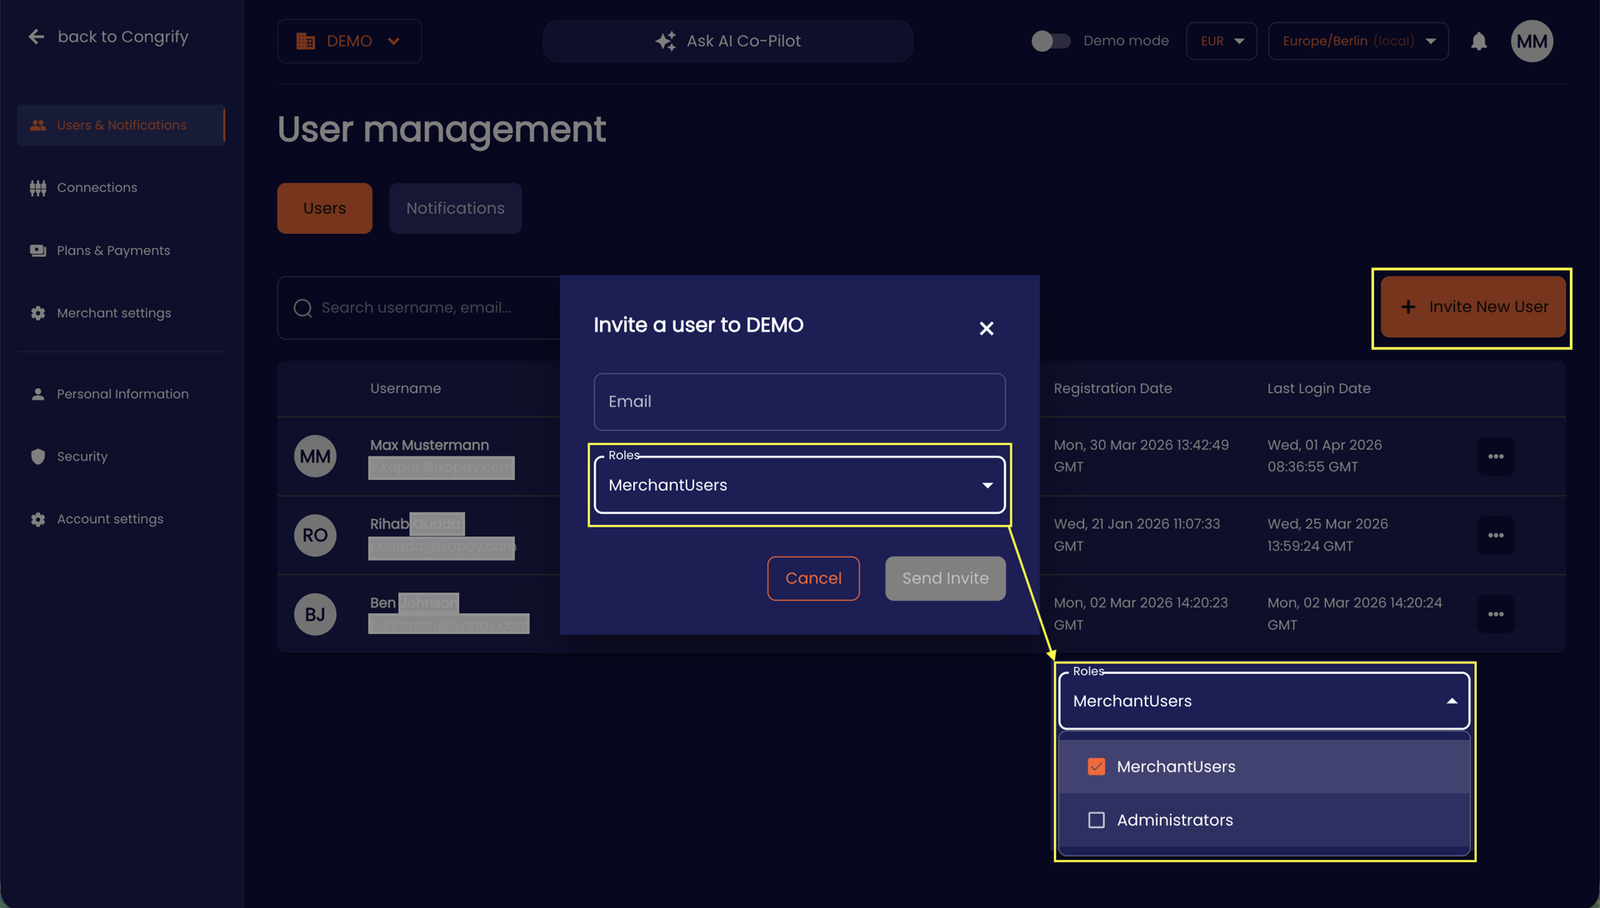
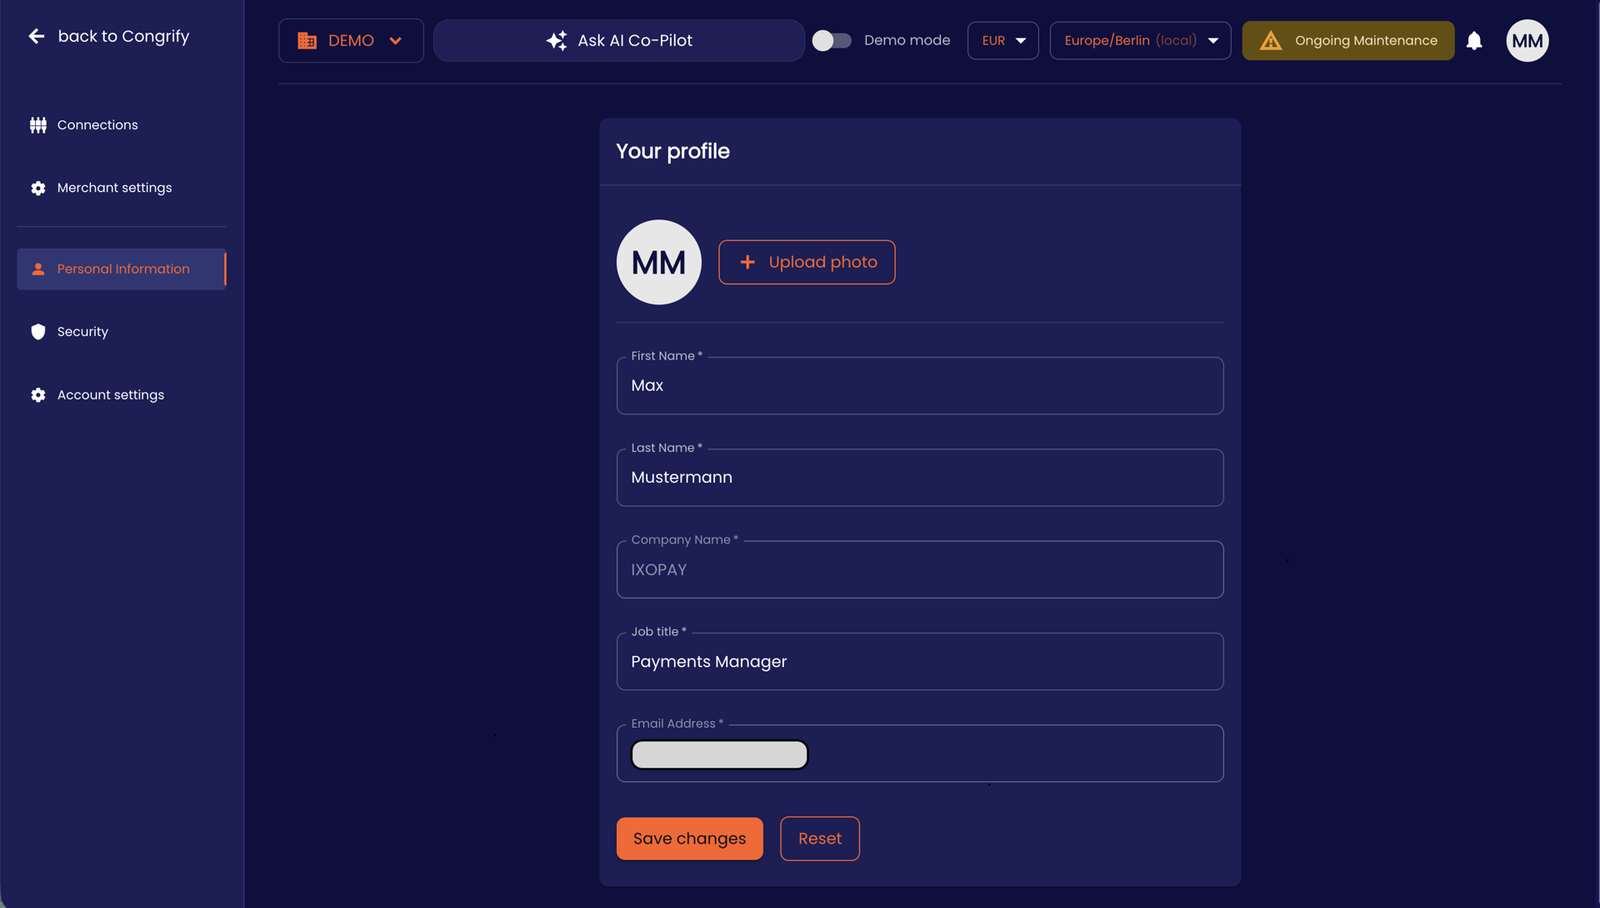
Add new users to your account by clicking on ‘+ Invite New Users’ button, and inserting their email address and assigning a role based access as 'Merchant User' (i.e. providing read and limited write access to the IXOPAY Payments Intelligence analytics platform) and/ or as an 'Administrator' (i.e. extended account, connection and credentials management). The new Users are notified over email and can then access their User profile on IXOPAY Payments Intelligence to further personalize their User profile with their name, profile photo, and employee designation.
-
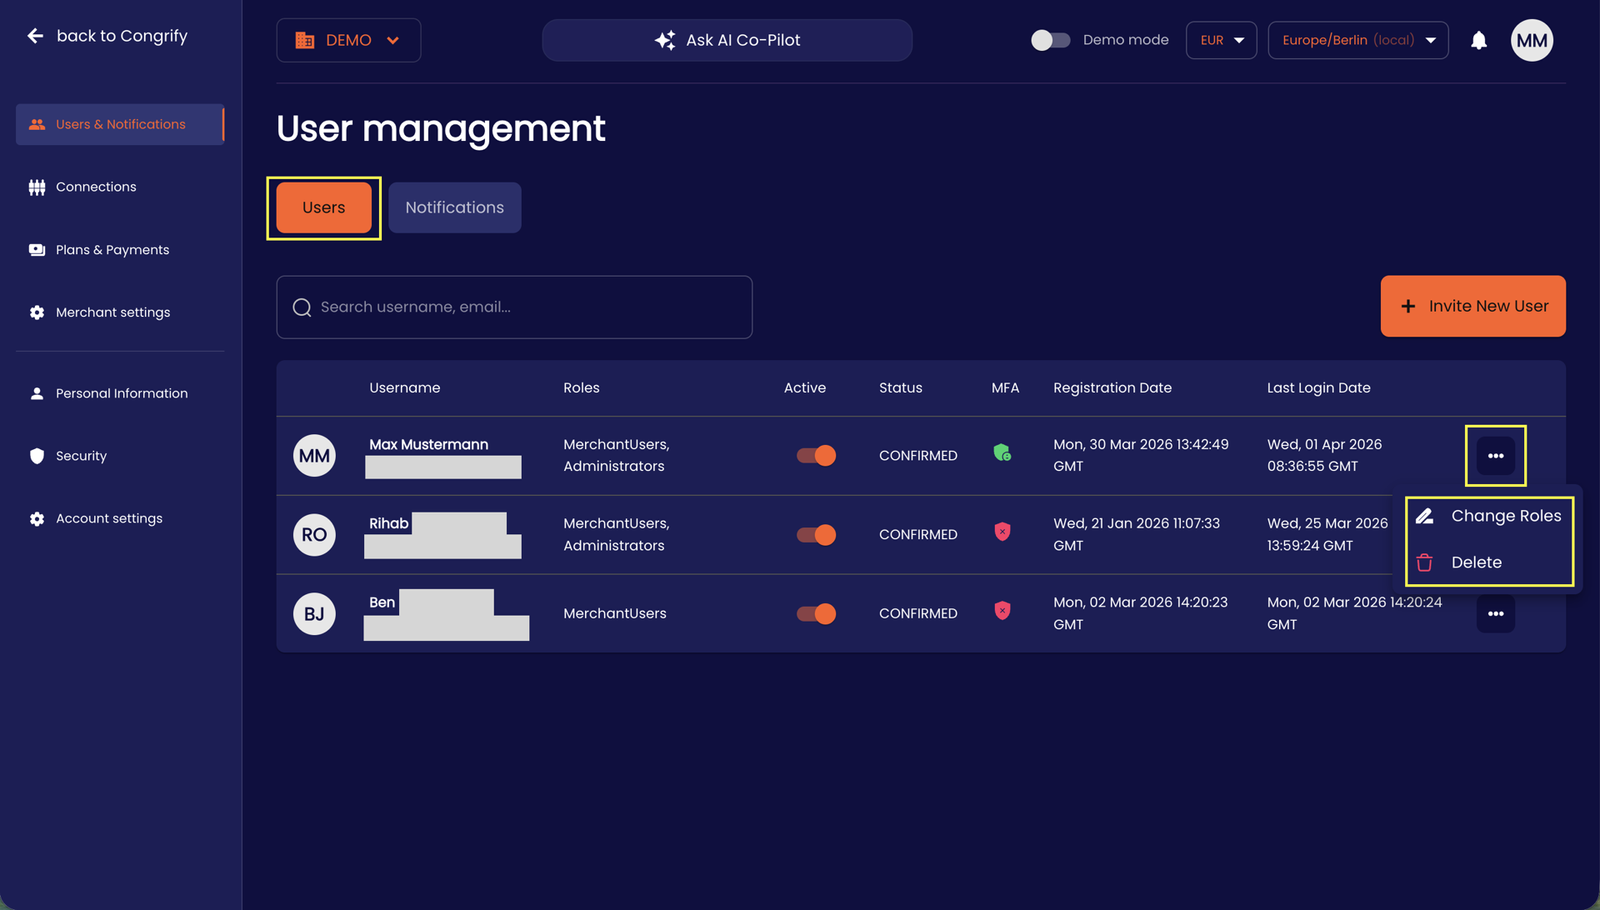
As a privileged Administrator in the Users tab, you can search and view the current details, access rights (including toggling temporary access as an 'active’ user), user status (including MFA onboarding) and activity details of your onboarded team, and further manage their role-based access rights through the User Management page.
-
Under the Notifications tab, you can also individually control the notifications, alerts and updates pushed to each User in the IXOPAY Payments Intelligence app and external 3rd party (such as Slack) channels.
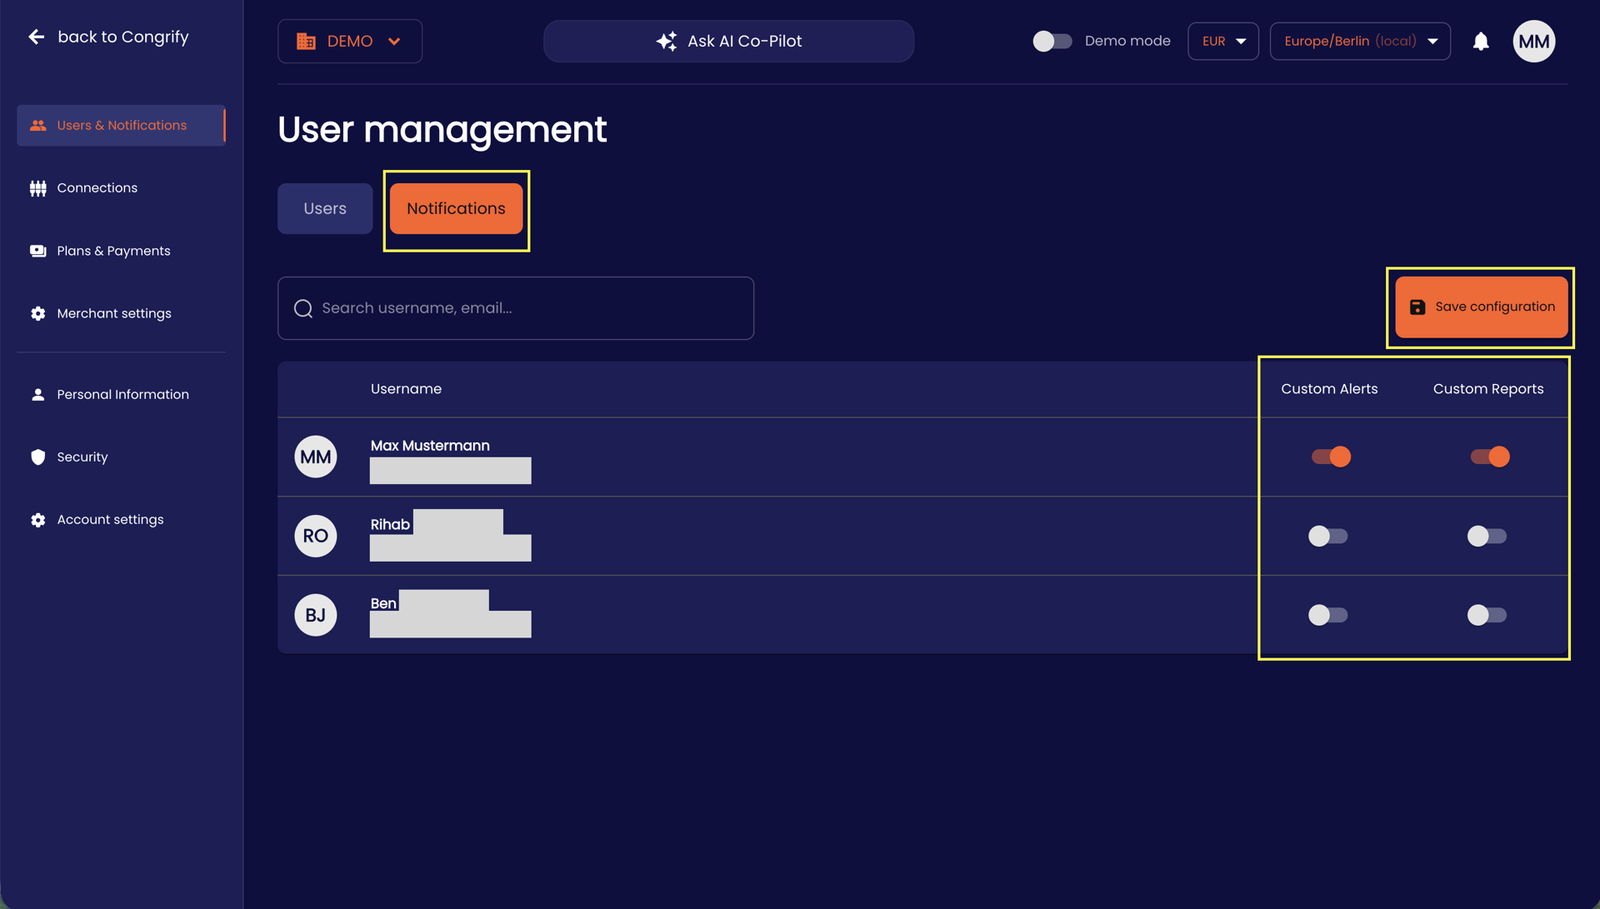
-
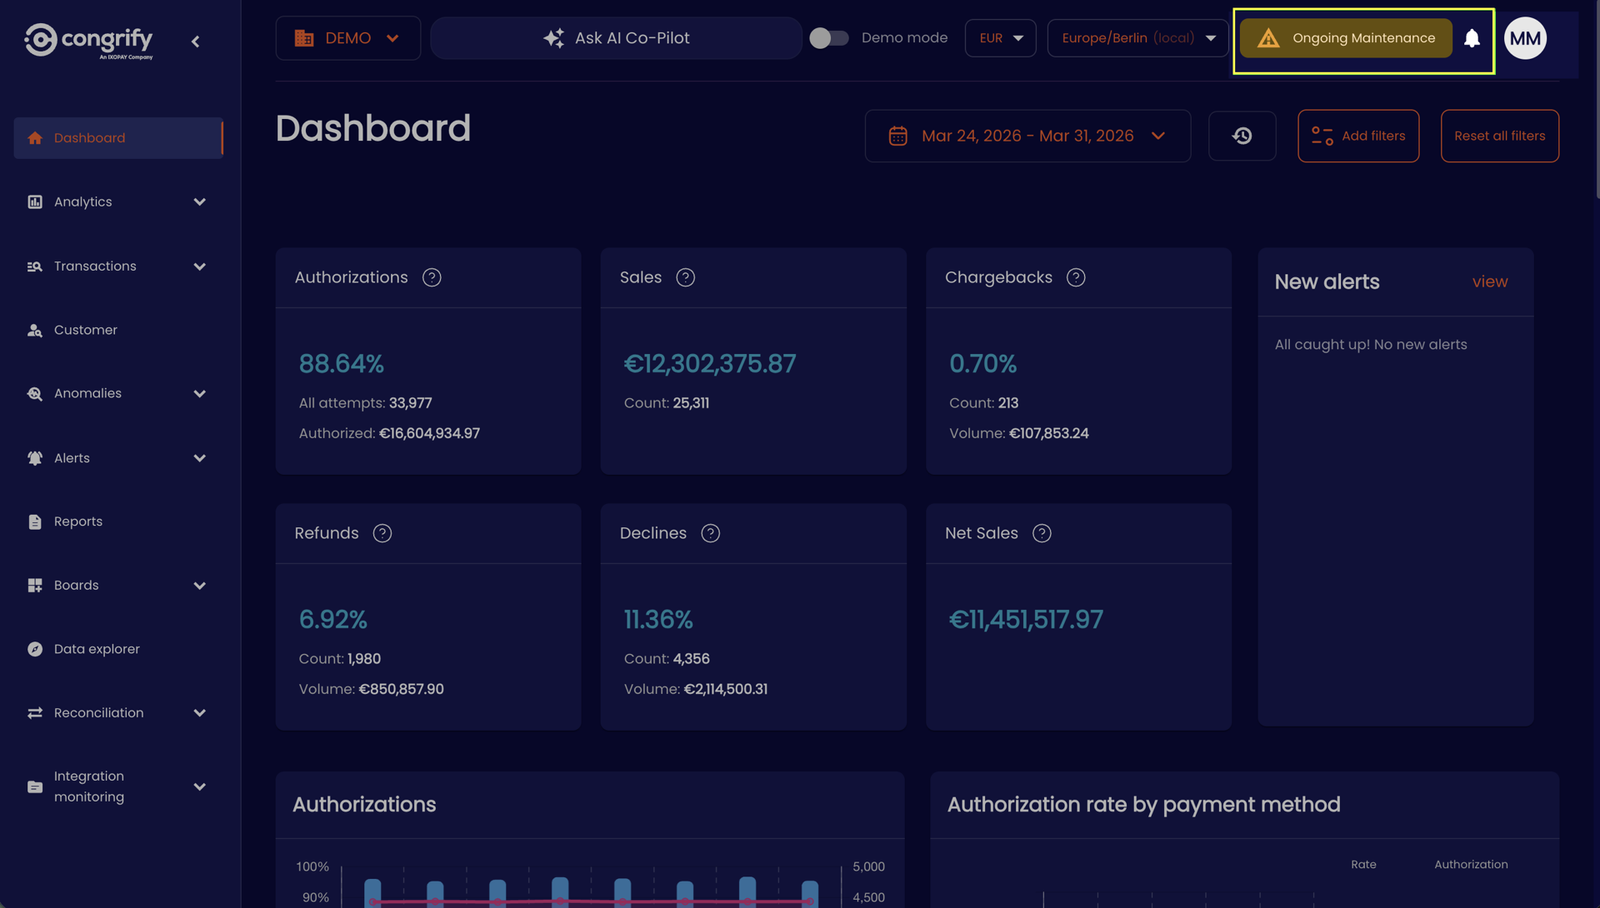
Additionally, you can view all notifications and alerts from the IXOPAY Payments Intelligence team of upcoming maintenance directly on the dashboard
Role Types Summary
| Role Type | Role Permissions |
|---|---|
| Owner | Is the owner of the account. When registering an account with IXOPAY Payments Intelligence, the first user is automatically assigned as an Owner. The Owner can see all functionalities and settings in IXOPAY Payments Intelligence and is the only user that cannot be deleted. If you need to delete yourself as an owner, please contact the support team. |
| Admin | Has all the accesses in the platform to access user ('Merchant Users') management including access rights, manage connection credentials, set merchant settings, etc. |
| Merchant User | Is the user profile who has access to the reporting, visualization and analytical data features of the IXOPAY Payments Intelligence platform, with limited personal management of user profile, settings, etc. |
Account Settings
-
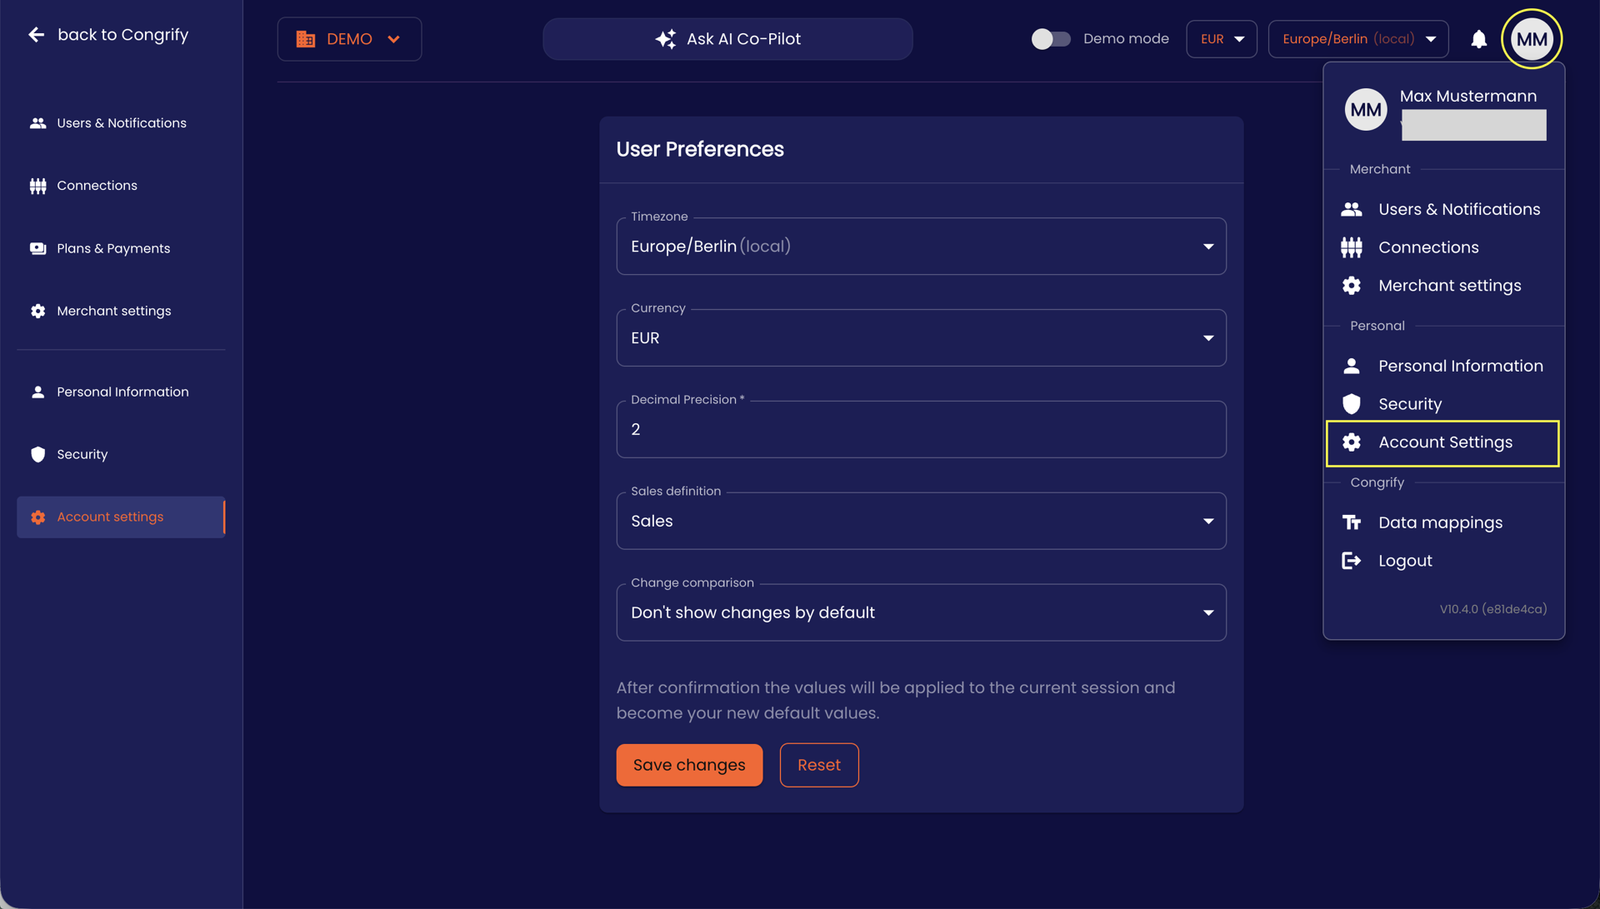
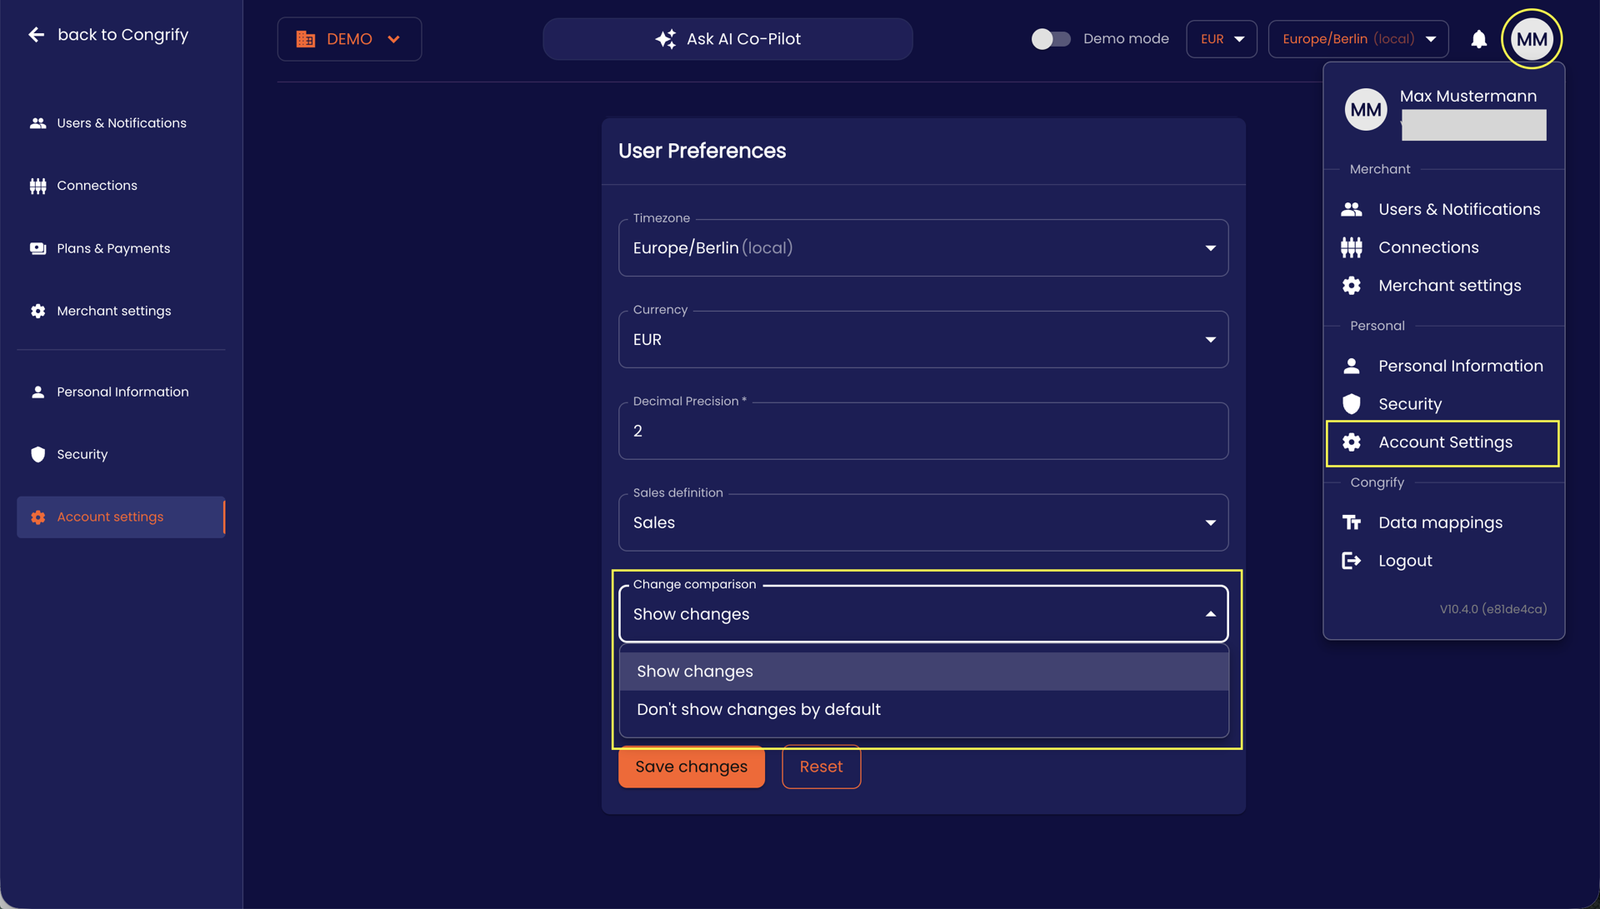
Customize your preferences for timezone, currency, decimal precision, default common terminology and change comparison directly through your 'Account Settings' under your User tab.
-
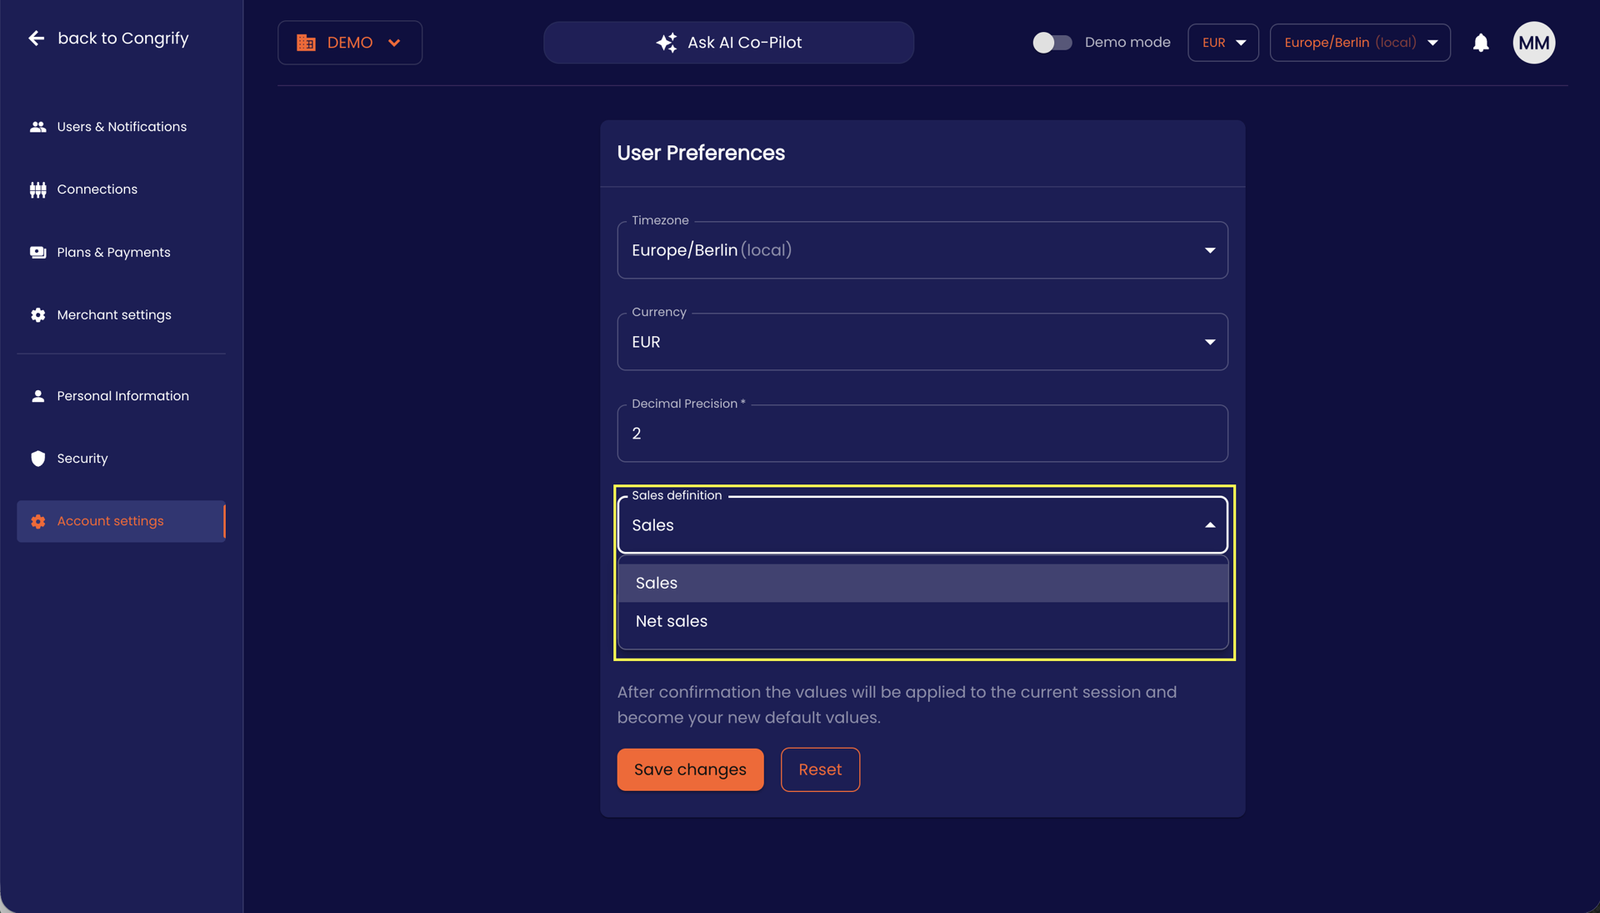
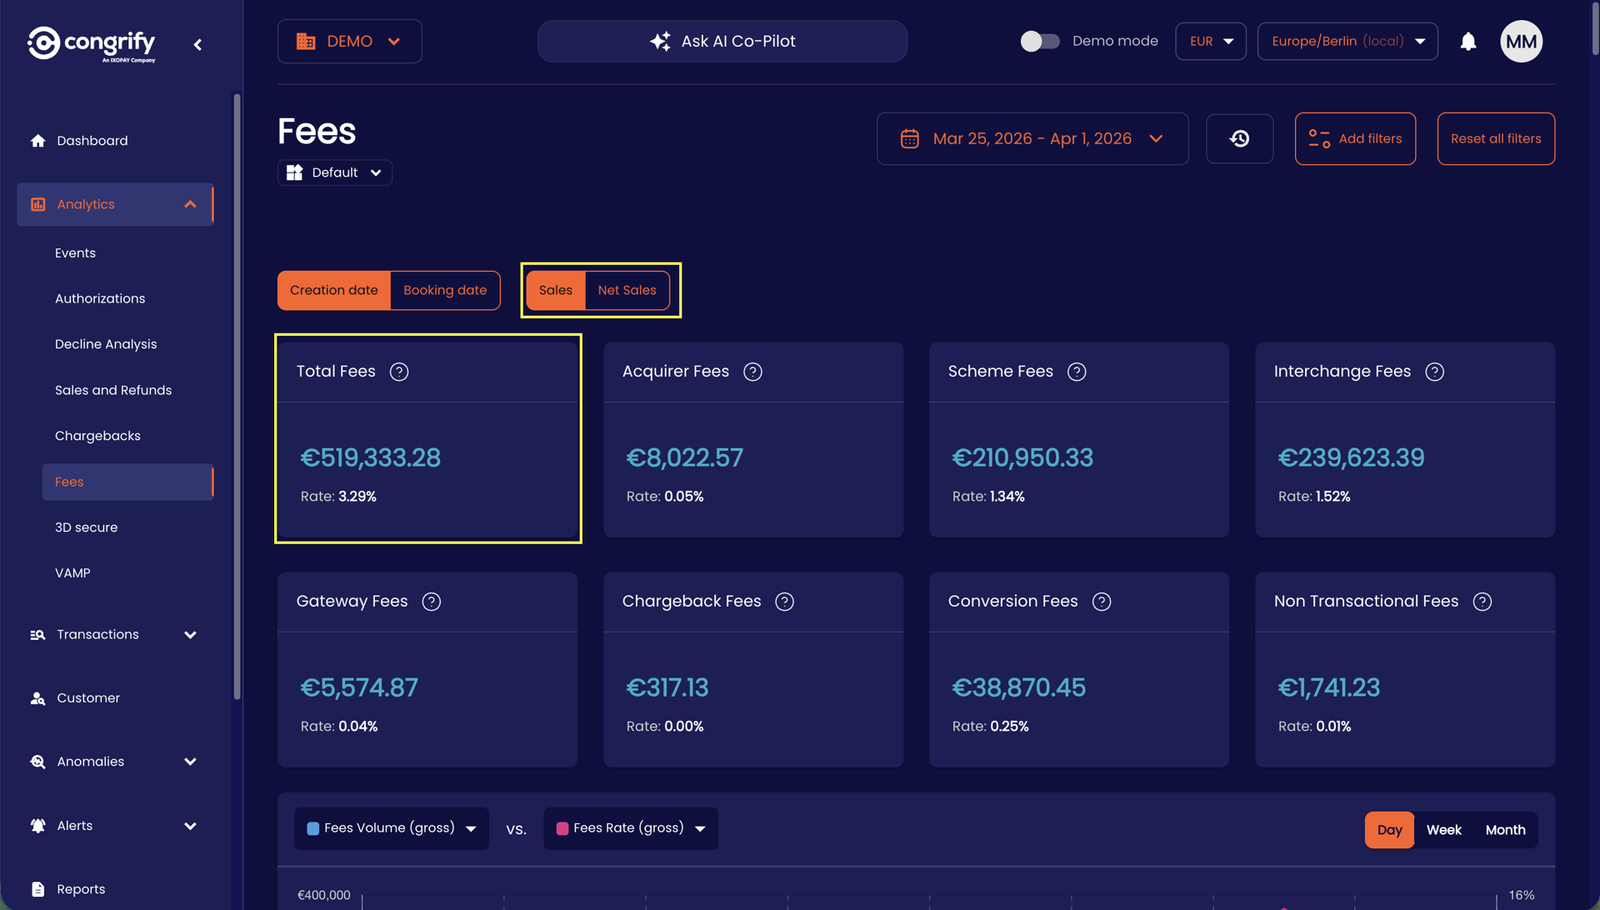
As part of the account settings changes, you can also set the default rate calculations for Fees basis ‘Sales' or ‘Net Sales’ denominations. However, you can also toggle the rate calculations directly on the 'Analytics’-> Fees page to re-compute and compare such rates in real-time.

-
You can also toggle visibility of changes in aggregated data on the dashboard and analytics pages. By default the changes are computed on the same time period directly preceding the selected time, however, as a User, you can select custom change time-periods directly on each dashboard or analysis page to compare your payments data aggregated over different selected time periods vs change period through the UI.
- First, toggle change computation through the User tab → Account Settings, selecting ‘Show Changes’ under 'Change Comparison'.
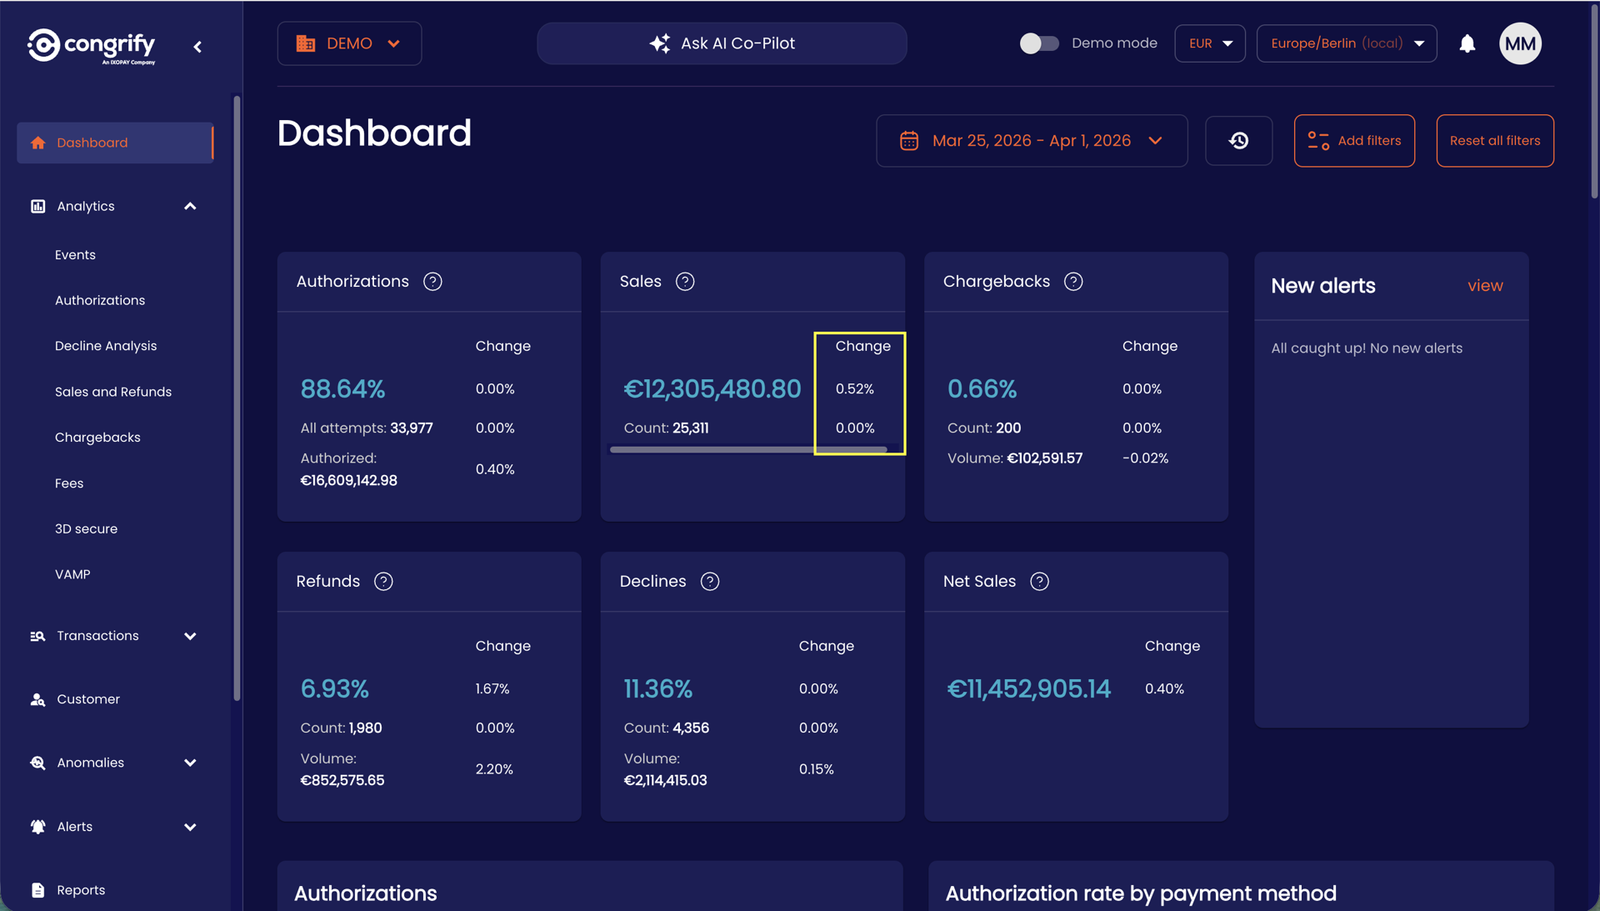
- On the dashboard, the percentage increase or decrease of the data point (i.e. 'change’) should now be visible.
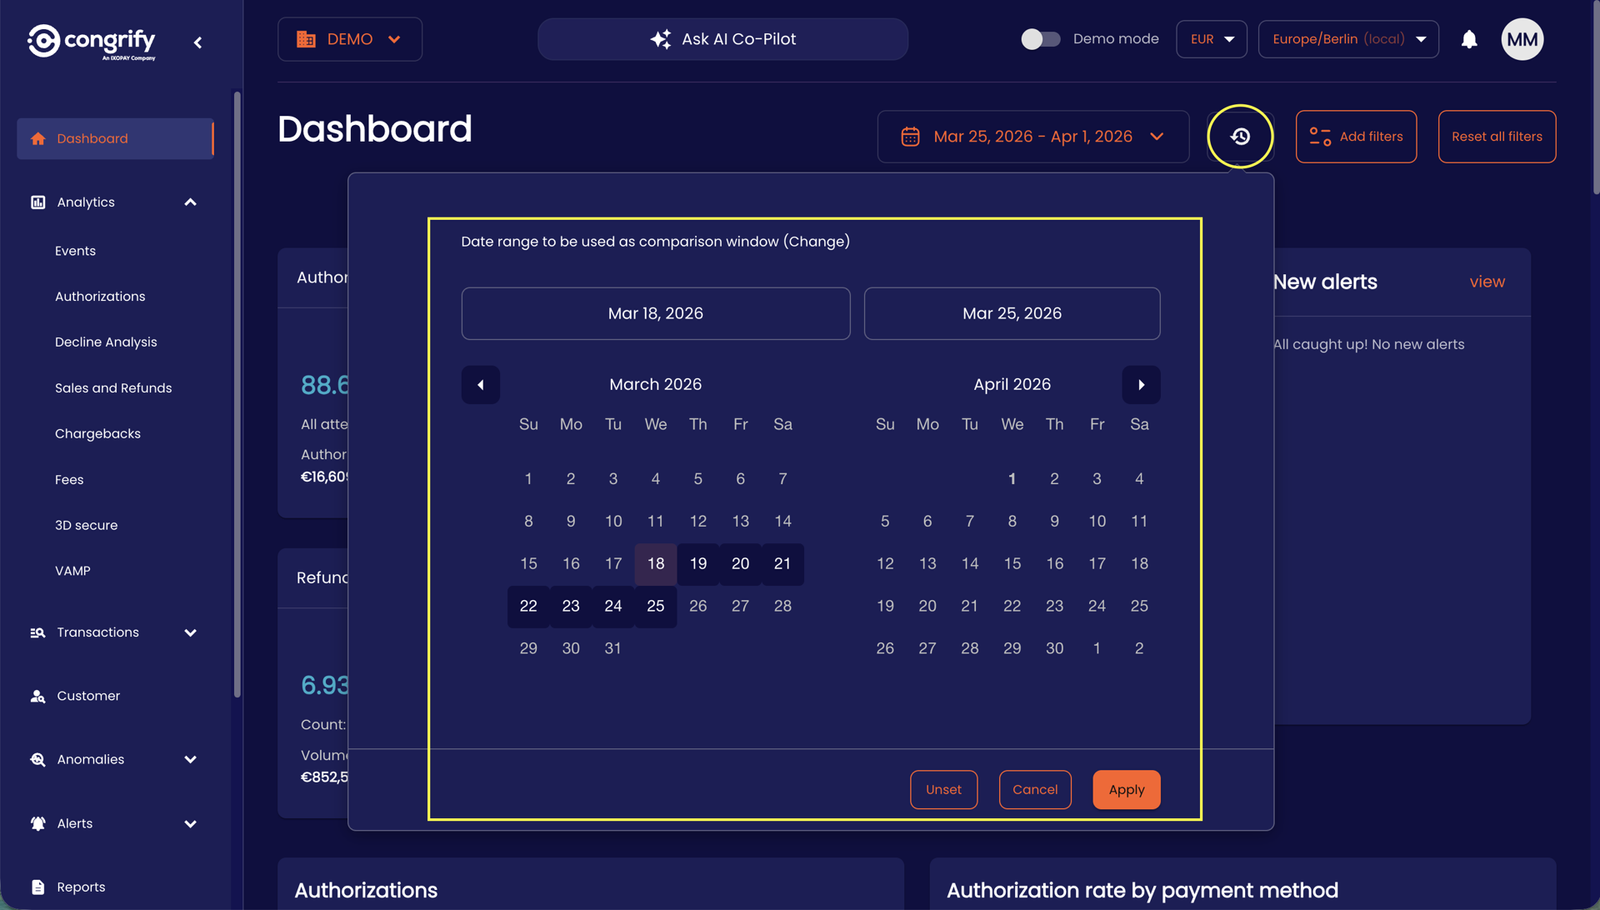
- You can further configure the comparison periods for the 'change' computation by selecting the time window for the change period directly on the dashboard.
- First, toggle change computation through the User tab → Account Settings, selecting ‘Show Changes’ under 'Change Comparison'.