How to Start
To get started with the IXOPAY Payments Intelligence platform, follow this 10-step onboarding guide to transition from exploration to live operational monitoring and to your first data analysis steps.
Step 1: Create or Access Your Demo Account
Sign up for an account on the IXOPAY Payments Intelligence dashboard. By default, you will enter Demo Mode, populated with sample data. Use this environment to explore IXOPAY Payments Intelligence’s observability features, explore sample KPIs, and test the IXONav interface before linking live feeds with your real payments data.
For more details, refer to the Registration and Login guide.
Step 2: Go Live & Connect your PSP Data Sources
Once you are ready to go live and connect your PSP data sources, you have two options:
- a) Contact IXOPAY support or your Account Manager to switch your workspace to Live Mode;
- b) Directly switch on Live Mode (Merchant Owner or Merchant Administrator role) within the portal, and then connect your real payments data feeds.
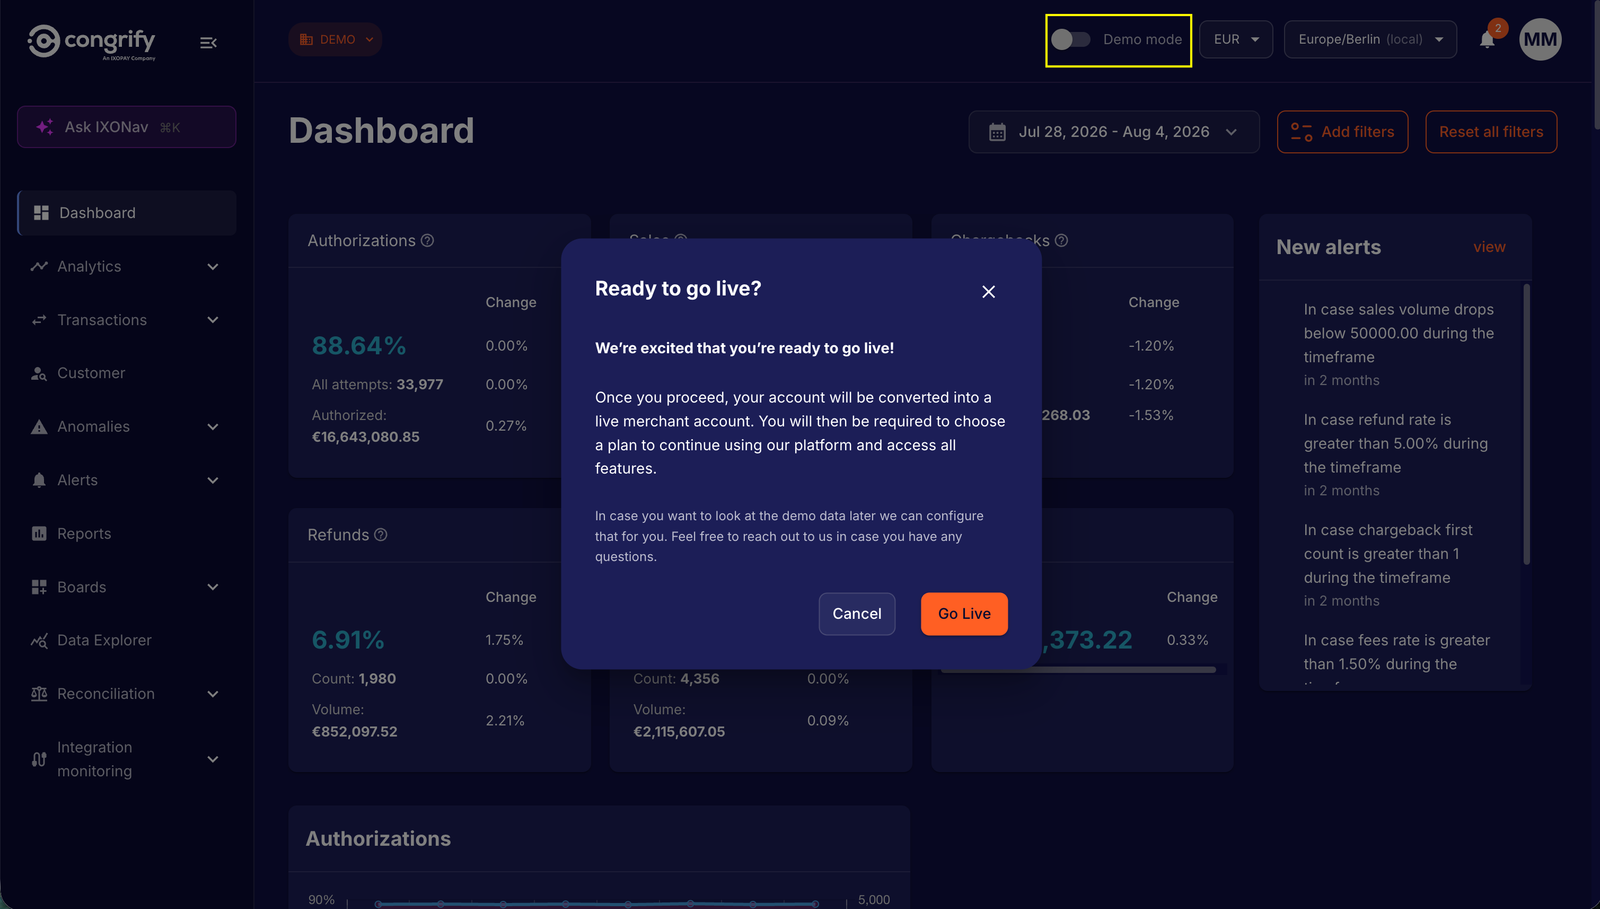
Connecting your Payments Data Sources:
- For IXOPAY Orchestration and/or Tokenization Customers: Connect directly through your existing IXOPAY account integration. You can contact the IXOPAY Support team to ensure availability of your payments operations data to IXOPAY Payments Intelligence.
- For Standalone Setup: Provide the credentials required by the Payment Service Provider you would like to connect. Please refer to the detailed Integration Guide for the PSP you would like to connect. If a PSP integration is not supported yet, please contact our support or your point of contact.
Step 3: Team Access
Navigate to User Management and invite team members who require access. All users must configure Multi-Factor Authentication (MFA) to meet platform security standards once the workspace is in Live Mode. Refer to our guidelines in User Management and Notifications for a step-wise breakdown of creating and managing your team's access to IXOPAY Payments Intelligence.
Step 4: Import Historical Data (30-Day Minimum)
During PSP connector configuration, run the automated historical import (please refer to the Integration Guide).
Ensure you ingest at least 30 days of past payment data so that you have enough data to start leveraging our analytics and intelligence. If your PSP lacks pre-generated historical reports, contact IXOPAY Support to assist with bulk ingestion where possible.
Step 5: Review Dashboards & Monitor Data Ingestion
Now that you have connected your PSP data sources, it’s time to get familiar with the types of data the platform ingests and how KPIs and Analytics are being organized. As a first step, navigate to the Observability Dashboards to verify incoming streams:
- Check the pre-defined dashboards in Analytics and get familiar with Authorizations, Decline Reasons, Sales, Refunds, Disputes and Fees KPIs. Refer to our Dashboard guide for further details.
- Verify how the data is being ingested and which types of reports are received from the Payment Service Providers. Refer to our Integration Monitoring guide for details.
Troubleshooting: If specific KPIs or tables appear empty, contact IXOPAY Support. This is typically caused by missing data points from the PSPs or non-standard report formatting from your payment provider.
Step 6: Customize Dashboard Views
Tailor metrics to your operational hierarchy by creating filters and adjusting views based on your organization's specific needs.
Save custom slices by payment method, acquiring bank, currency, entity, or specific decline reason codes to quickly track your primary operational metrics. Please refer to the Dashboard management and view customization guides for details.
Step 7: Query Data Using IXONav (AI Payments Assistant)
Utilize IXONav, the built-in AI assistant, to interact with your payment datasets.
- Ask Questions: Query your payment data using conversational language (e.g., "Why did my authorization rate drop in Europe yesterday?").
- Save & Schedule: Save your most frequent or critical investigative queries and schedule them to run automatically at defined intervals.
- Customize your IXONav settings: Decide how many days you want to store chats, and star your most relevant chats.
- Connect to Slack: We support Slack integrations for Alerts and Notifications for a seamless interaction. Please contact IXOPAY Support to enable this functionality.
Step 8: Configure Performance Alerts & Anomaly Detection
Get familiar with our Alerting functionalities and the Anomaly Detection modules:
- Alerts: Establish threshold-based rules for key metrics (e.g., spikes in chargeback ratios, sudden declines in authorization rates, or fee discrepancies) to receive real-time notifications. Refer to our Alerts guide for further details.
- Anomaly Detection: Discover anomalous behavior by unifying fragmented data from providers, which enables identification of hidden revenue or other KPI performance leaks and operational failures that traditional static reporting tools miss. Refer to our Anomaly Detection guide for further details.
Step 9: Explore and Configure Custom Reports
Go to the Reports section and explore which types of reports you can enable. You can create, for example, weekly or monthly reports for all your most common KPIs such as Sales, Authorization Rates, and Refunds, and select the data dimensions that you want to have in your scheduled analysis (e.g. merchant account, gateway, payment method). You would then have a scheduled PDF generated in the portal and delivered via email.
Step 10: Explore your PSP raw data
With the Data Explorer, you can explore your raw data in a no-code SQL approach, with aggregate and raw event data access. Refer to our Data Explorer guide for further details.