Getting Started
IXOPAY Payments Intelligence is a self-service, no-code platform that enables seamless integration with various payment service providers.
To get started, log into your IXOPAY Payments Intelligence account and navigate to the "Connections" section. From there, you can activate the integration for the payment service provider you are using to process payments.
Please note that only users with Owner or Admin roles will have the necessary permissions to configure this integration.
Once the integration is successfully activated, it will be listed under "Connected Providers" for easy reference and management.
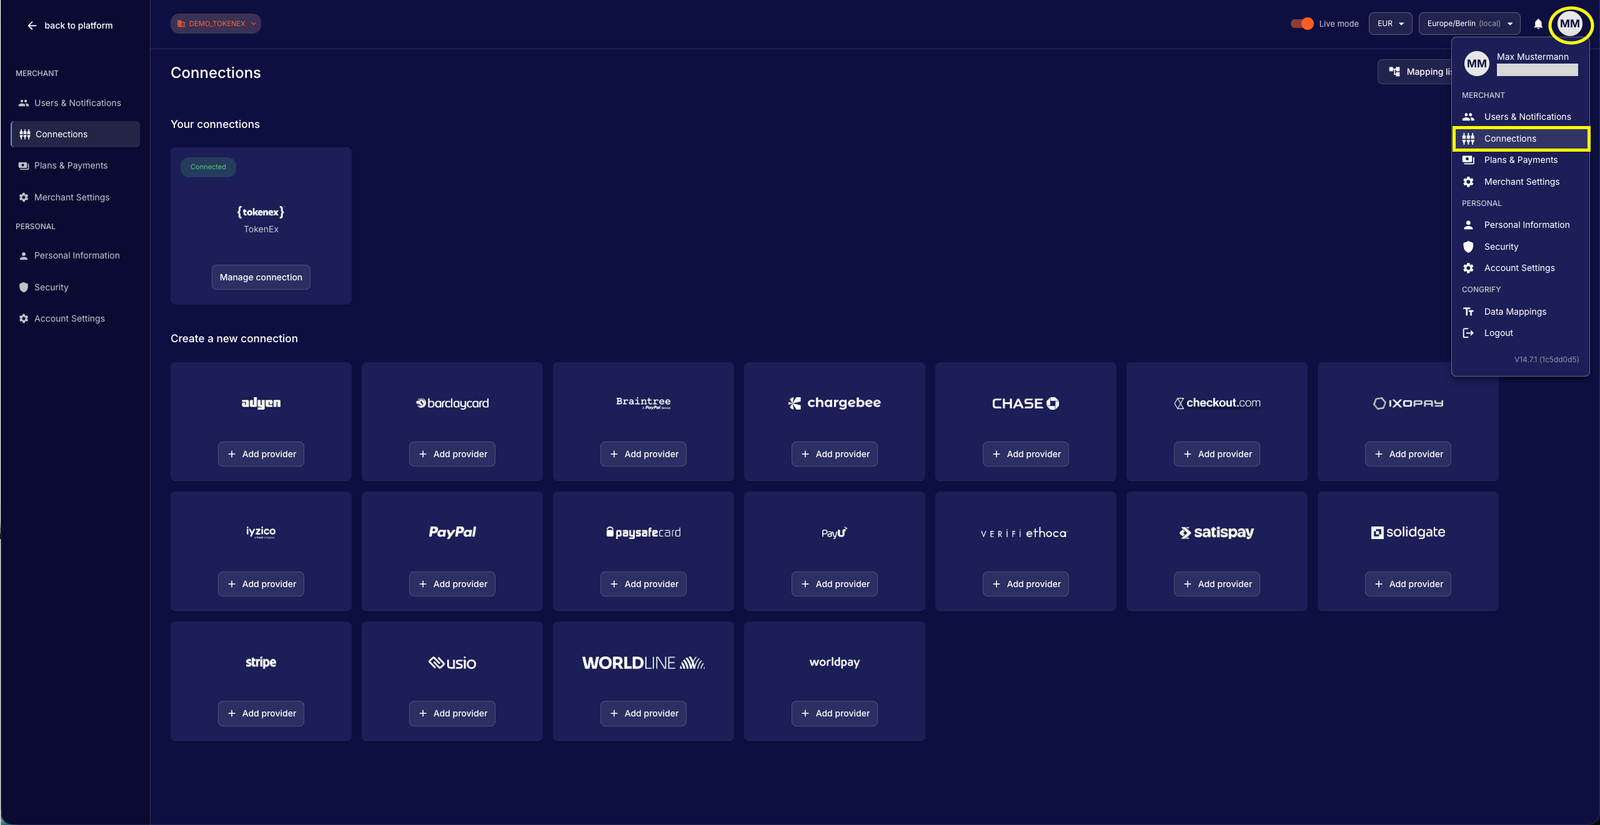
General steps for each PSP connection
As a general guideline, please follow the steps highlighted below for each Payment Service Provider integration to ensure a correct data ingestion setup and to familiarize yourself with the process.
Step 1: Provide required credentials
Connect your PSP with the required configuration information. Please find the relevant PSP for your integration under the "Integrations" section. If a PSP connection is not available yet, please contact IXOPAY support or your IXOPAY point of contact.
Step 2: Check credentials validity
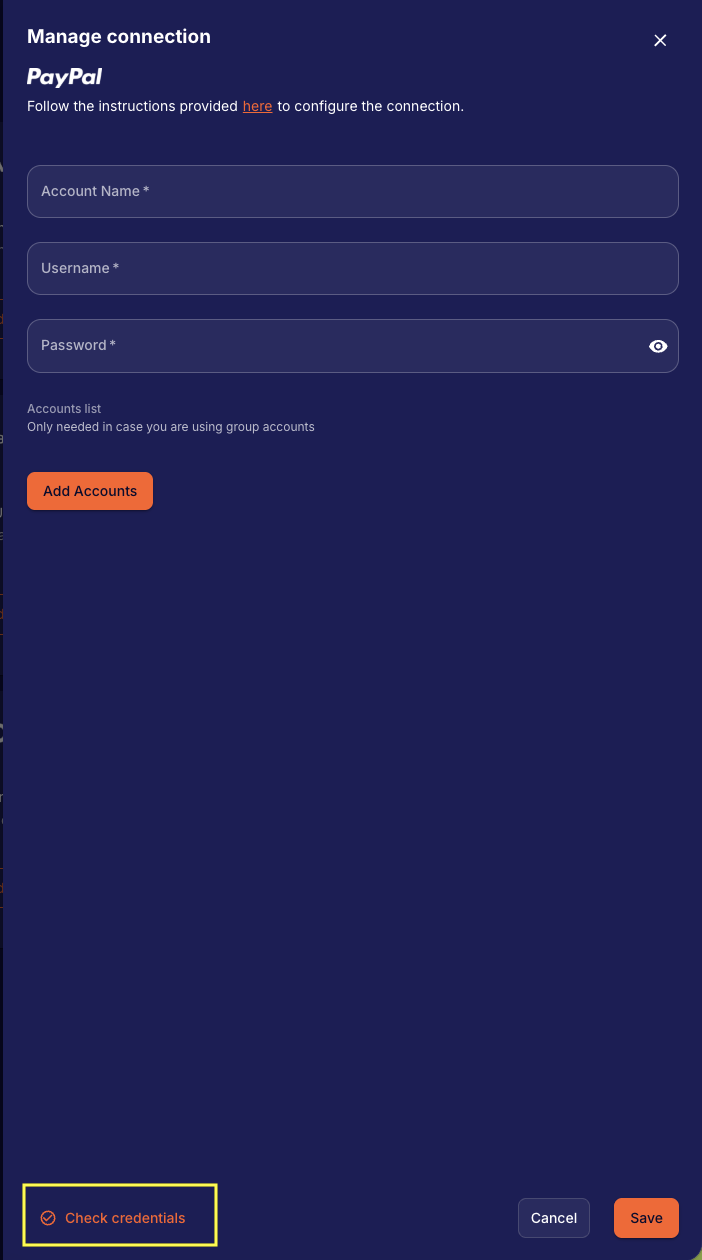
Once you have provided your PSP credentials, please click on "Check credentials" to validate that they are working and valid.
Click on the "Check credentials" button on the lower part of the configuration pop-up.
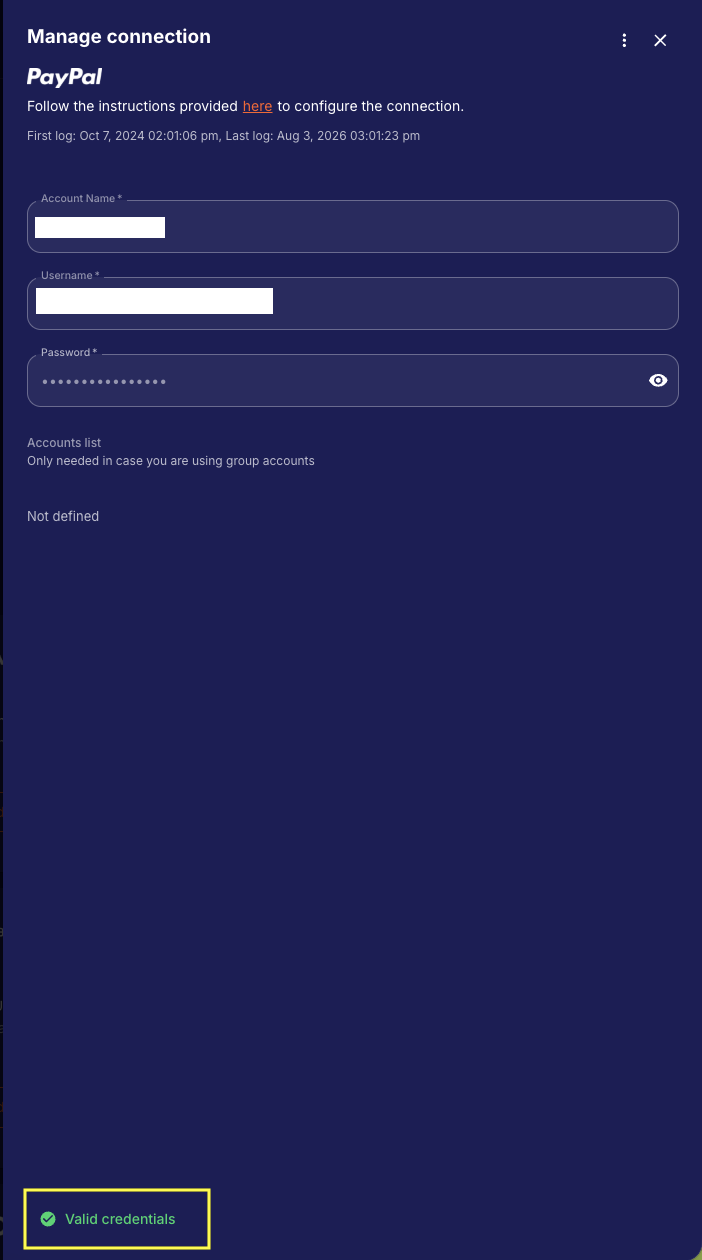
Once your credentials have been verified, the button will turn green and display "Valid Credentials." Hovering over the button shows the timestamp of the most recent check.
If validation is unsuccessful, an error message will be displayed. Please ensure your credentials are correctly configured and have the required permissions from your PSP.

If your credentials are set up correctly but the validation still fails, please contact our support team for assistance.
Step 3: Historical data import
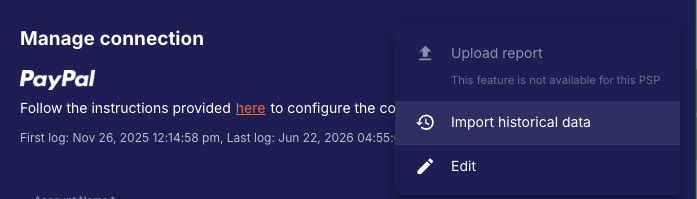
Once the credentials are confirmed, you can proceed with importing historical data. In order to do this, go to the three dots at the top right side of the screen in the pop-up for the configuration.
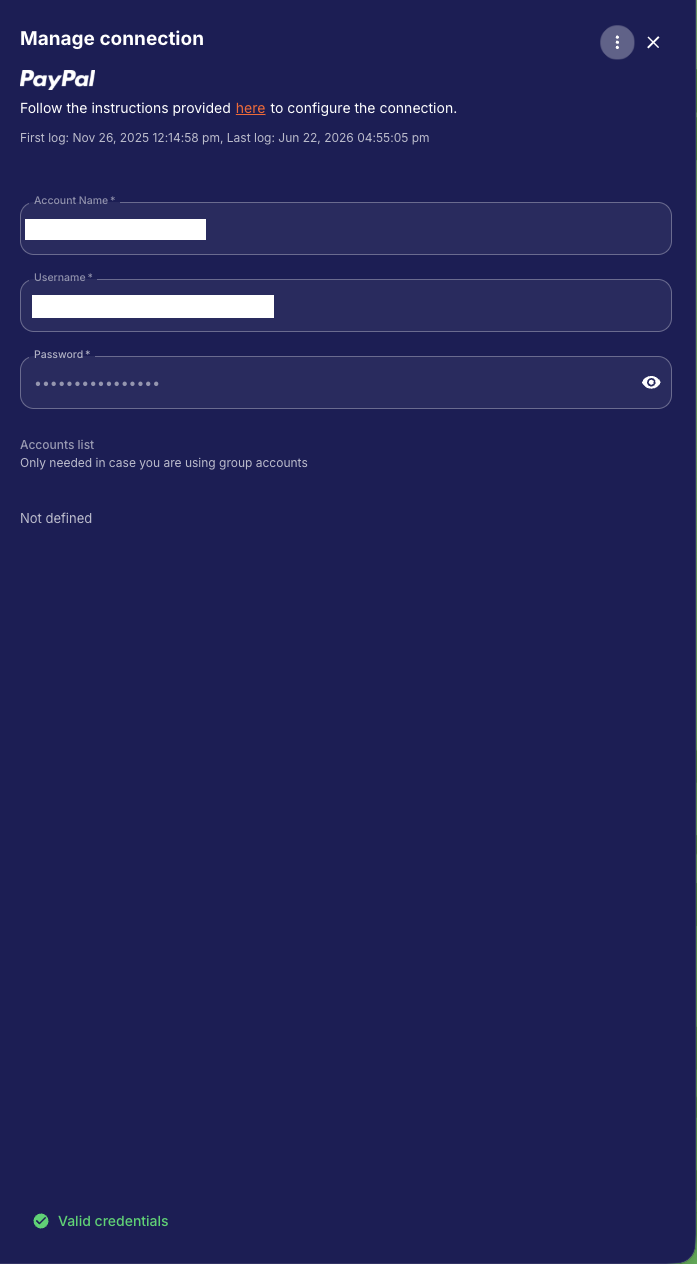
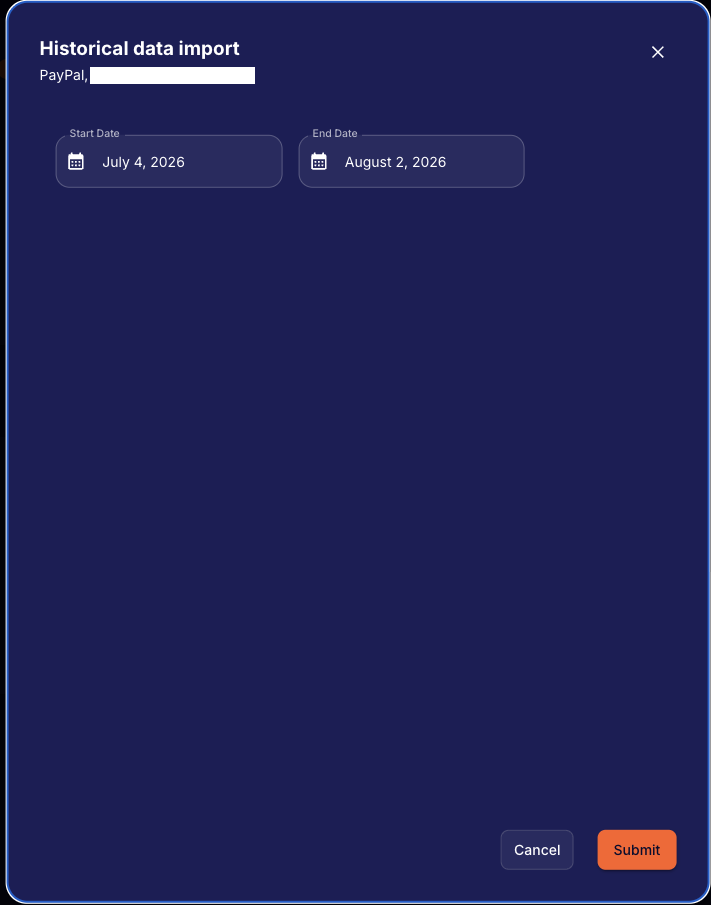
Then click on "Import historical data" in the drop-down menu and select the date timeframe to have the data imported.
Click "Submit". Once the data ingestion is confirmed and finalized, you will see a success message.
Step 4: Monitor data ingestions
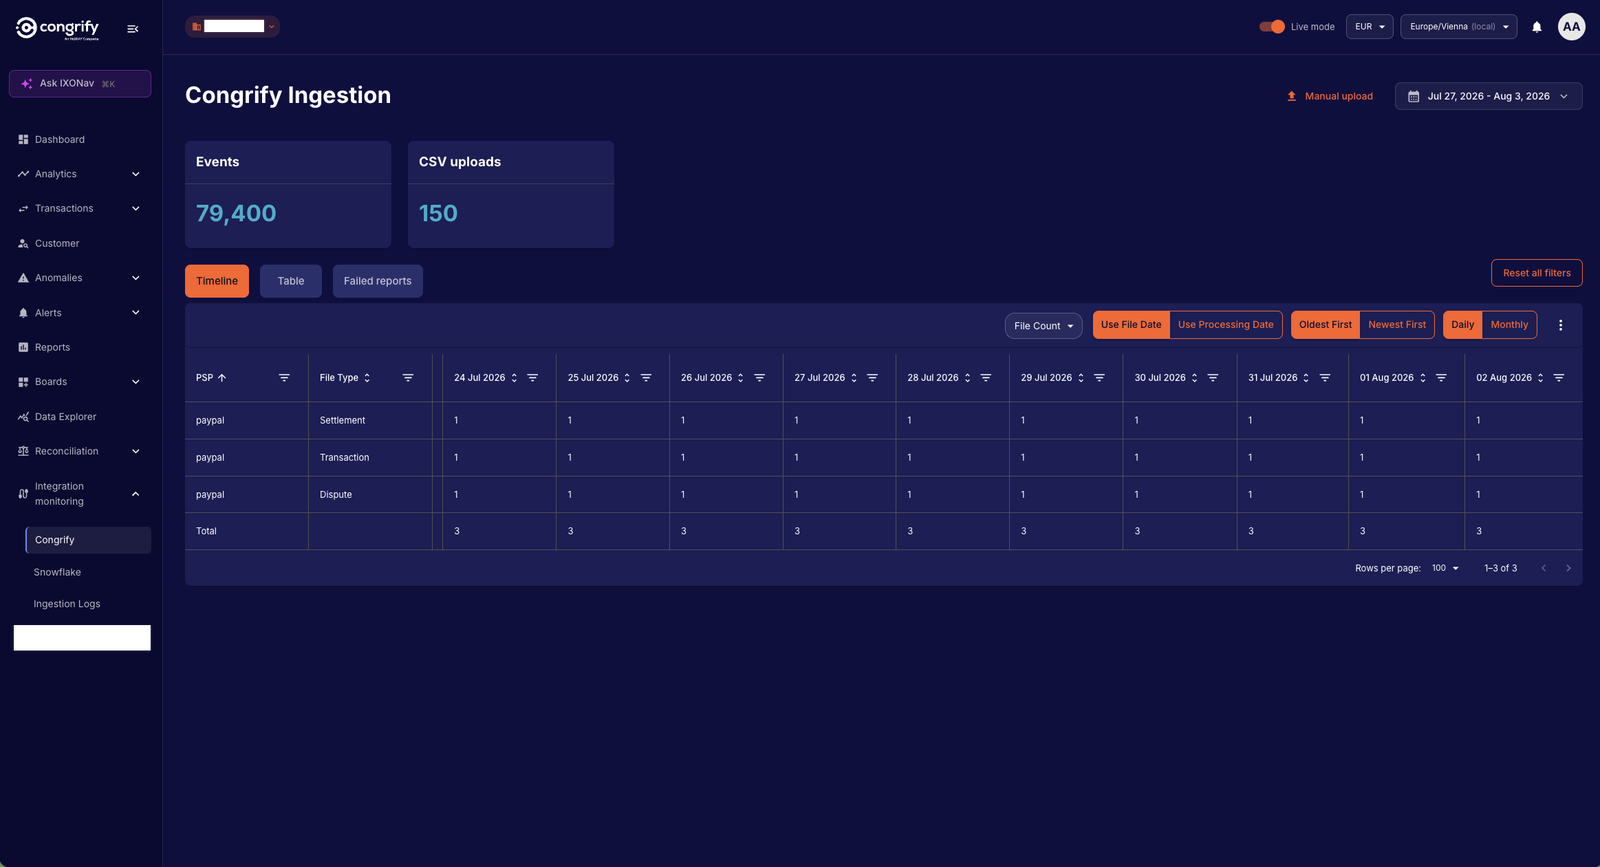
To review your daily ingestion processes, you can monitor the progress and ensure the data is being imported via the "Integration monitoring" page. Here you can perform various analyses to monitor the status of your data ingestions.
Step 5: Data ingestion notifications
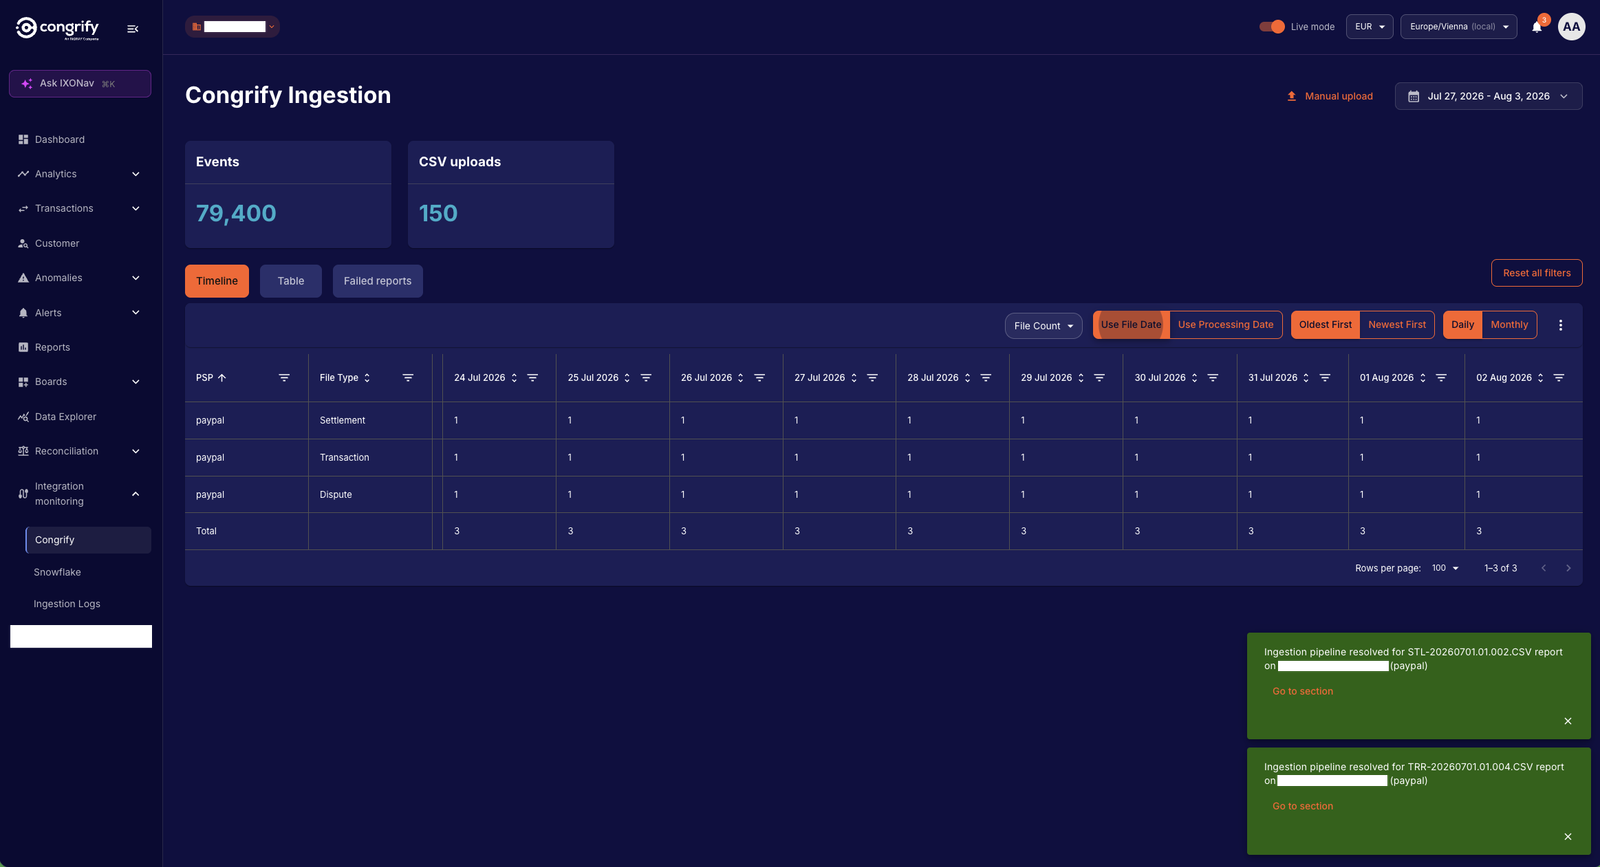
There are notifications for live updates on issues and their resolution in case any arise during the import. They will be displayed as pop-up messages and stored under the bell icon on the top right side of the screen. You will receive notifications in case of delays or technical ingestion issues; our data ingestion engine will retry the data ingestion at the earliest convenience and resolve the alerts.
Step 6: PSP data lineage and available reports
Get familiar with PSP data lineage and available reports.
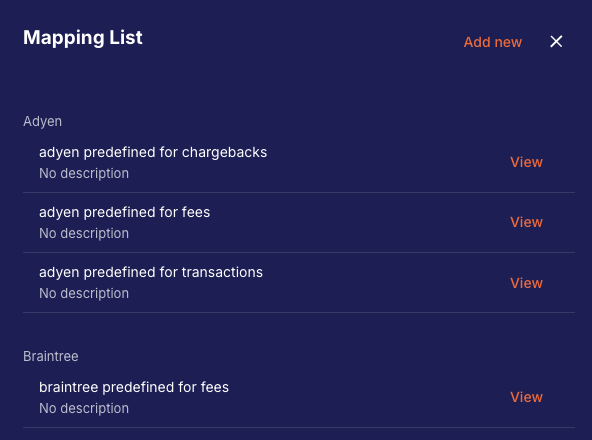
The column mapping for the connected PSP can be found on the Connections page at the top under "Mapping list".

Select the relevant PSP and click on "View".
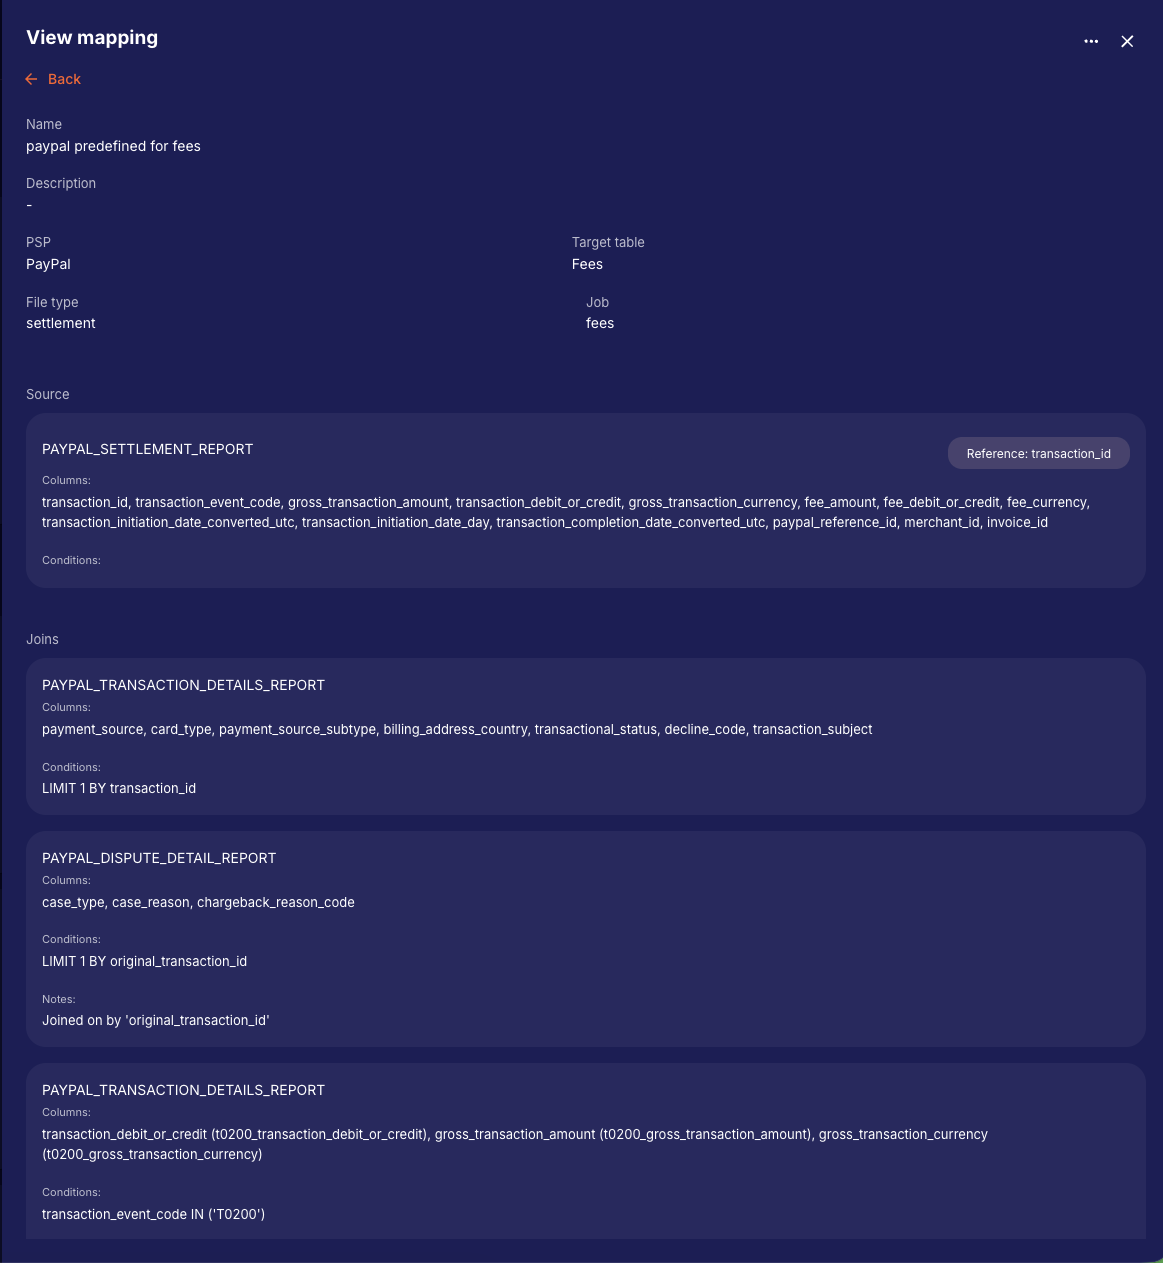
The mapping will be shown in a pop-up screen and specifies the reports that are involved in populating the data fields one by one.
Step 7: Data value mappings
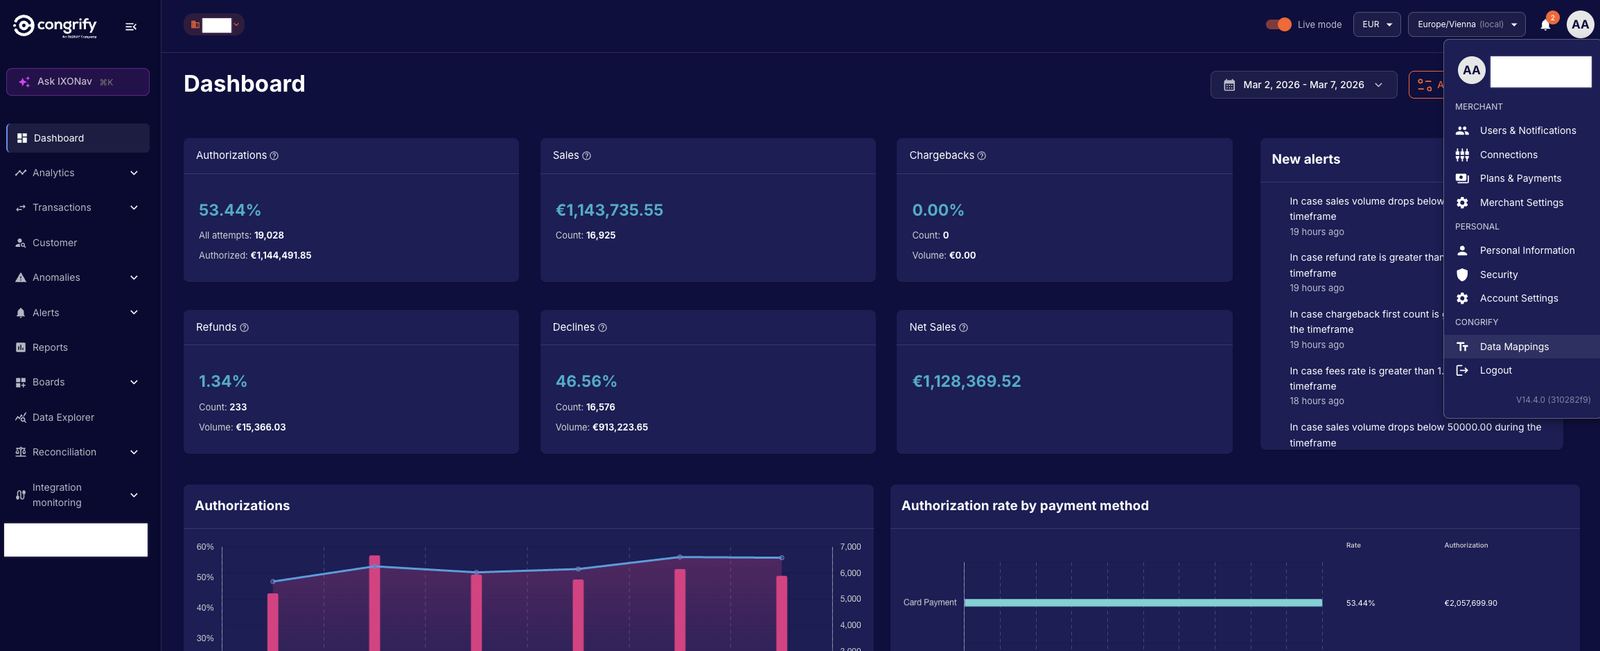
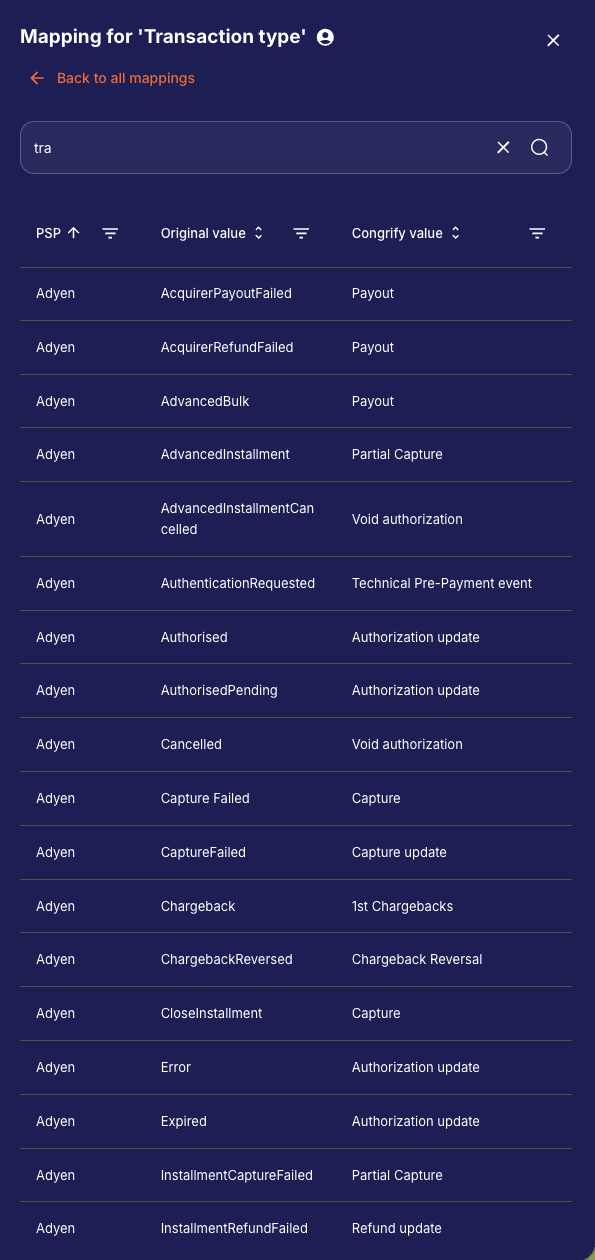
In order to see how the original values from the PSPs are mapped once they have been put into the correct columns, select the menu item called "Data Mapping" after clicking on the profile button at the top right side of the screen.
It will show the selection of all data columns from our harmonization data layer that are mapped universally across the PSP data sources.
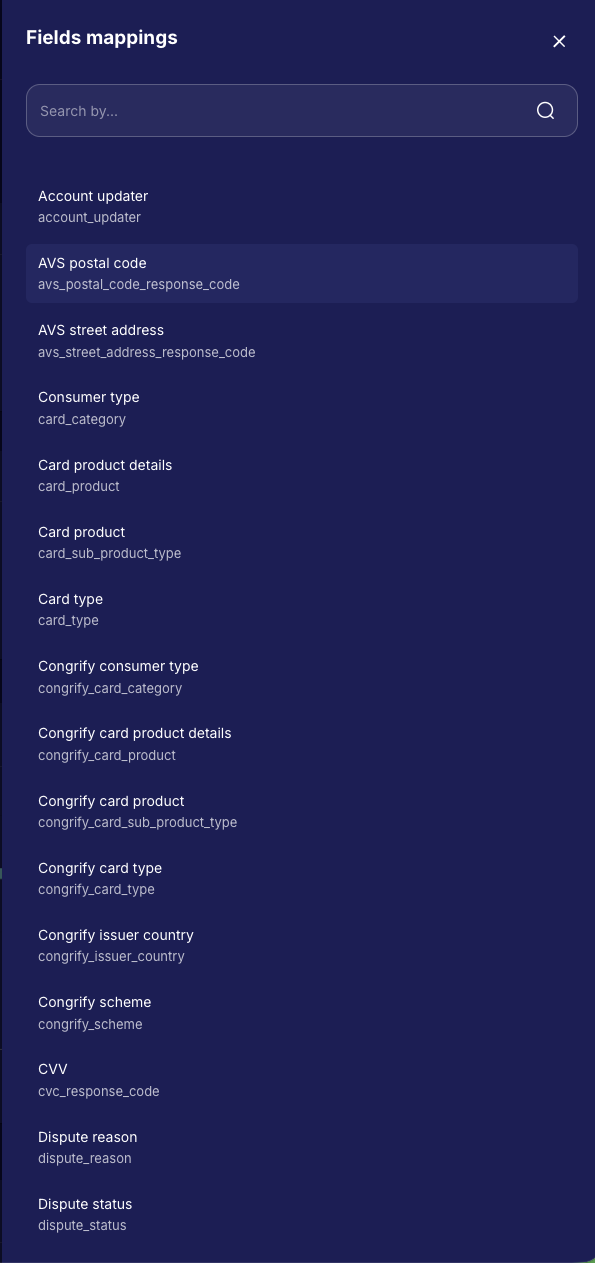
Clicking on any of them will show the pairs of mapped and raw values for each PSP. For example, below you can see how the original value from the payment service provider has been mapped to our general transaction type terminologies.
Available PSP connections
IXOPAY Payments Intelligence currently offers native integrations with the following Payment Service Providers:
| PSP | URL |
|---|---|
| Adyen | https://www.adyen.com |
| Amazon Payment Services | https://paymentservices.amazon.com/ |
| Barclaycard | https://www.barclaycard.co.uk/business |
| Braintree | https://www.braintreepayments.com |
| Chargebee | https://www.chargebee.com |
| Chase | https://www.chase.com/business/payments |
| Checkout.com | https://www.checkout.com |
| IXOPAY | https://www.ixopay.com |
| PayPal | https://www.paypal.com |
| PaySafecard | https://www.paysafecard.com |
| PayU | https://www.payu.com |
| PayU (iyzico) | https://www.iyzico.com |
| Satispay | https://www.satispay.com |
| Stripe | https://www.stripe.com |
| USIO | https://usio.com/ |
| Worldline | https://www.worldline.com |
| Worldpay | https://www.worldpay.com/en |