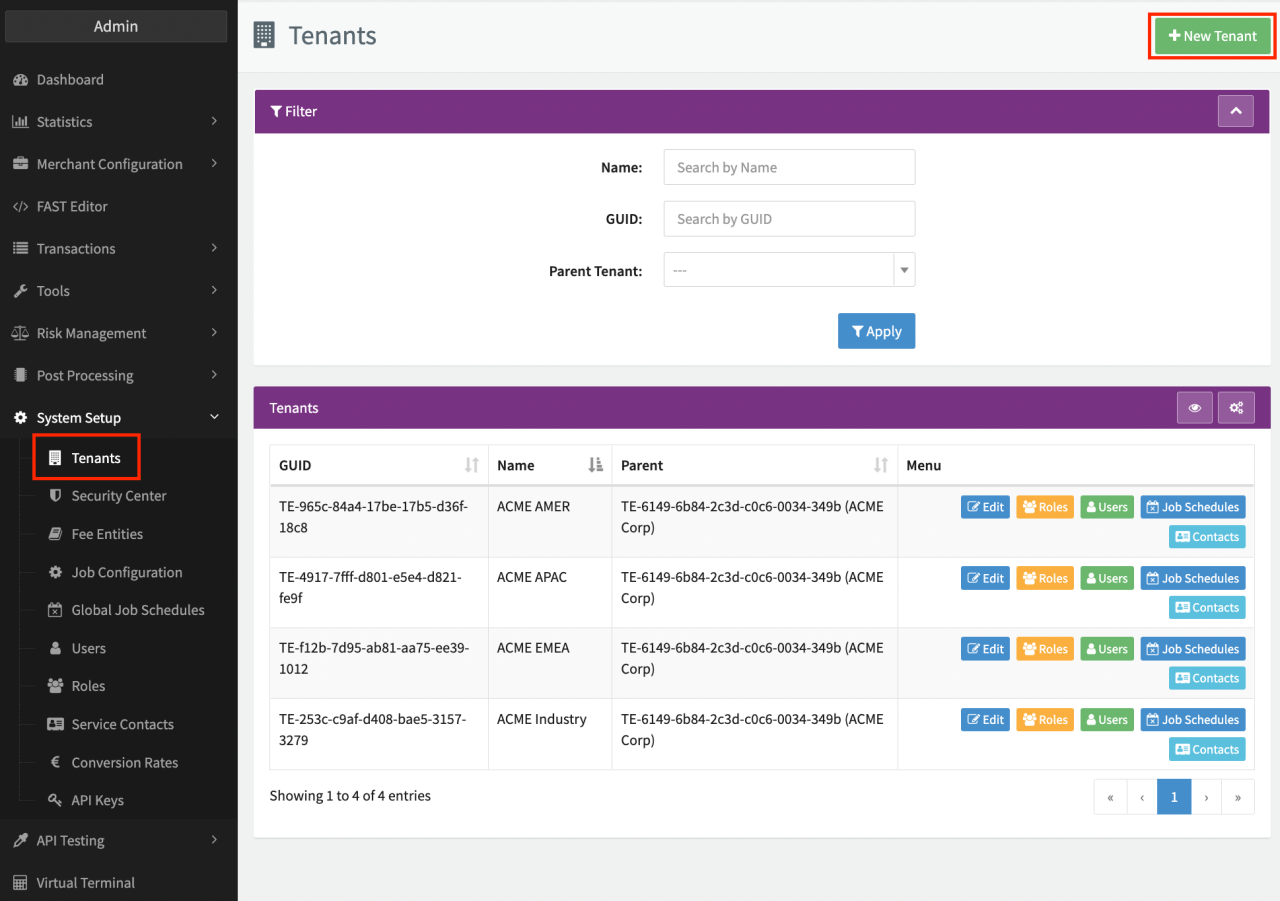
Tenants
If you want to get access to all IXOPAY platform features you need to upgrade your plan. Please contact our Support Team in the IXOPAY Customer Experience Portal for more information.
Sub-Tenant Configuration
Your company or organization is represented using tenants in the IXOPAY platform. You can structure your organization hierarchically using sub-tenants.
Please note that unlike other entities in the IXOPAY platform, (sub-)tenants cannot be archived.
Adding a New Sub-Tenant
To add a new sub-tenant to your setup:
- Click + New Tenant in the tenants overview.
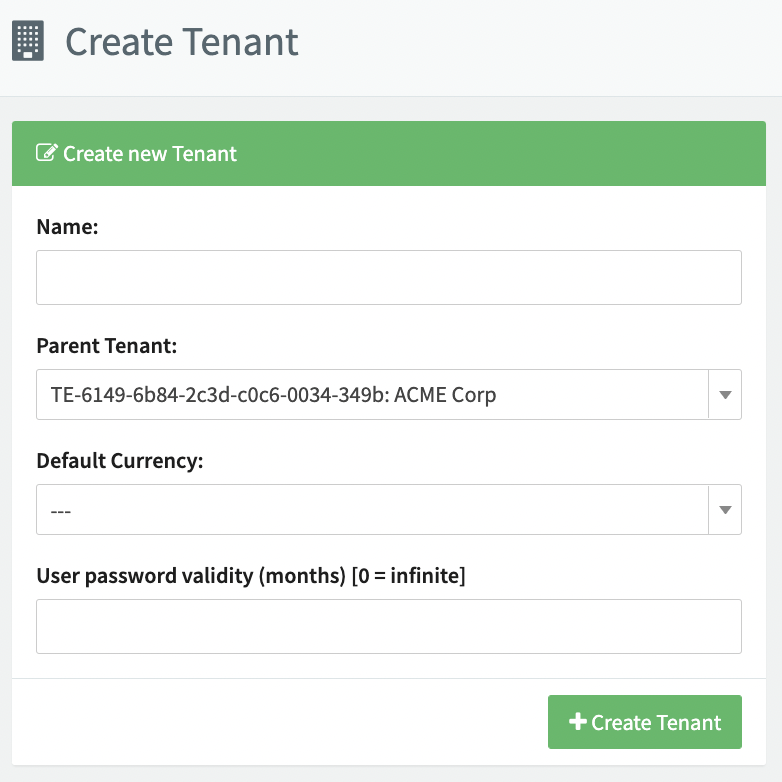
- Enter the sub-tenant's name, parent tenant, default currency and user password validity.
- Click Create Tenant.
The newly created sub-tenant is displayed in the tenants overview where it can be edited further.
Editing a Sub-Tenant
To edit a sub-tenant in your setup:
- Click Edit in the tenants overview for the sub-tenant you want to edit.
- Make the desired changes in the tenant settings and click Save Tenant.
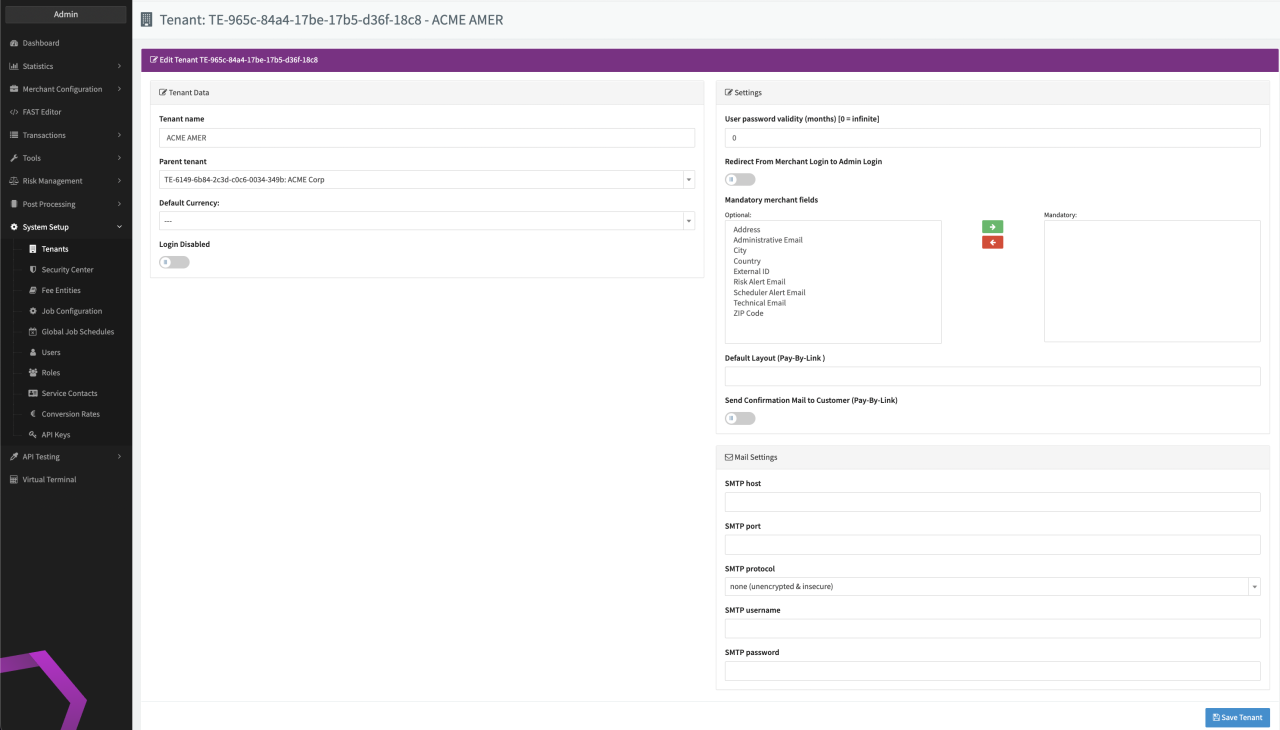
Available sections are
Tenant Data:
- Tenant name
- Parent tenant
- Default Currency
- Login Disabled
Settings:
- User password validity (months)
- Redirect From Merchant Login to Admin Login (toggle on/off)
- Mandatory merchant fields
- Default Layout (Pay-By-Link)
- Send Confirmation Mail to Customer (Pay-By-Link) (toggle on/off)
If you enable the Login Disabled option, all users are prevented from accessing the tenant and any merchants under this tenant. It does not prevent transactions from taking place.
Additional Tenant Editing Options
Keep in mind that settings (e.g. Mail Settings) are inherited from the parent entity, unless they are overridden.