Pivot Table
If you want to get access to all IXOPAY platform features you need to upgrade your plan. Please contact our Support Team in the IXOPAY Customer Experience Portal for more information.
Video: Creating a Pivot Table

To customize your pivot table:
- Navigate to the Statistics section, sub-section Pivot Table.
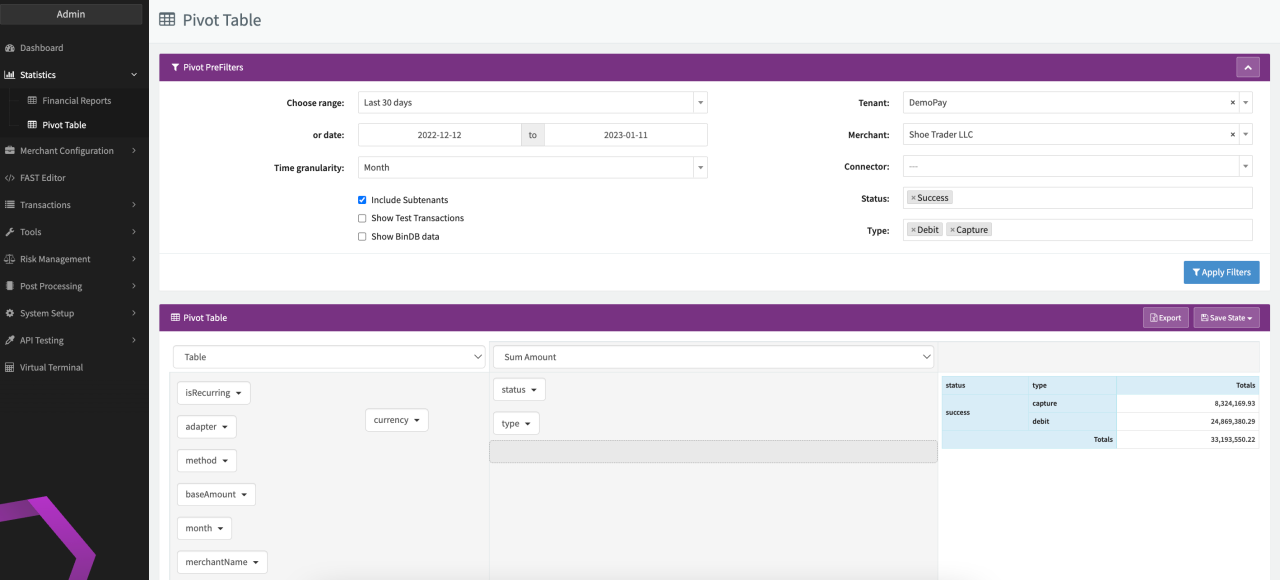
- Before customizing the pivot table, enter Pivot PreFilters to define the data available for analysis:
- Choose Range/or date: Select a time period from the drop-down (This month, last month, last 30 days, last 3 months, this and last 3 months, this week, last week, last 7 days, last 14 days), or select a specific date range using the date fields (from-to).
- Time granularity: year, month, day, hour, only hour, only day of week
- Choose whether to Include Subtenants, Show Test Transactions, Show BinDB data
- Select a Tenant, Merchant, Connector
- Select one or more Status and/or Type
Filter the data as needed and click on Apply Filter to create the pivot table. If you make any subsequent changes to the filter, you need to click on Apply Filter to apply your changes to the pivot table.
If you do not select a specific Merchant as a pre-filter, the pivot table can include multiple merchants. This allows you to display the number of captures, debits and preauthorize transactions that were successful for different connectors, for example. You can still filter out specific merchants by applying filters to the pivot table's criteria (see below).
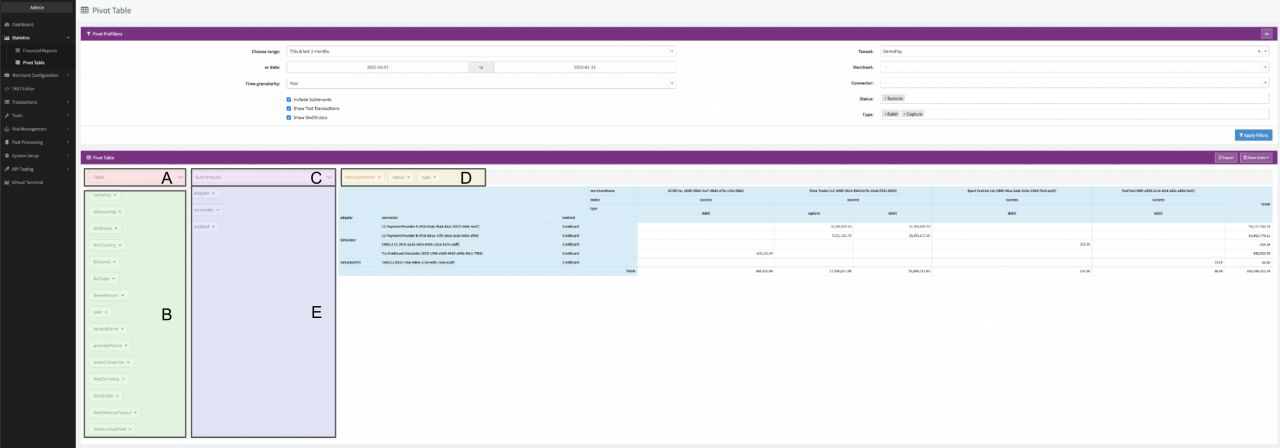
The data displayed in the pivot table can be further customized. You can determine what data should be included and how to visualize it:
- Pivot Table Type: Select the type of visualization. The following options are available: Table, Heatmap, Row Heatmap, Col Heatmap, Ratio by Row, Ratio by Column, Line Chart, Bar Chart, Stacked Bar Chart, Area Chart, Scatter Chart (see Pivot Table Customization - section A)
- Pivot Table Data: Select which data should be grouped in the pivot table: Count Transactions, Sum Amount, Sum Amount (in Base Currency), Fees, Payout, Success Rate, Success Rate + Count, Success Rate by Volume (see Pivot Table Customization - section C)
- Pivot Table Lines/Columns variable: Drag & drop variables from the list (Section B the Pivot Table Customization screenshot) to section D or E (see Pivot Table Customization screenshot) to add variables as columns or rows respectively. Determine the order in which variables are displayed in the pivot table by dragging them to the desired position, indicated by a box with a dashed outline. The following variables are available: tenantName, merchantName, providerName, adapter, connector, metaConnector, method, type, isRecurring, status, status simplified, currency. baseAmount, feesCurrency, feesEntity, feesDeductsPayout, year, binBrand, binCountry, binLevel, binType
- Pivot Table Filter: Click on a variable to apply a filter to restrict the data displayed in the table. For example, you can choose which merchants to display or filter by transaction status. The variable name is displayed in italics and with a red text to indicate that a filter has been defined.
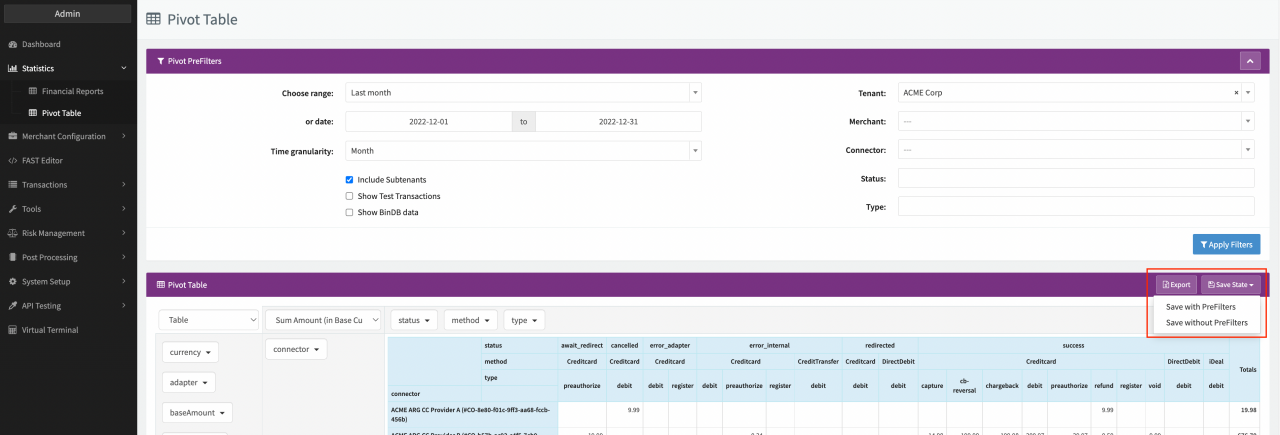
After configuring your pivot table, you can save it as a template or download the table in XLS (Excel) format:
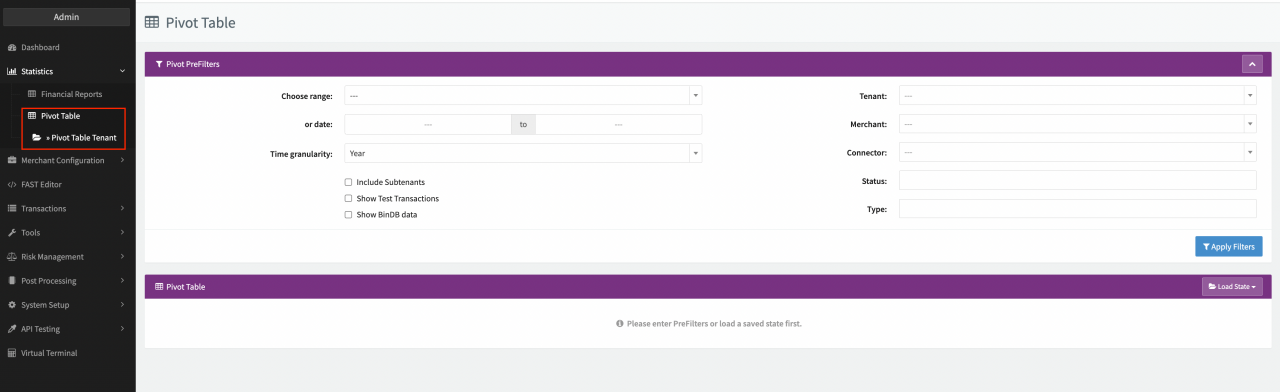
- Select Save State to save your current configuration as a template. You can choose to either Save with PreFilters or Save without PreFilters. Enter a name for the template. Once the template has been saved, you can load the template by clicking on Load State (see Saved Pivot Template).
- Select Export to export the pivot table as an .xls file.