Create Risk Rules for Your Risk Profile
No risk data is stored for transactions processed in Test Mode. Some risk checks, e.g. checking the total transaction amount for a customer require existing data in order to be evaluated. In order to perform risk checks in test mode, enable the Risk Engine: Store Test Transaction too connector setting (set the value to 1).
After creating a risk profile, you can add and combine risk rules in the risk profile, based on your risk management strategy. The IXOPAY platform provides a set of predefined risk rules (see the list of Existing Rules) that allow you to perform a variety of checks. These rules fall into the following categories:
- General checks
- Customer checks
- IP address checks
- Credit card checks
- IBAN checks
- External risk checks
You can define specific actions for each rule and Score Card & Actions for each risk profile.
For example, you would like to handle transactions from Austria where the value of the transaction is higher €99. To do so, you need to add risk rules to your risk profile as follows:
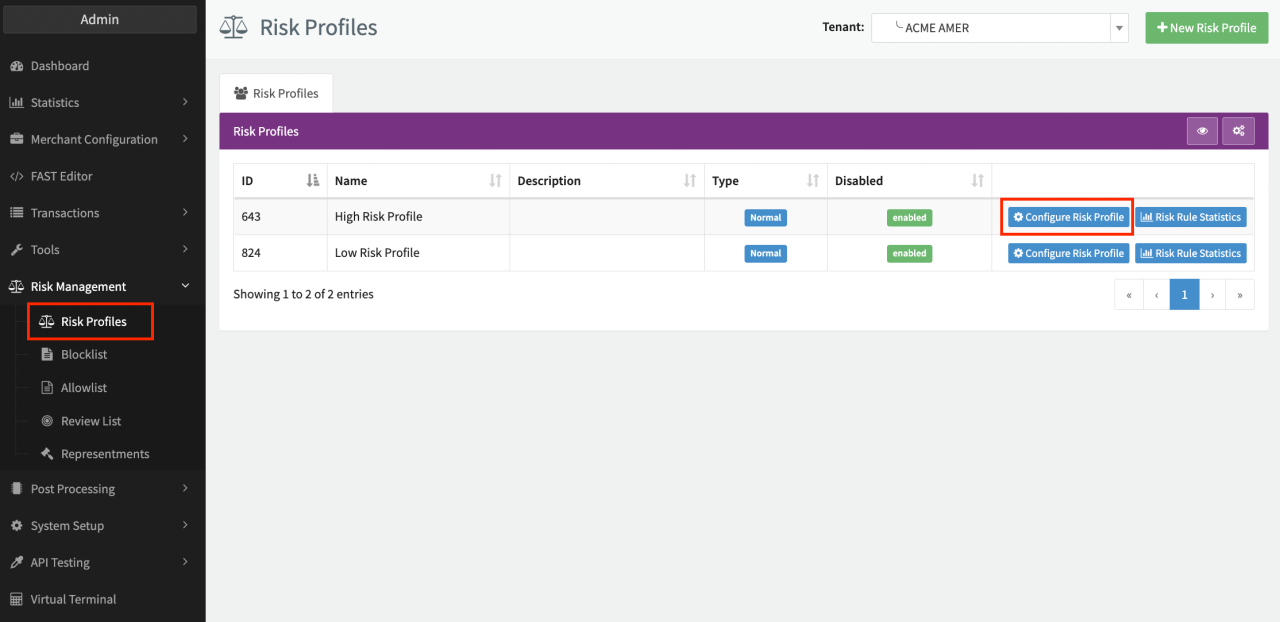
- Open up the Risk Management section in the navigation menu and select the Risk Profiles entry,
- Click on Configure Risk Profile next to the risk profile you want to edit (see Configure Risk Profile).
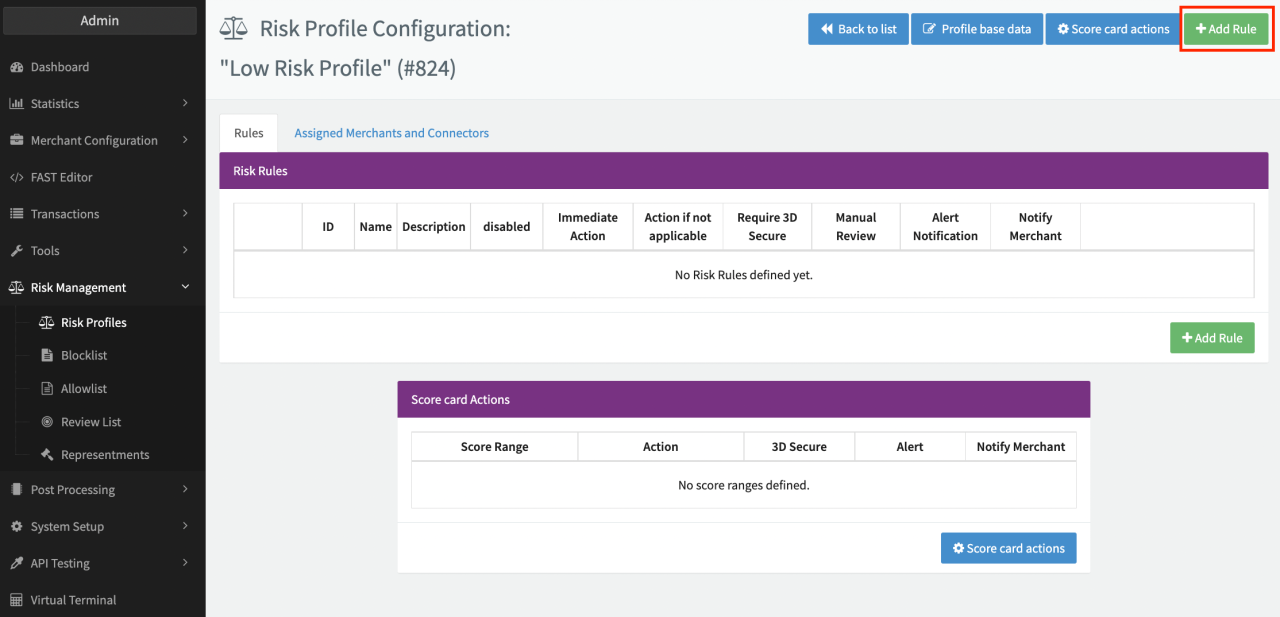
- Click on +Add Rule (see Add Risk Rule)
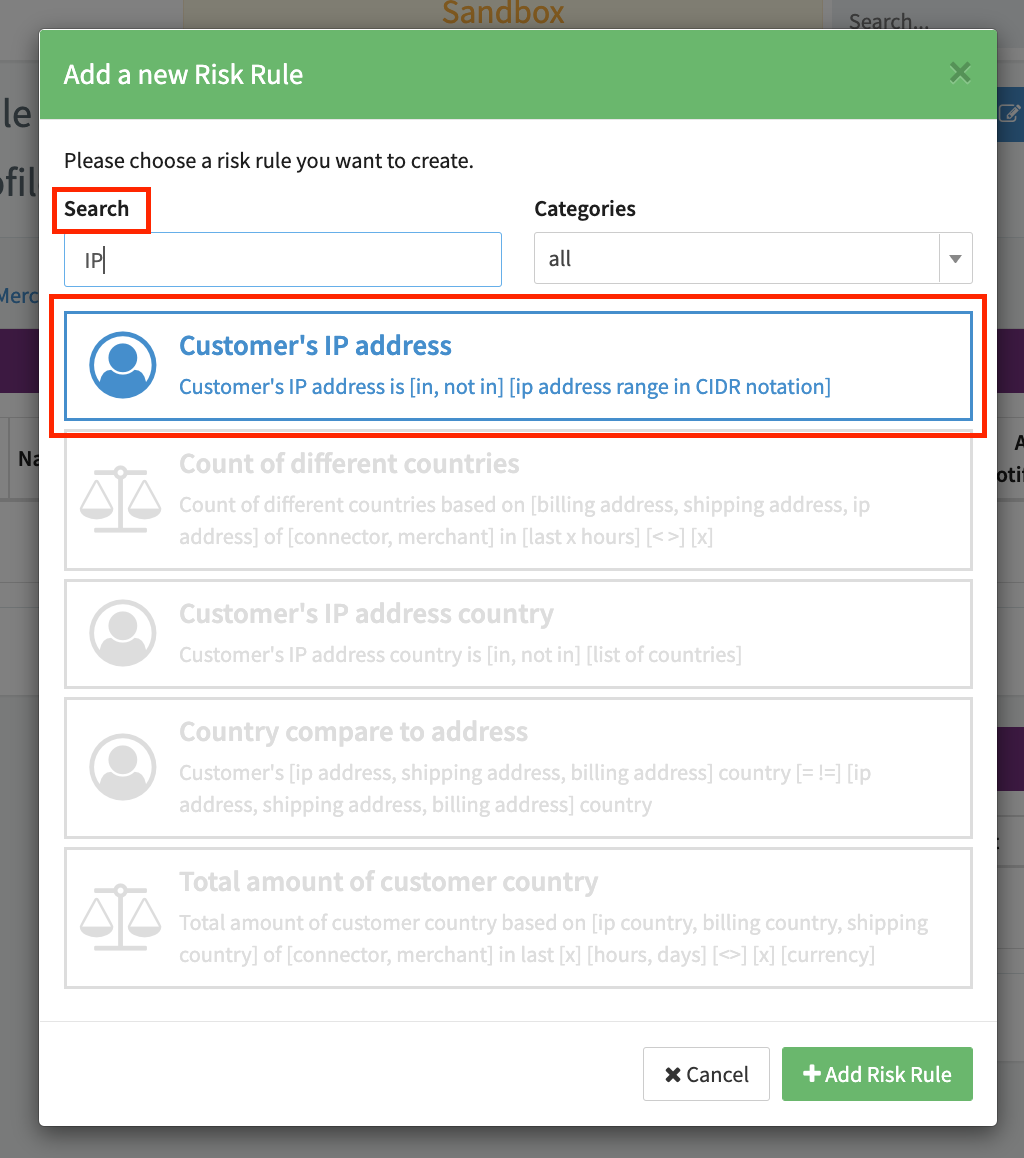
- To filter transactions for a specific country (e.g. Austria), select the risk rule Customer's IP address country. You can simply enter "IP" in the search field to restrict the list of risk rules to those containing your search term (see Filter Risk Rule I).
- With the risk rule selected, click on + Add Risk Rule.
The Create Risk Rule dialog is displayed. You can configure the relevant parameters and actions here:
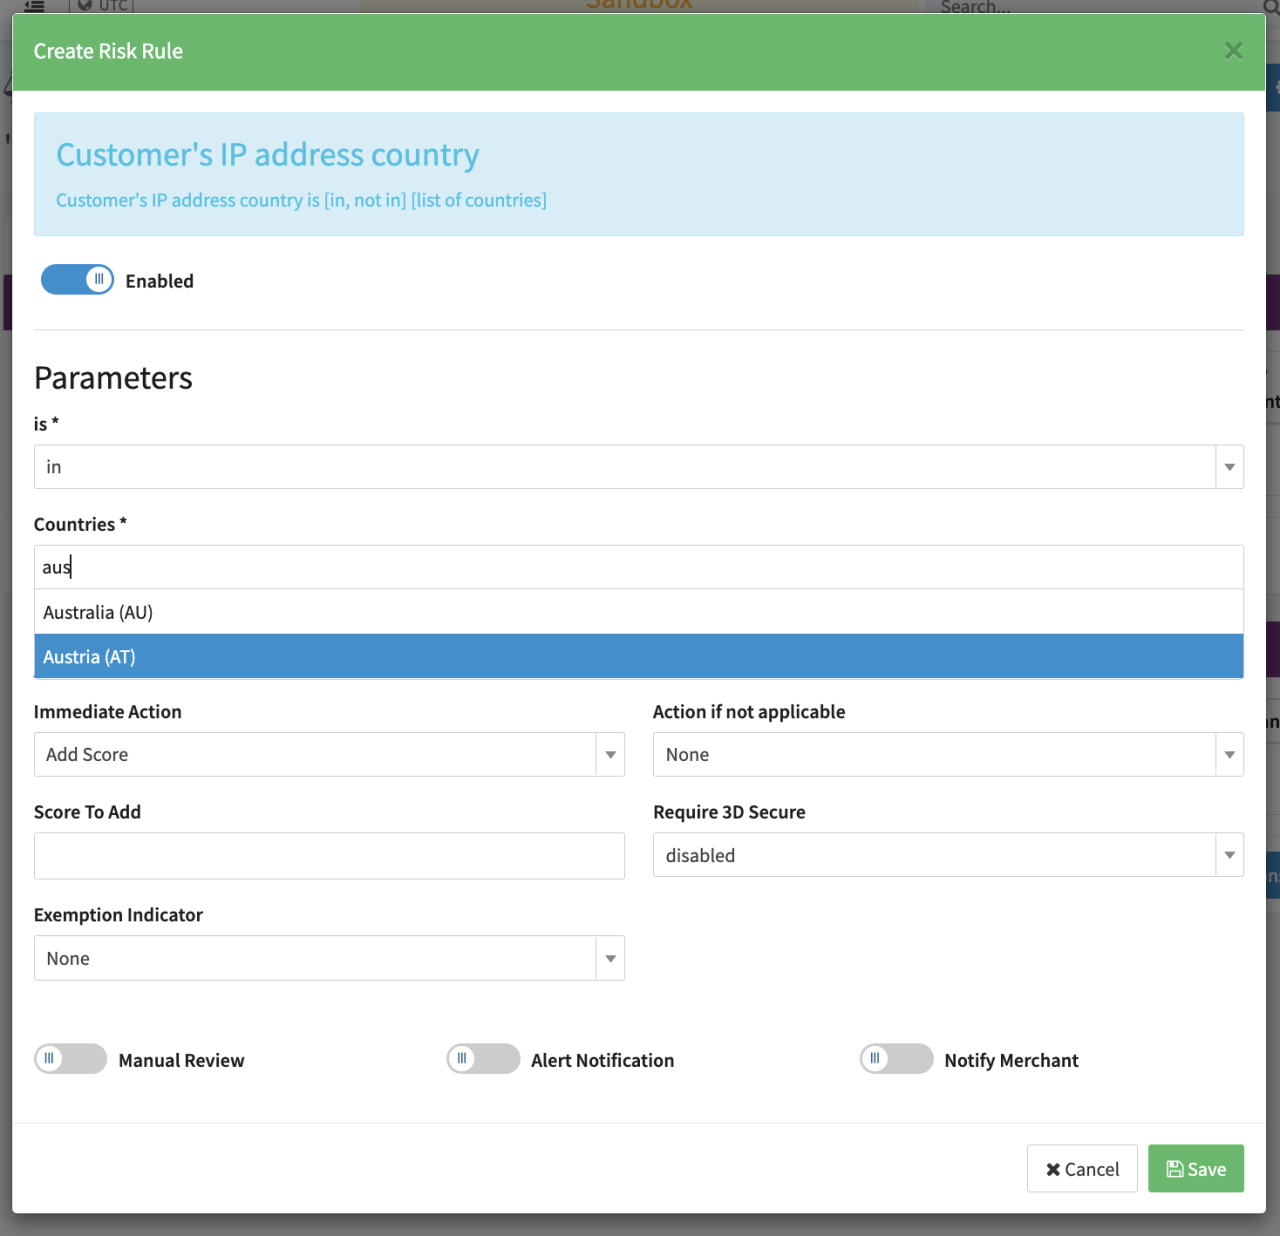
- Select "in" from the drop-down list in the in field.
- Select "Austria" in the Countries field. Enter the first few letters of the country name to quickly locate a specific country in the list (see Customer's IP address country).
- Select "Add Score" as the Immediate Action from the drop-down list. This rule is applied whenever the rule is triggered (see below for possible Actions). "Add score" will add the score entered in the Score to Add field to the transaction's risk score.
- You can also select an Action if not applicable from the drop-down menu that is applied if the rule is not triggered (i.e. the customer's IP address is not in Austria).
- Enter "40" as the Score to Add. This value is added to the score for the transaction.
- Click on Save to add the rule.
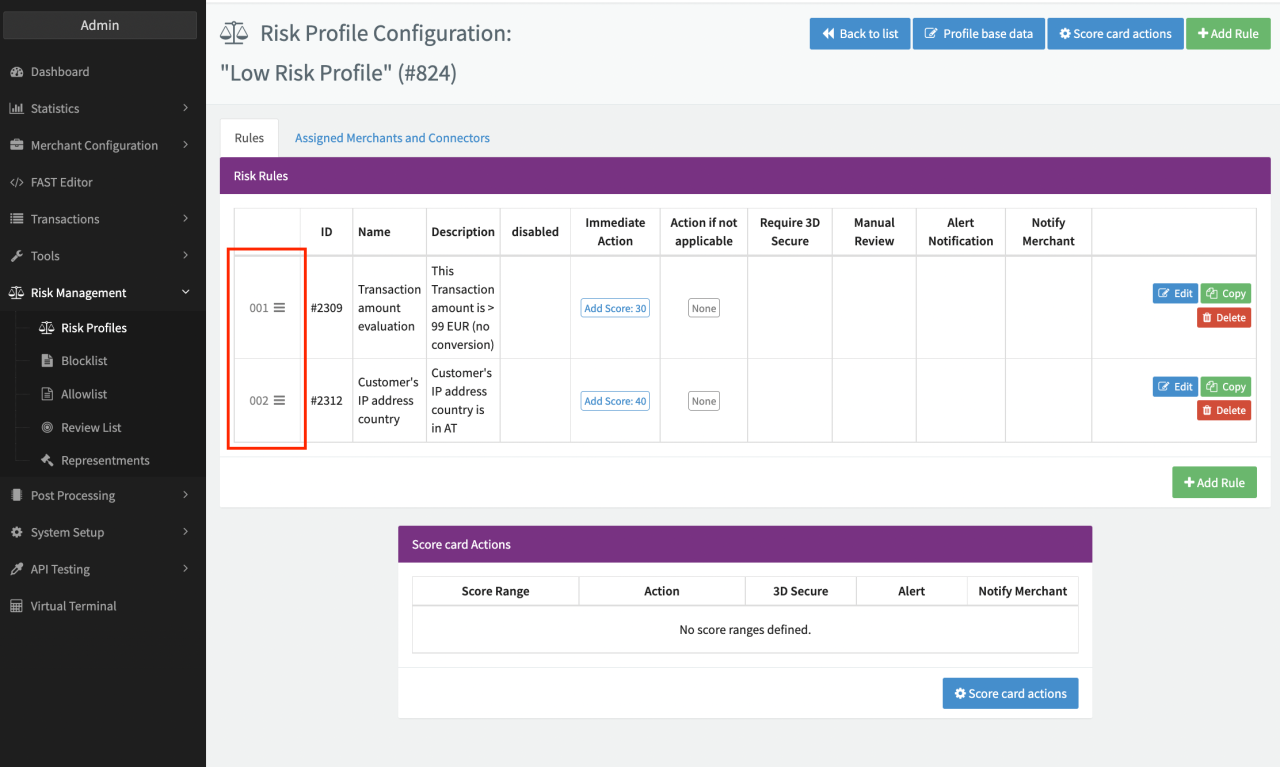
If you have multiple rules in the same risk profile, the score will be added for each rule and may trigger a subsequent action (see Score Card & Actions). Now add a second Risk Rule:
- Click on +Add Rule (see Add Risk Rule).
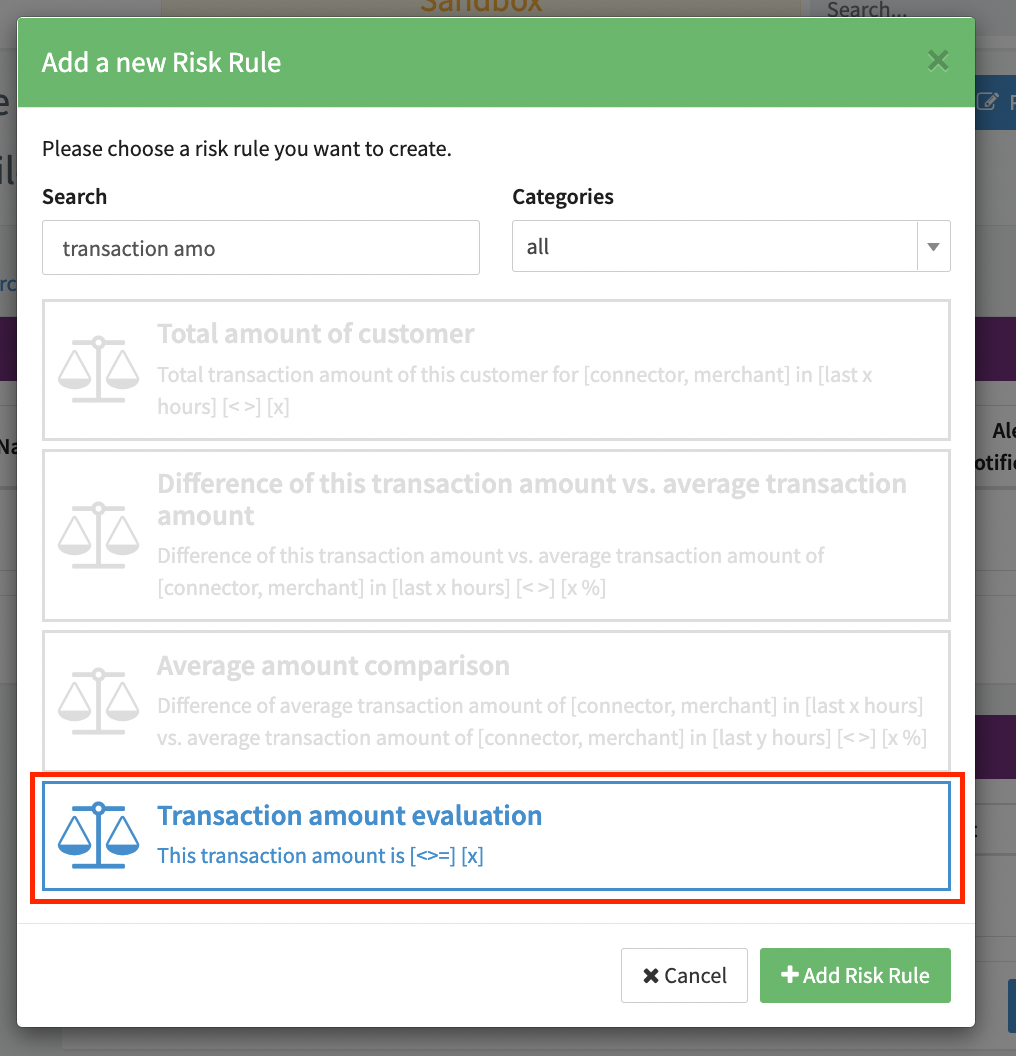
- To define a rule that applies for transactions above a certain amount, e.g. more than €99, select or search for the Transaction amount evaluation risk rule (see Filter Risk Rule II).
- Select the Transaction amount evaluation risk rule and click on +Add Risk Rule.
The Create Risk Rule dialog is displayed. You can configure the relevant parameters and actions here:
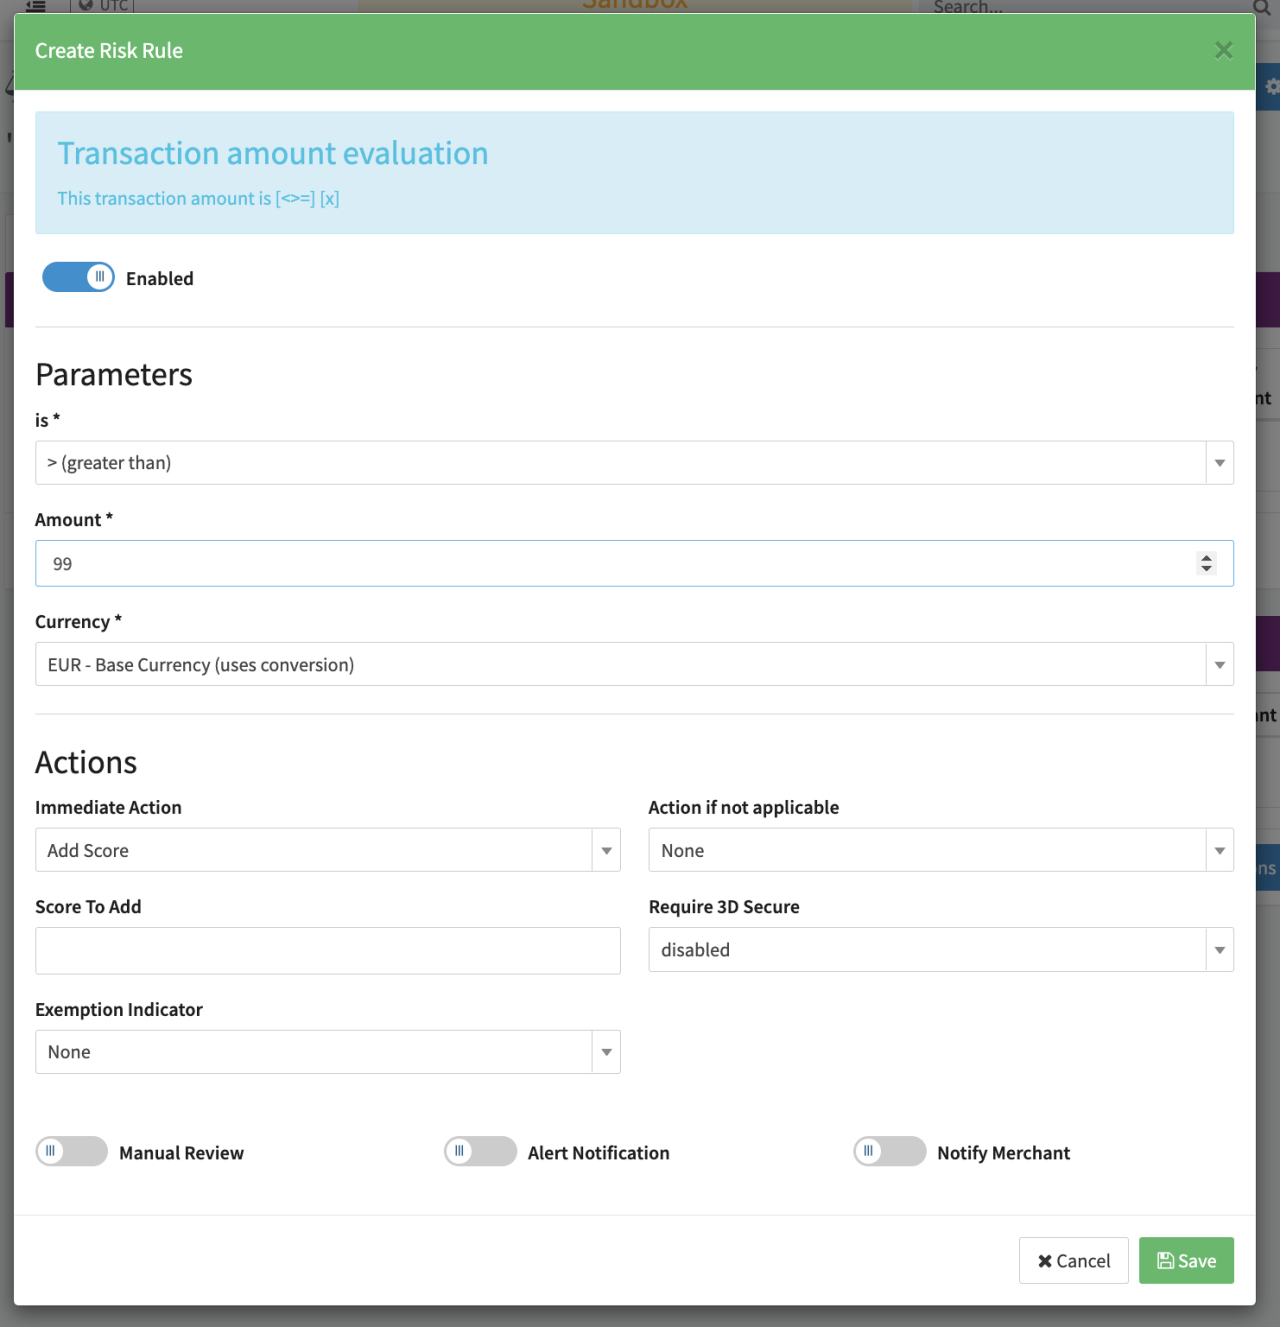
- Select "> (greater than)" from the drop-down list in the is field (see Transaction amount evaluation).
- Enter the Amount, in our example "99".
- Select Currency from the drop-down list, in our example EUR.
- Select "Add Score" as the Immediate Action from the drop-down list. For details on the other available actions, see Actions below.
- You can also select an Action if not applicable from the drop-down menu that is applied if the rule is not triggered (i.e. the value of the transaction is €99 or less).
- Enter "30" as the Score to Add.
- You can choose to enable 3D-Secure for transactions with a value of €99 or more by selecting "mandatory (for all)" in the Require 3D Secure field.
- You can also choose an Exemption Indicator.
- Click on Save to add the rule.
When adding multiple rules to a risk profile, organize your rules from highest to lowest priority. If you have rules that share the same criteria, the rule with the higher priority will override rules with a lower priority. Use the burger icon next to the rule number to drag and drop rules to define the order.
Actions
Actions can be configured in the Create Risk Rule dialog. These actions are executed immediately if the transaction matches the criteria defined in the risk rule. The following options are available:
Immediate Action / Action if not applicable
- None
- Add Score: The value is added to the total risk score (Score to Add). Values can be negative.
- Decline: The transaction is declined due to the risk rule.
- Approve: The transaction is approved and processed.
Require 3D Secure
See also 3D Secure Configuration.
- disabled
- optional (not for recurring)
- mandatory (not for recurring)
- optional (for all)
- mandatory (for all)
Exemption Indicator
The transaction will be removed/enhanced/updated with an exemption indicator, if not set or inferior (according to their value). For the exact value behind each selection, refer to the API Documentation on
- None
- Remove
- Low Value
- Low Risk
- Whitelisted Merchant
- Secure Corporate Card
- MIT Recurring
- Moto
- Anonymous Card
Challenge Indicator
Conditional option that only applies if 3D-Secure is selected. The transaction will be enhanced/updated with a challenge indicator, if not set or inferior (according to their value). For the exact value behind each selection, refer to the API Documentation on 3D-Secure 2.0 Data.
- No preference
- Frictionless Preferred
- Challenge Preferred
- Challenge Mandated
- No challenge requested (transactional risk analysis is already performed, data share only, strong customer authentication is already performed, utilise whitelist exemption if no challenge required)
- Challenge requested (whitelist prompt requested if challenge requires)
Manual Review
Enable this setting to set the transaction's status to Pending until it is manually approved or declined by a user (see also Review List).
Alert Notification
Enable this setting to trigger an alert within the platform for logged in users (see Manage and Visualize Alerts) and/or by email. Every user with the necessary permissions can subscribe to different alert types (risk alerts, conflict alerts, general alerts etc.). Alerts can be collected and sent in bundles by mail or in the application (e.g. instantly, hourly, daily...).
Notify Merchant
Enable this setting to send an email notification to the Merchant. The notification will be sent to the email address entered as the Risk Alert Email in the merchant (Basic Data section).
Debit transactions set to manual review will be split into pre-auth and a capture/void transactions (depending on the manual review user action) and therefore counted as two separate transactions. Manual review should therefore only be selected for payment methods and connectors that support the pre-auth transaction type.
External Risk Checks
In addition to the in-built risk rules, the IXOPAY platform also provides integrations with third party fraud and risk management providers. You can add and configure external risk checks as described below.
Kount — External Risk Check
Kount Complete helps protect online merchants and retailers against digital payments fraud with advanced machine learning, a flexible rules engine and self-service analytics. Kount Complete allows merchants to accept more legitimate orders, growing their business while protecting them from fraud.
An account with Kount is required to use this service.
You need to configure the IXOPAY platform by adding Kount to your connector settings and risk profile.
Add Kount to your connector settings
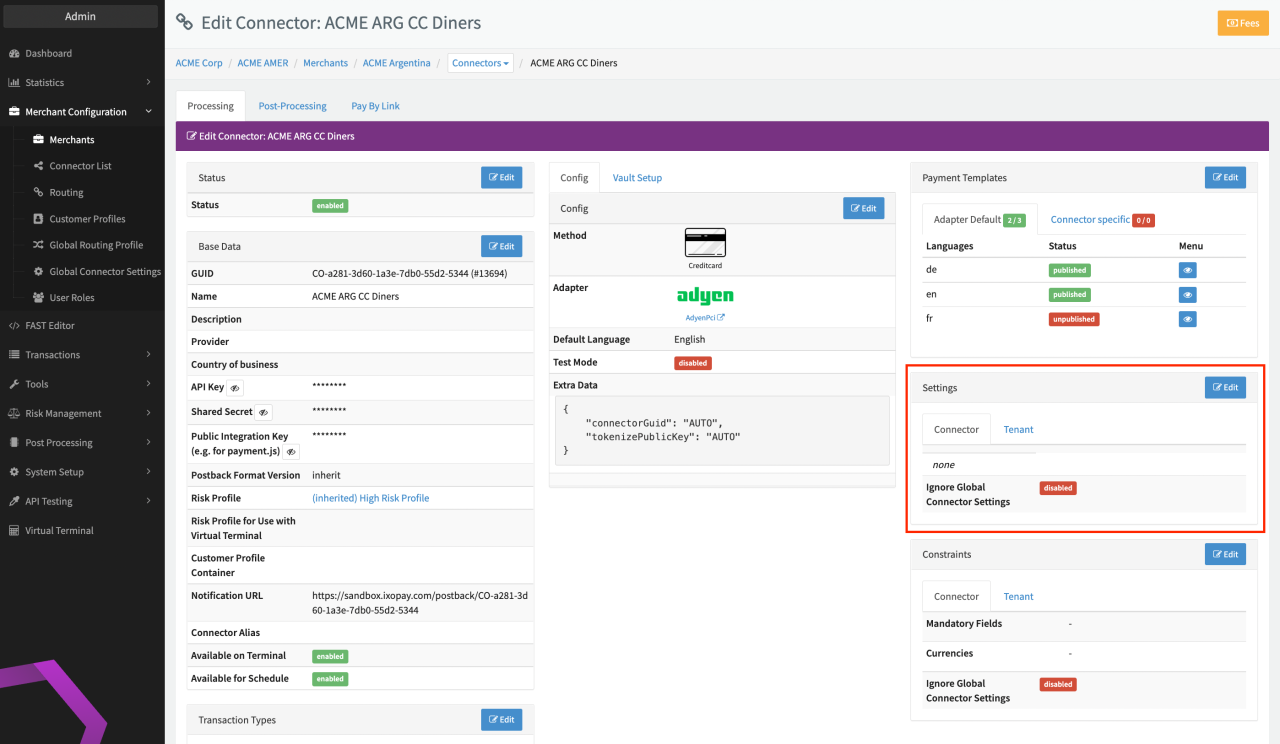
- Open the Merchant Configuration entry in the navigation menu, select Connector List and click on Edit next to the connector you want to configure (see Connector Details Overview).
- Click on Edit in the Settings section.
- Click on the drop-down list ("Select a setting") and either locate "Kount" under External Risk Checks or enter "Kount" to filter the entries.
- Select and Add the following Kount parameters:
- Merchant ID
- Use Kount Sandbox
- Init Scripts Automatically (0|1)
- API Key
- Fields (in JSON format)
- Enable Update Calls
- After adding the parameters, enter values for the parameters in the corresponding fields.

Add Kount to your risk profile
- Open the Risk management entry in the navigation menu, select Risk Profiles.
- Click on Configure Risk Profile for the risk profile you want to edit (see Configure Risk Profile).
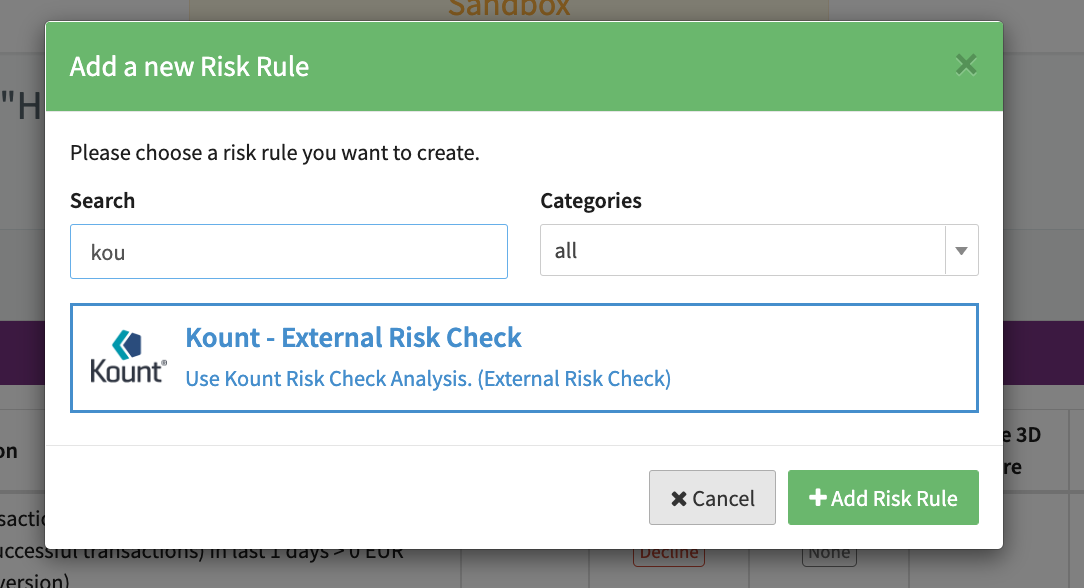
- Click +Add Rule (see Add Risk Rule)
- Locate the Kount - External Risk Check risk rule (see Filter Risk Rule III).
- Select the risk rule and click on + Add Risk Rule.
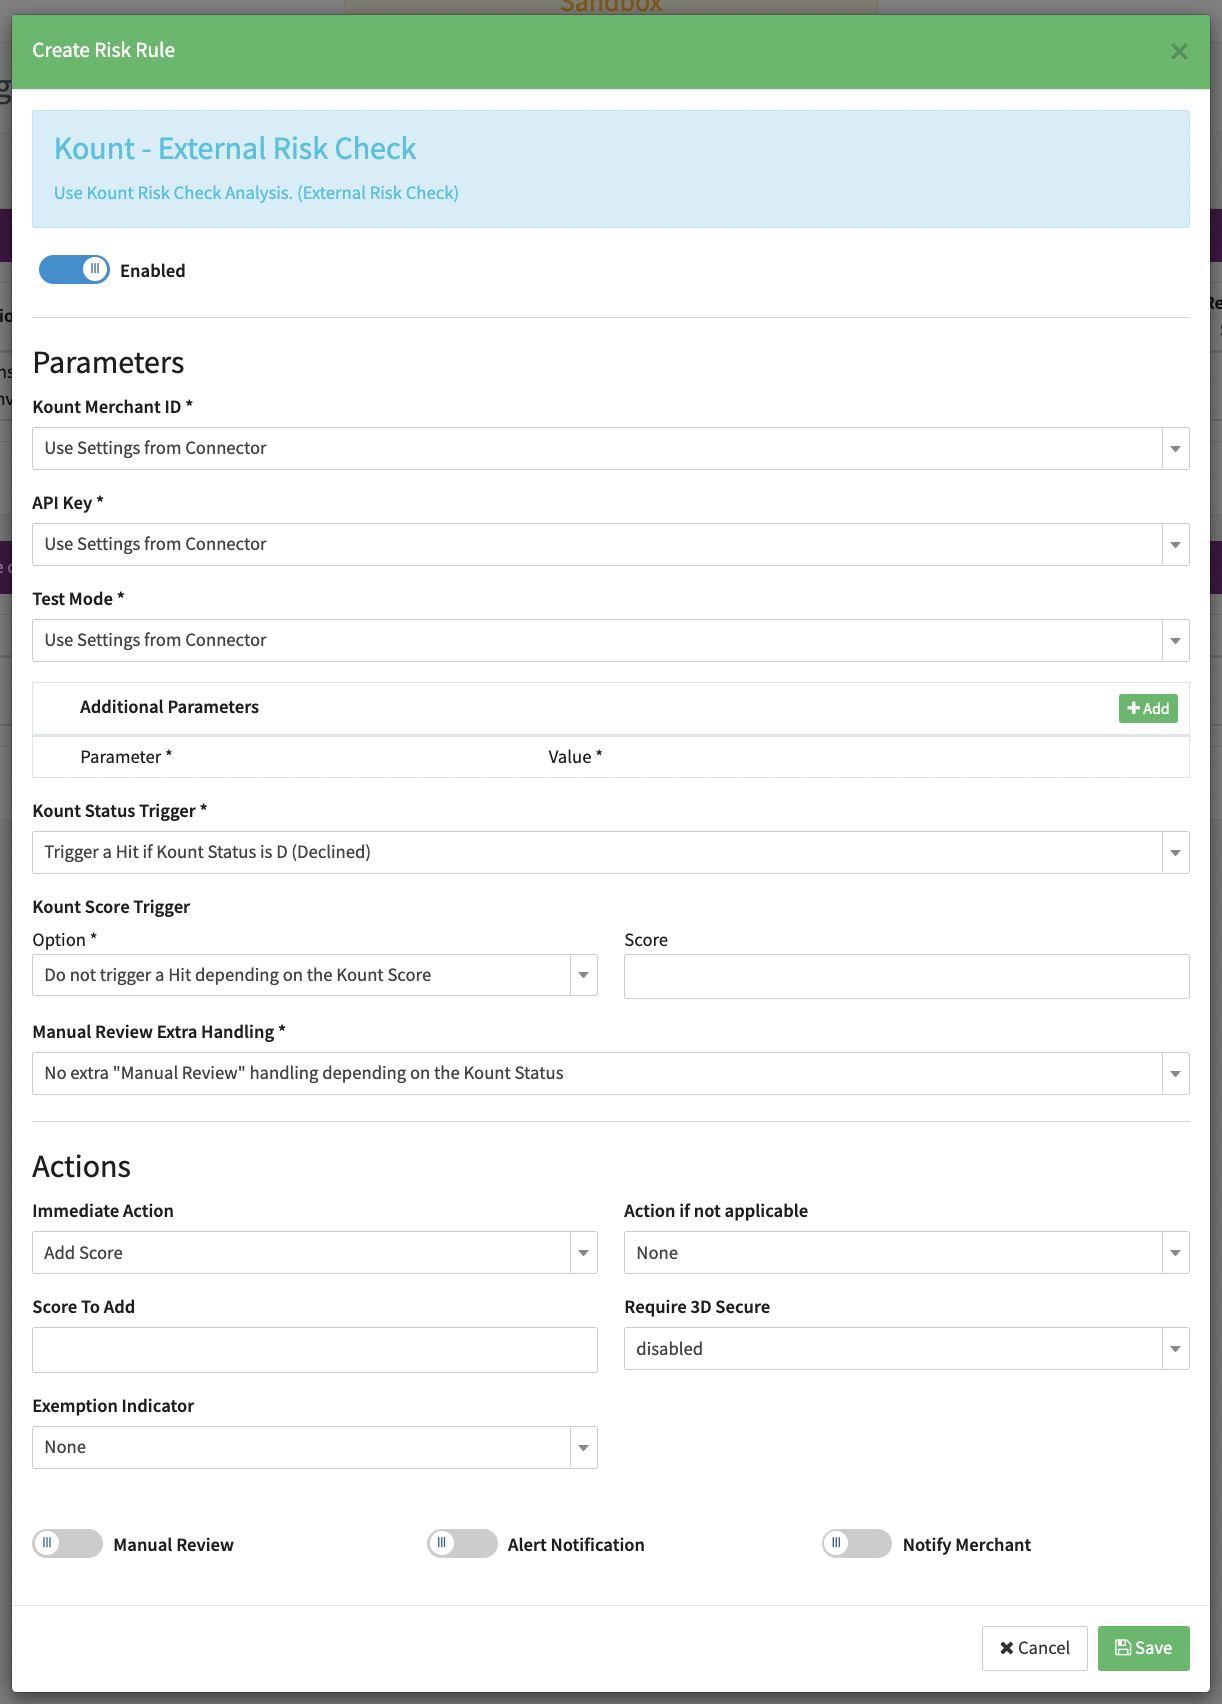
The Create Risk Rule dialog is displayed. You can configure the relevant parameters and actions here. Once you are done, click on Save.
Every transaction checked against the risk profile will be forwarded to Kount be checked.
MaxMind — External Risk Check
MaxMind is an industry-leading provider of IP intelligence and online fraud detection tools. Use MaxMind minFraud Score to get a transaction riskScore and an IP risk score. Create simple rules based on selected minFraud inputs and outputs or your custom inputs to accept, reject, or manually review transactions.
An account with MaxMind is required to use this service.
You need to configure the IXOPAY platform by adding MaxMind to your risk profile.
Add MaxMind to your risk profile
- Open the Risk management entry in the navigation menu, select Risk Profiles.
- Click on Configure Risk Profile for the risk profile you want to edit.
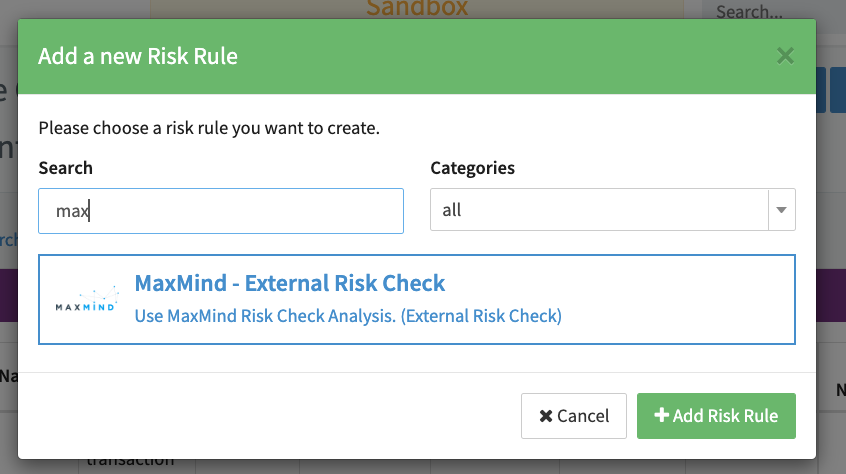
- Click +Add Rule.
- Locate the MaxMind - External Risk Check risk rule (see Create Risk Rule - Maxmind).
- Select the risk rule and click on + Add Risk Rule.
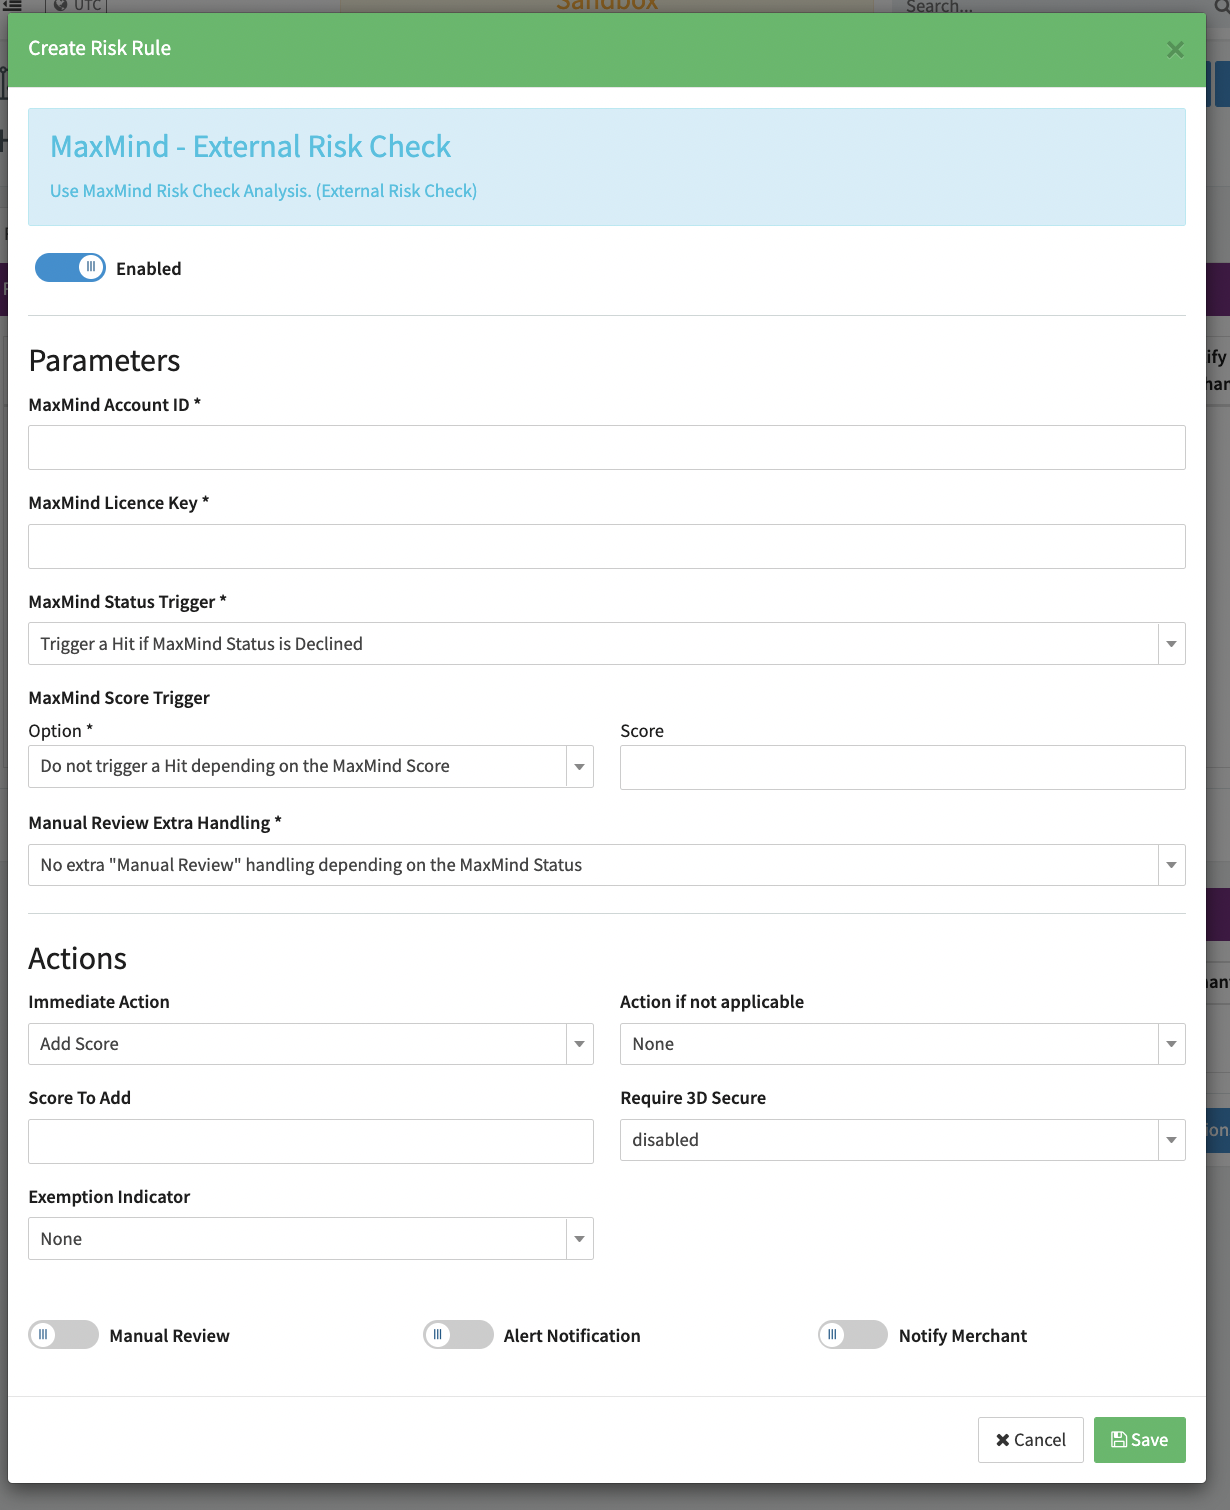
- The Create Risk Rule dialog is displayed. You can configure the relevant parameters and actions here.
Enter the mandatory parameters (see Risk Rule Parameters - Maxmind):
- MaxMind Account ID
- MaxMind Licence Key
- MadMind Status Trigger: You can choose to Trigger a Hit if MaxMind Status is Declined; Trigger a Hit if MaxMind Status is Declined or Manual Review or Do not trigger a Hit depending on the MaxMind Status
- MaxMind Score Trigger: You can between: Do not trigger a Hit depending on the MaxMind Score; Trigger a Hit if MaxMind Score is greater or equal than Score (enter the score in the Score field); Trigger a Hit if MaxMind Score is lower than Score (enter the score in the Score field)
- Manual Review Extra Handling: You can choose between: No extra "Manual Review" handling depending on the MaxMind Status; Enable "Manual Review" if MaxMind Status is Manual Review
- Once you are done, click on Save.
- Every transaction checked against the risk profile will be forwarded to MaxMind be checked.
Forter — External Risk Check
Forter is one of the leaders in e-commerce fraud and policy abuse prevention, Forter protects against all forms of fraud and abuse throughout the customer journey, including credit card fraud, chargebacks, returns abuse and account takeover, and improves conversion rates that have been impacted by PSD2 by helping merchants secure all available exemptions and exclusions.
To be able to use Forter you have to register an Account with them.
On the IXOPAY platform side you have to make sure to add Forter on the Adapter settings and in the Risk Profile.
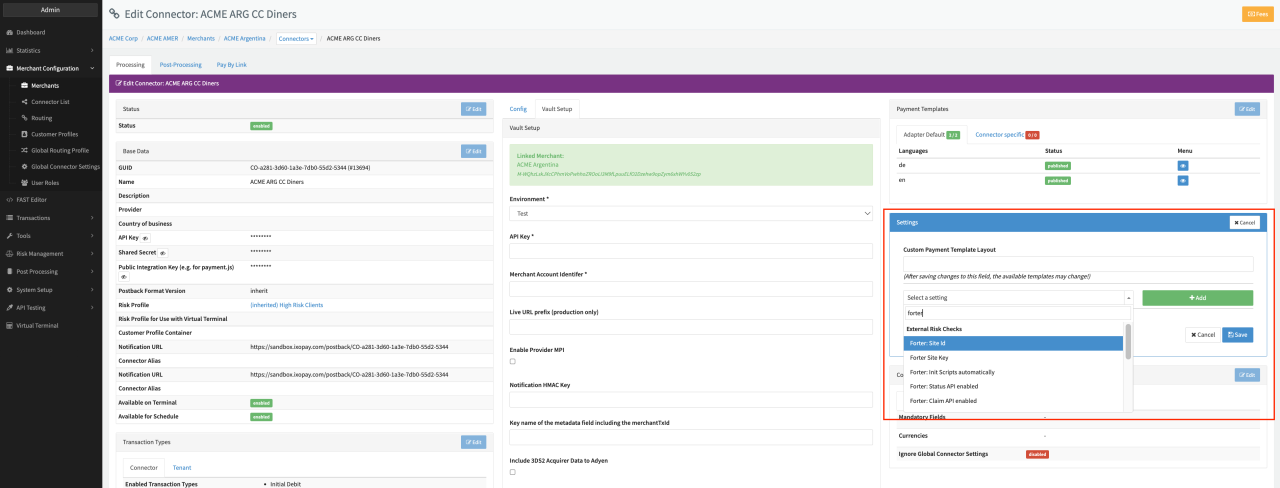
Adding Forter to your connector settings
Go to the Connector you want to setup Forter on and edit the settings (see Connector Details Overview - Settings), under "External Risk Checks" add all the points regarding Forter.
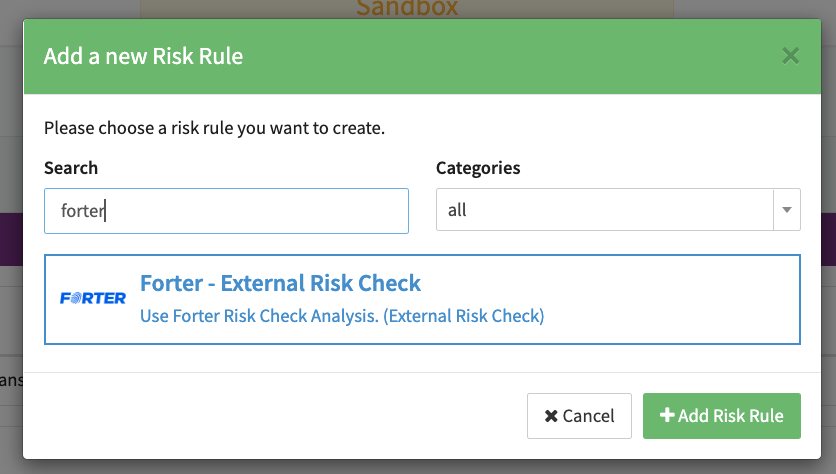
Add Forter to your risk profile
To add Forter as a Risk Rule you need to open the Risk Profile and add Forter (see Create Risk Rule - Forter)
Next setup your profile as wished and save it (see Risk Rule Parameters - Forter)
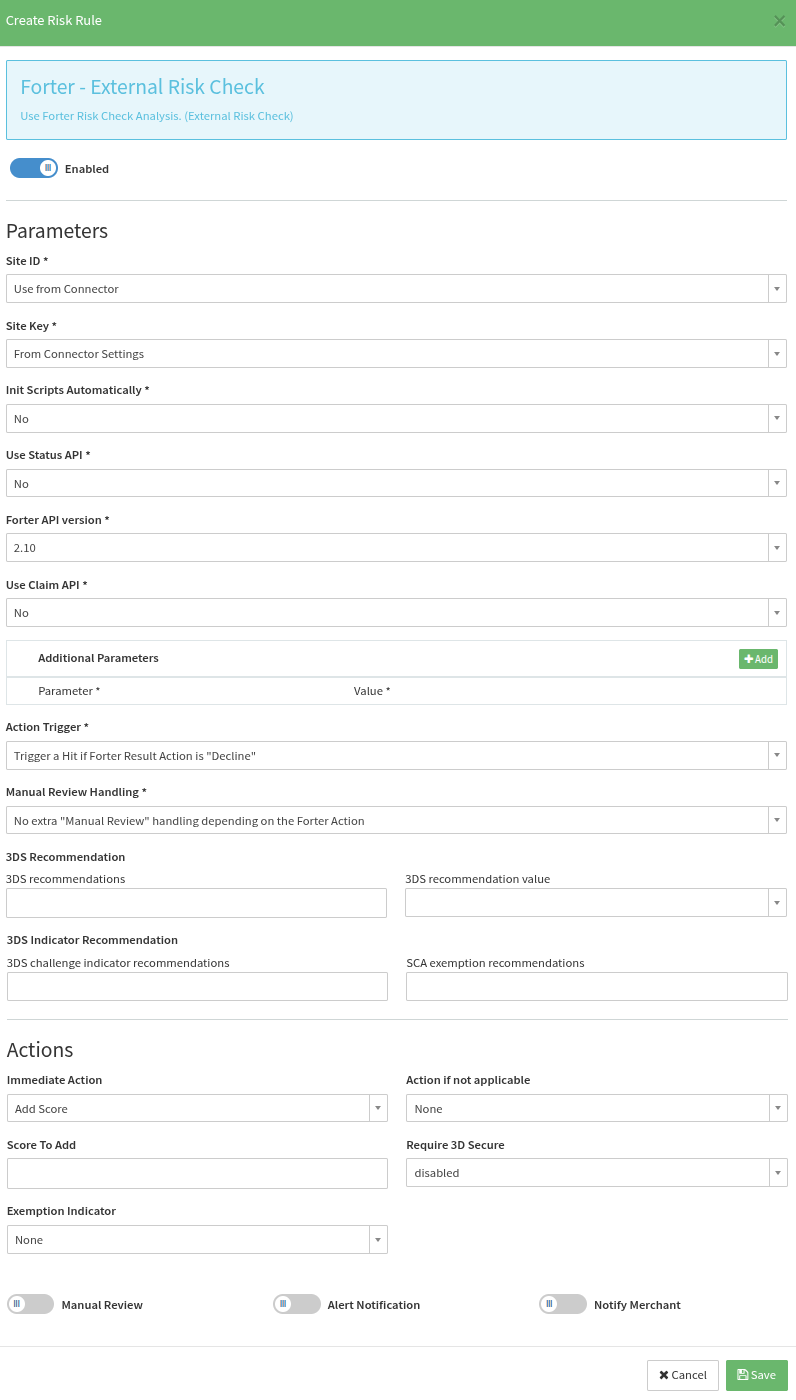
Forter Risk Rule Configuration
| Configuration | Description |
|---|---|
| Site ID | Which Site ID to use • Use from Connector • From Risk Rule Additional Parameters |
| Site Key | Which Site Key to use • Use from Connector • From Risk Rule Additional Parameters |
| Init Scripts Automatically | Whether to initialize scripts automatically • Yes • No • From Connector |
| Use Status API | Whether to use the Status API • Yes • No • From Connector |
| Forter API Version | Which API Version to use • 2.10 • 2.11 • 10.1 |
| Use Claim API | Whether to use the Claim API • Yes • No • From Connector |
| Additional Parameters | Configure additional parameters • Site ID• Site Key. |
| Action Trigger | Specify the trigger hit behaviour based on Forter's action result • Trigger a Hit if Forter Result Action is "Decline" • Trigger a Hit if Forter Result Action is "Decline" or "Not Reviewed" • Trigger a Hit if Forter Result Action is "Not Reviewed" • Do not trigger a Hit independent of the Forter Result Action |
| Manual Review Handling | Specify manual review handling based on Forter's action result • No extra "Manual Review" handling depending on the Forter Action • Enable "Manual Review" if Forter Action is "Not Reviewed" • Enable "Manual Review" if Forter Action is "Decline" |
| 3DS Recommendations | Can only be used with Forter API Version 10.1. • 3DS recommendations list of possible Forter recommendations • 3DS recommendation value which 3DS requirement to set based on Forter's recommendation |
| 3DS challenge indicator recommendations | Can only be used with Forter API Version 10.1. Select which recommended Forter challenge indicators should be applied Supported recommendations: • VERIFICATION_REQUIRED_3DS_CHALLENGE➜ will set the 3DS challenge indicator to 03 - Challenge Preferred |
| SCA exemption recommendations | Can only be used with Forter API Version 10.1. Select which recommended Forter exemptions should be applied. Supported recommendations: • REQUEST_SCA_EXEMPTION_TRA➜ will set the exemption indicator to 02 - Low Risk• REQUEST_SCA_EXEMPTION_LOW_VALUE➜ will set the exemption indicator to 01 - Low Value• REQUEST_SCA_EXEMPTION_CORP➜ will set the exemption indicator to 04 - Secure Corporate Card |
Notolytix — External Risk Check
NOTO has developed an enterprise-grade solution to counteract all the threats of financial crime. It helps companies to consolidate information from all data sources and provides real-time monitoring and alerts to help organisations to quickly reference high risk user behaviour and transaction patterns.
NOTO's Fraud Solution is used to detect:
- Card Fraud for Issuing and Acquiring Transactions
- Payment Fraud
- Account Compromise & Account Fraud
- Loyalty & Promotion Abuse
- Merchant Risk
To be able to use Notolytix you have to register an Account with them.
On the IXOPAY platform side you have to make sure to add Notolytix in the Risk Profile.
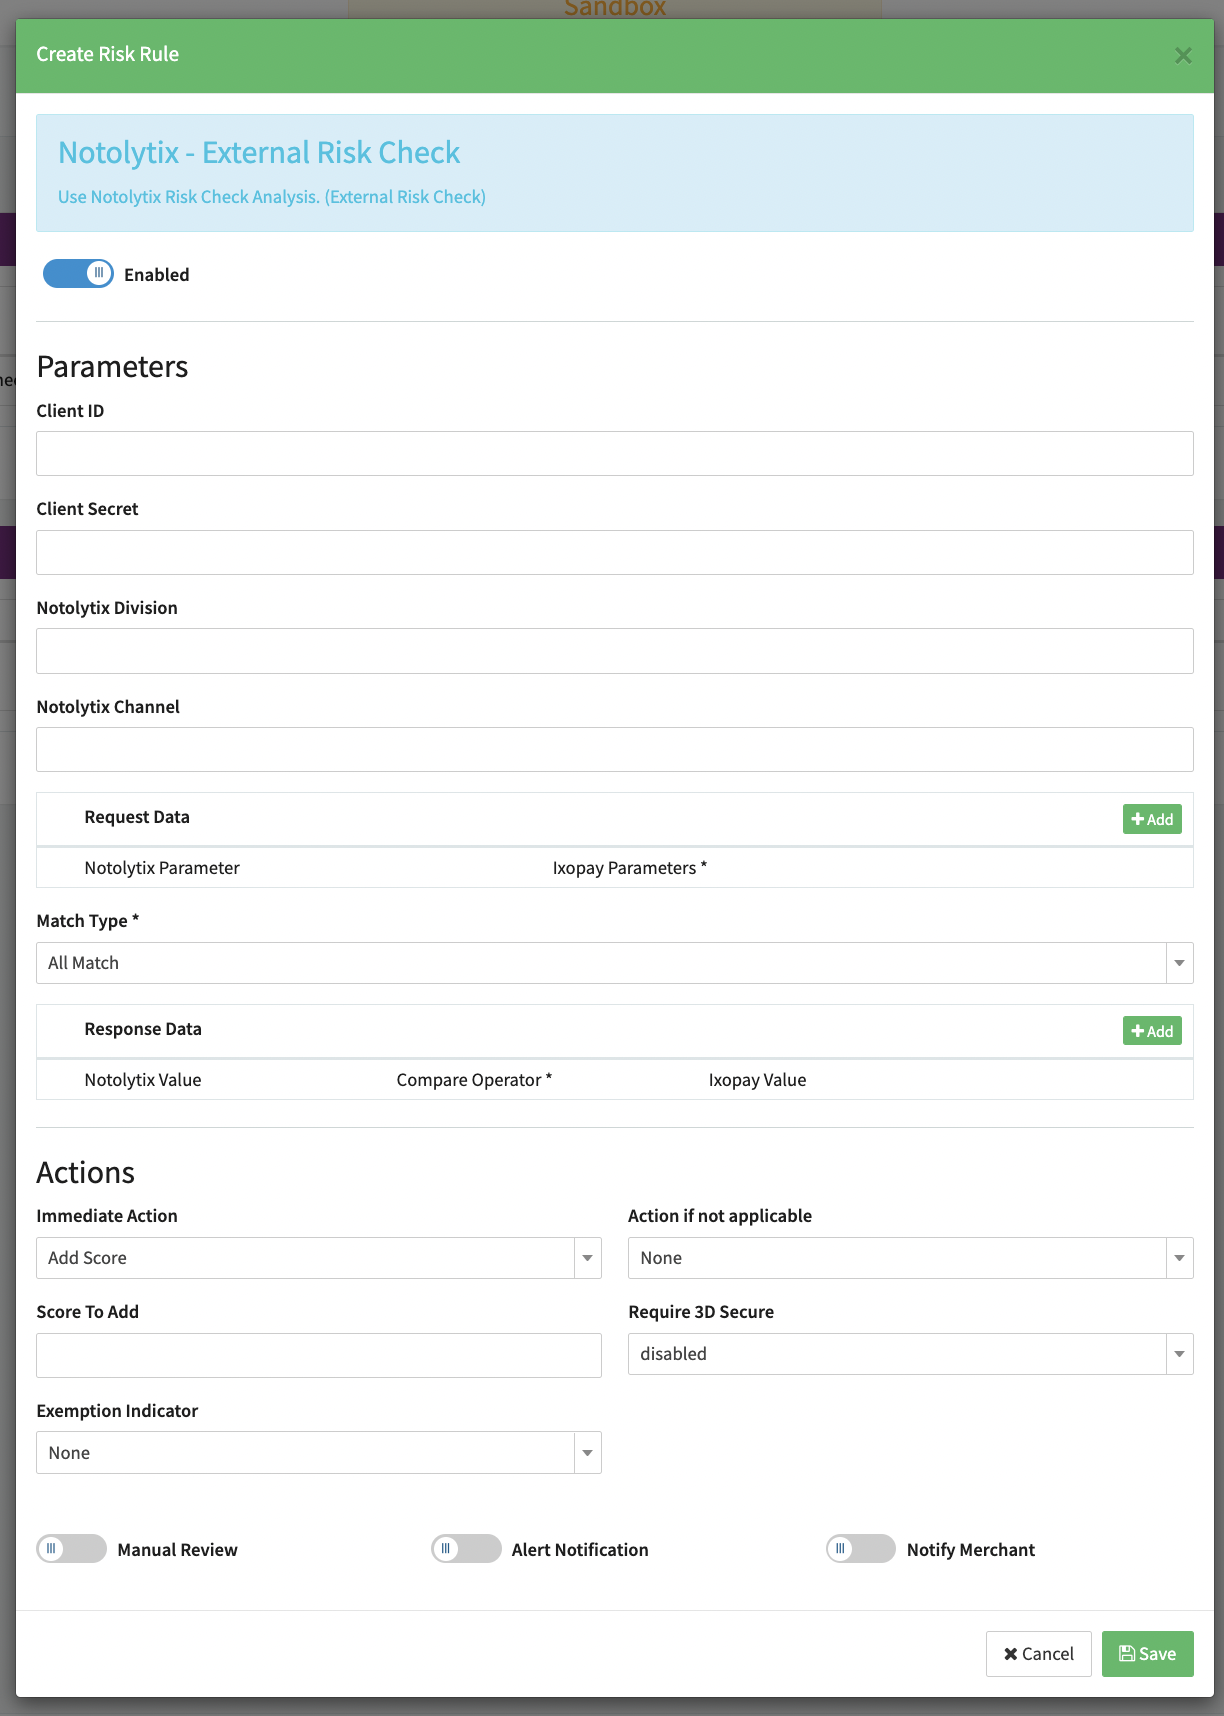
Adding Notolytix into your Risk Profile
To add Notolytix as a Risk Rule you need to open the Risk Profile and add Notolytix (see Create Risk Rule - Notolytix)
Next setup your profile as wished and save it (see Risk Rule Parameters - Notolytix)

Fraud.net - External Risk Check
Fraud.net is an automated fraud management solution that accurately stops 99.7% of fraud before it starts. Its award-winning software streamlines your customer/vendor onboarding and transaction monitoring so you can prevent false positives and make safer, more profitable decisions.
To be able to use Fraud.net you have to register an Account with them.
On the IXOPAY platform side you have to make sure to add Fraud.net in the Risk Profile.
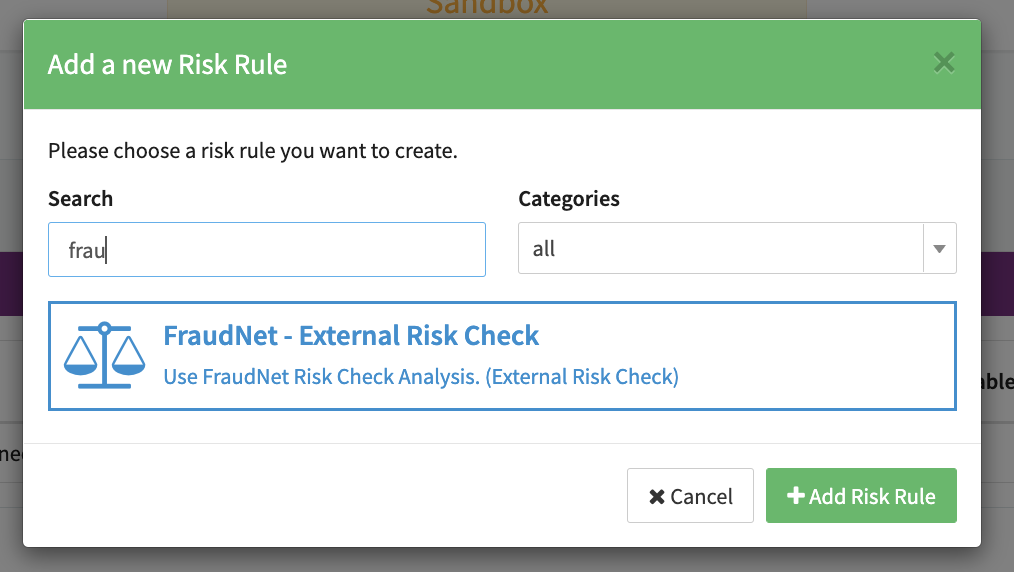
Adding Fraud.net into your Risk Profile
To add Fraud.net as a Risk Rule you need to open the Risk Profile and add Fraud.net (see Create Risk Rule - Fraud.net)
Next setup your profile as wished and save it (see Risk Rule Parameters - Fraud.net)