Provider Settlements
If you want to get access to all IXOPAY platform features you need to upgrade your plan. Please contact our Support Team in the IXOPAY Customer Experience Portal for more information.
The settlement of transactions with the processing providers presents a number of challenges to eCommerce enterprises. Different providers handle this process in different ways. For example, one service provider may provide settlement data within hours to be collected via an API, whereas it may take several days for another service provider to provide the data as a file. The format (JSON, XML, CSV, Fixed-width file, EPPRC, GRRCN, CAMT.054), semantics and granularity of the data often differ, generally as a result of the underlying payment method.
The IXOPAY Post-Processing Engine standardizes the settlement process across all providers and payment methods. All identified conflicts can easily be resolved within the IXOPAY platform, thereby drastically simplifying this task for your employees.
Before you ca manage provider settlements, settlements need to be enabled for your connectors as covered in the adapter-specific documentation. You may need to configure provider settlement data fetchers and settlement settings.
If you want to create settlements manually, refer to Manual Settlement below.
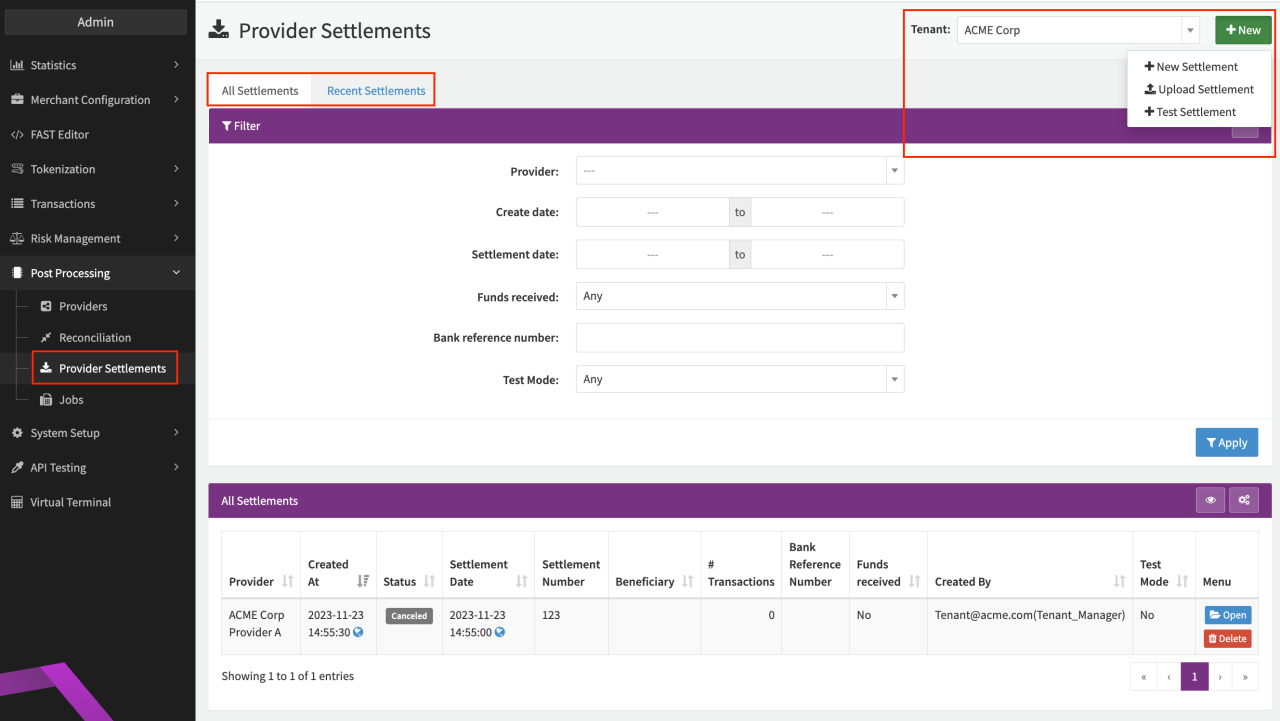
To view and manage provider settlements:
- Navigate to the Post Processing section, sub-section Provider Settlements. Any settlements retrieved from your providers are listed here.
- The Provider Settlements section contains two tabs (see Provider Settlement screenshot):
- All settlements (filter options available)
- Recent Settlements
- New Settlements can be created for the selected Tenant by selecting the option + New (see Manual Settlement below).
Each provider settlement is a batch including all transactions since the last retrieved provider settlement and includes the following information:
- Provider
- Created At
- Status:
- New: This batch is currently in creation
- Importing: This batch is importing transactions automatically based on settlement files
- Cancelled: The creation of the settlement was cancelled (see Manual Settlement below)
- Processing: The transactions in this batch are currently being processed
- Done: The settlement is fully processed and completed
- Conflicted: There is at least one transaction where the settlement amount/currency, fees or conversion rate does not match the expected values
- Settlement Number: The ID of the settlement batch from the PSP; or alternatively the day of the bank statement — needed for some adapters in order to correctly configure data fetchers in case you have processed transactions via a different platform in the past. The IXOPAY platform only processes settlements starting with a certain ID.
- # Transactions: Number of transactions in the provider settlement batch
- Settlement Date: Needed for some adapters in order to correctly configure data fetchers in case you have processed transactions via a different platform in the past
- Funds received: Whether the funds were already transferred
- Menu: The available options here depend on the status:
- Click Open to access the Settlement Details.
- Click Delete to delete the provider settlement (only possible settlements with the status New).
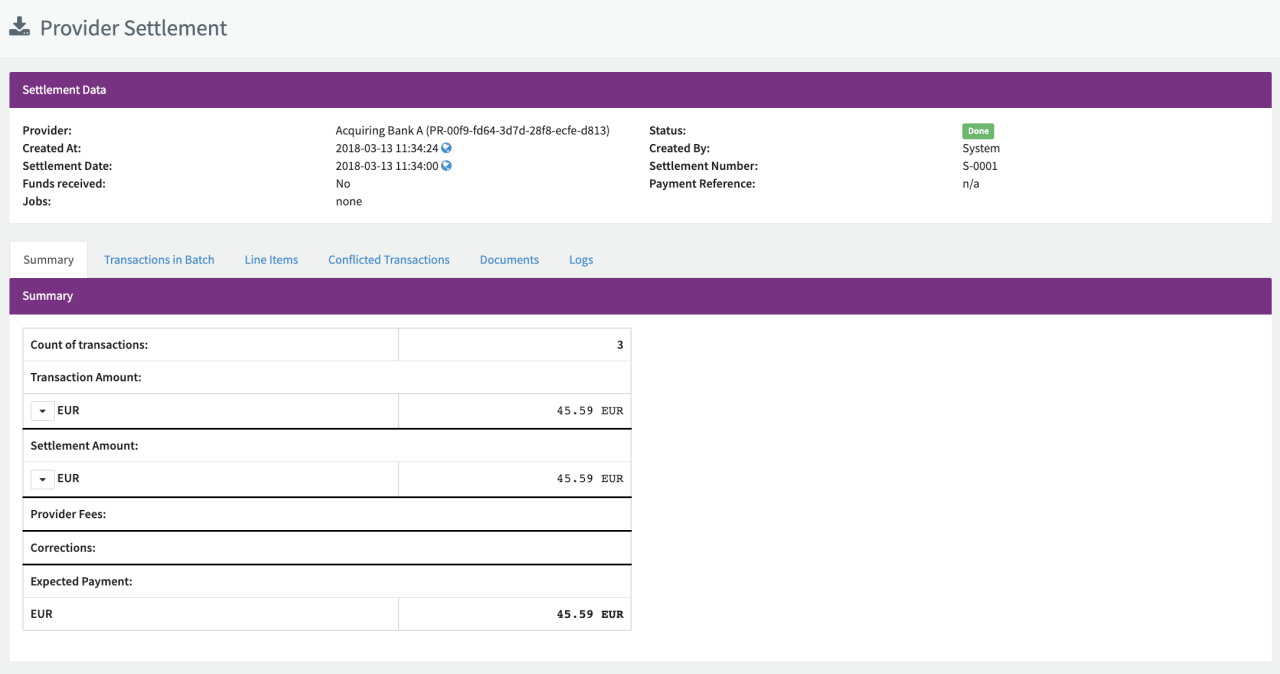
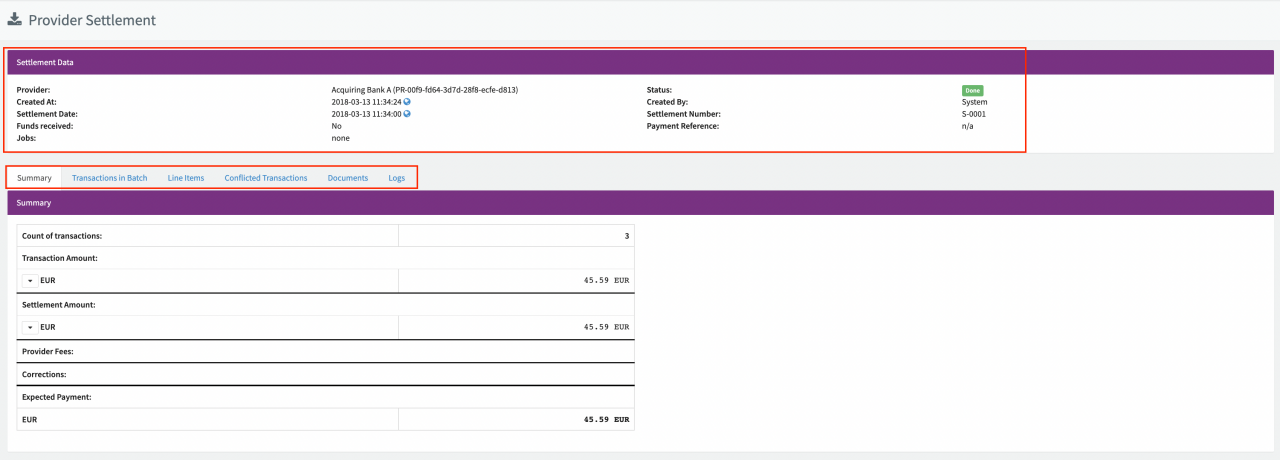
Settlement Details
The settlement details include further information about the provider settlement in various tabs:
- Settlement Data: Includes additional information about the provider settlement
- Payment Reference: The reference number for the wire transfer
- Jobs: Post processing jobs triggered by the provider settlement
- Summary: Overview of the number of transactions, transaction amount, settlement amount, fees and other line items
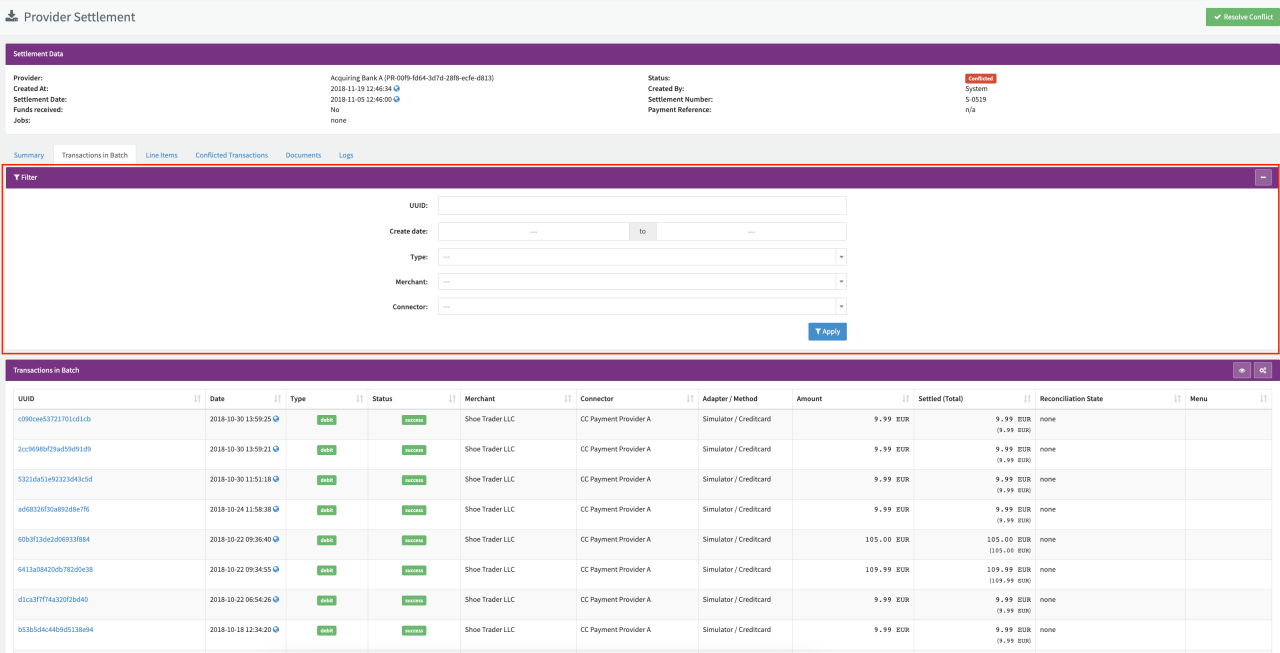
- Transactions in Batch: Overview of all transactions included in the provider settlement batch (filter options are available). A transaction might be included in multiple settlements. For each settlement, the IXOPAY platform stores the individual amount, the cumulative amounts are the total settlement amount.
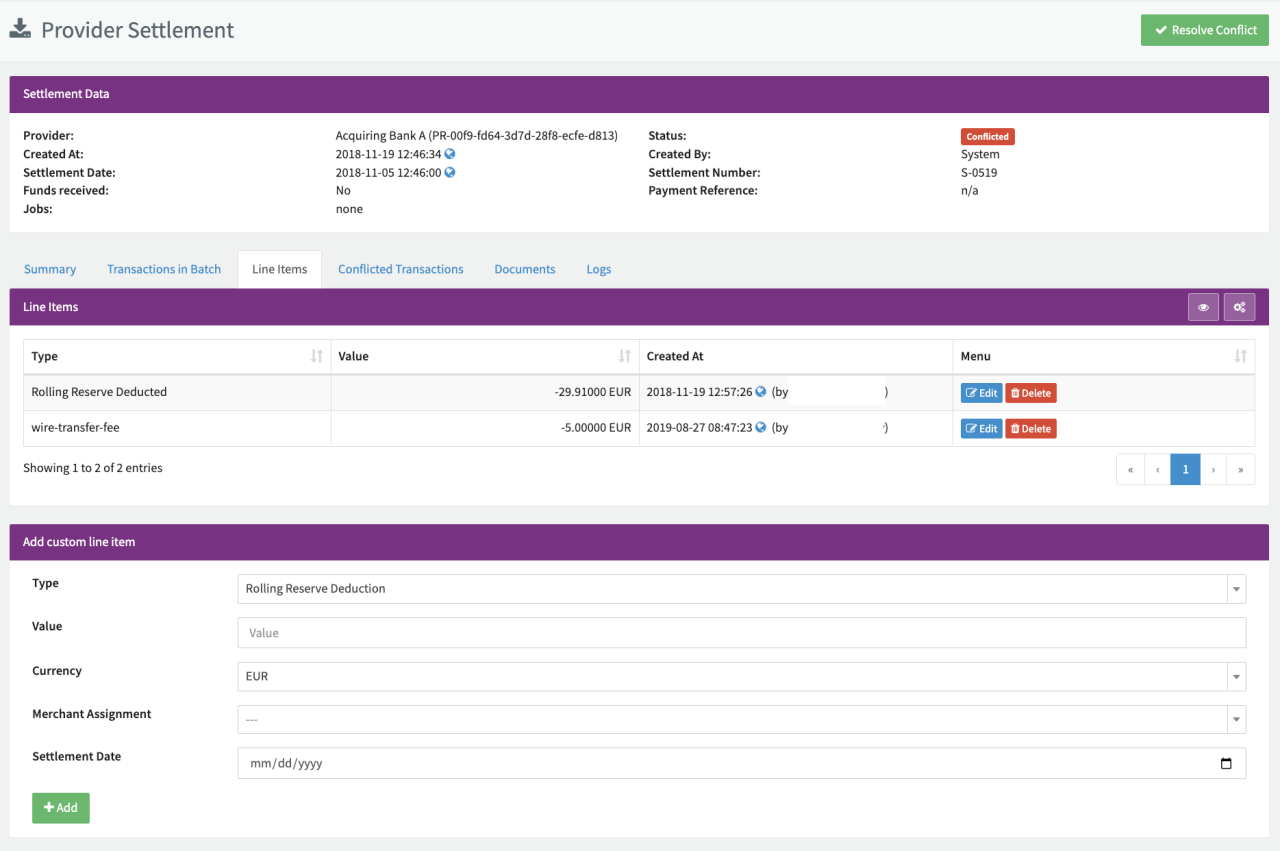
- Line Items: Overview of created custom/non-transaction related line items (e.g. rolling reserve/reimbursement, adjustments, fines, informational items like gross settlement, net settlement) with options to edit, delete existing Line Items and/or create new custom Line Items (see Line Items screenshot).
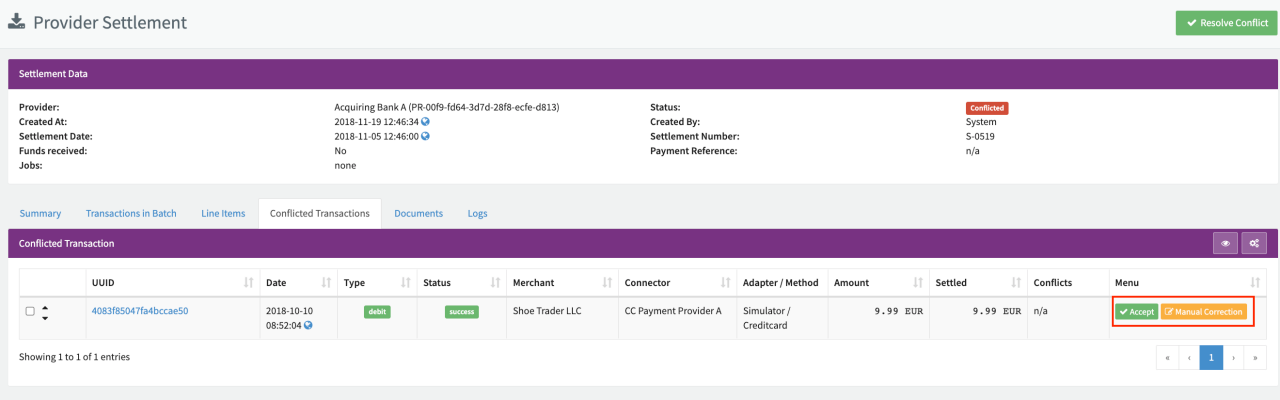
- Conflicted Transactions: Overview of all transactions with conflicts (see Conflicts section)
- Documents: Provider settlement documents overview (retrieved by the IXOPAY platform from the provider) with the option to manually upload and download documents (see Documents screenshot)
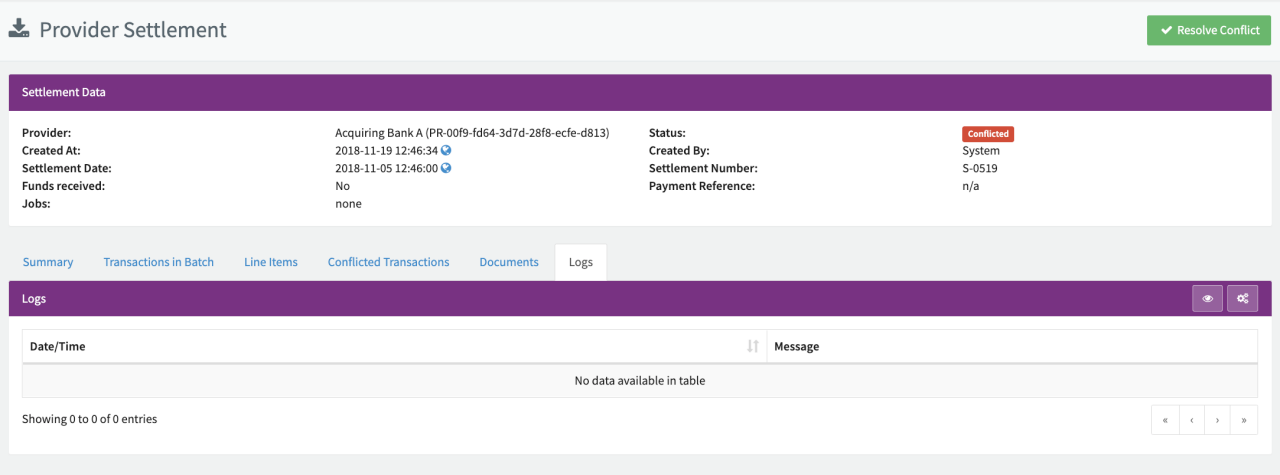
- Logs: Provider settlement logs contain information about items in the settlement statement/file that could not be processed (e.g. transactions that could not be resolved, see Logs screenshot)
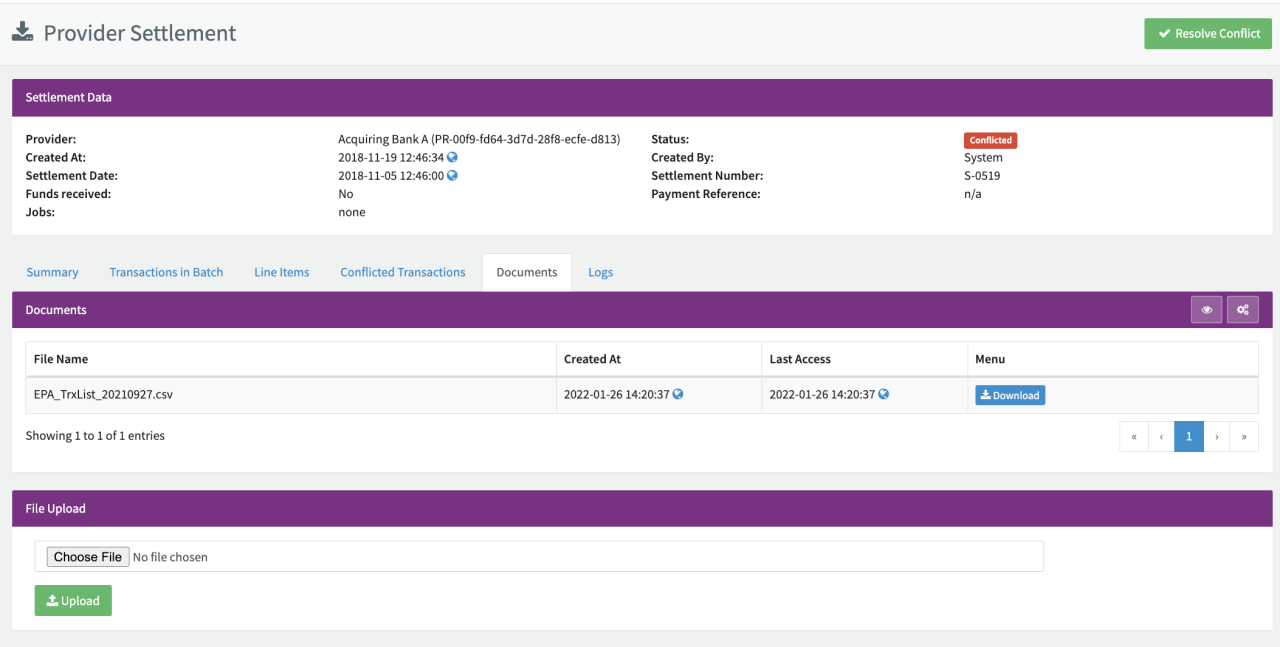
Files are retained for 12 months and permanently deleted thereafter.
Depending on the provider settlement status, you may need to take action to complete the settlement processing.
You can configure Post Processing Jobs triggered by provider settlements (see also Testing Provider Settlements). Once a settlement is finished, it automatically collects all settlement data, provider fees and rolling reserve. This data can be exported, e.g. to Navision.
Conflicts
The Conflicted Transactions tab displays all transactions where the data in the IXOPAY platform and the PSP's settlement data do not match. Transaction data that can cause a conflict are:
- Fees: The configured fees and the actual reported fees do not match
- Conversion Rate: The configured conversion rate does not match the actual conversion rate
- Amount: The settled amount does not match the (calculated) settlement amount (based on conversion rates)
For each conflict you have two options:
- Accept: Accepts the conflict without any action
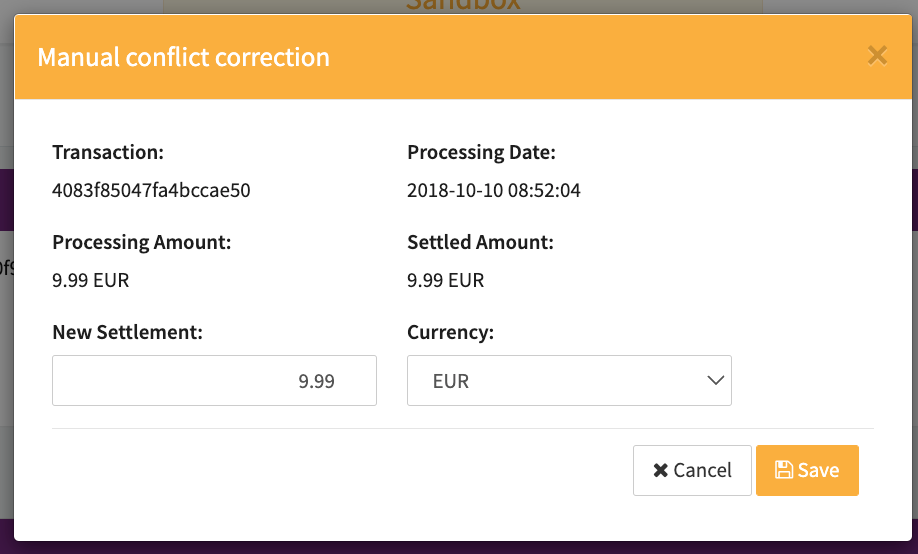
- Manual Correction: Update the settled amount manually for the transaction
Manual Settlement
There are two options for creating provider settlements manually (see Create Provider Settlement):
- + New Settlement and add the transactions
- Upload Settlement to upload a settlement files
To create a new settlement:
- Navigate to the Post Processing section, sub-section Provider Settlements
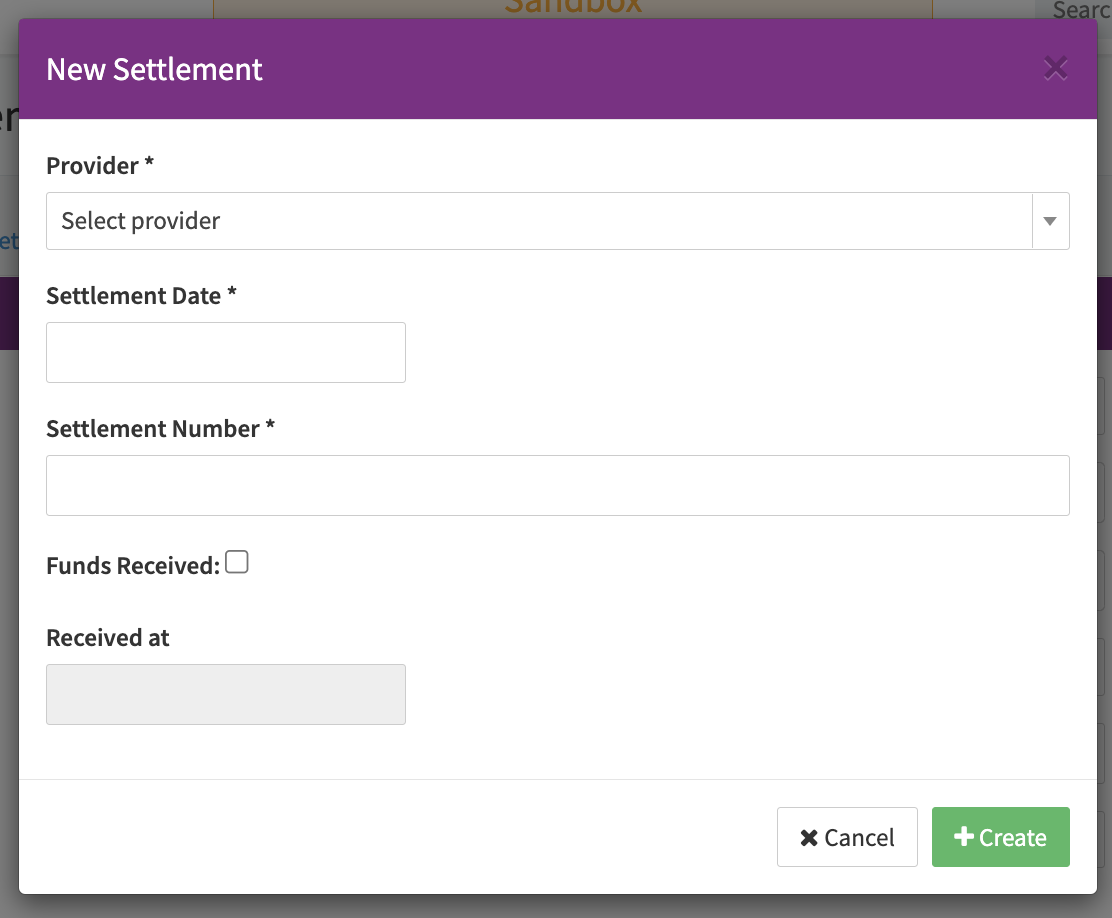
- Select + New and choose + New Settlement from the dropdown
- Enter the following information in New Settlement modal:
- Provider: Select he provider the settlement is for
- Settlement Date
- Settlement Number
- Enable Funds received.
- Select + Create. The manual settlement is added to the provider settlement overview with the status New.
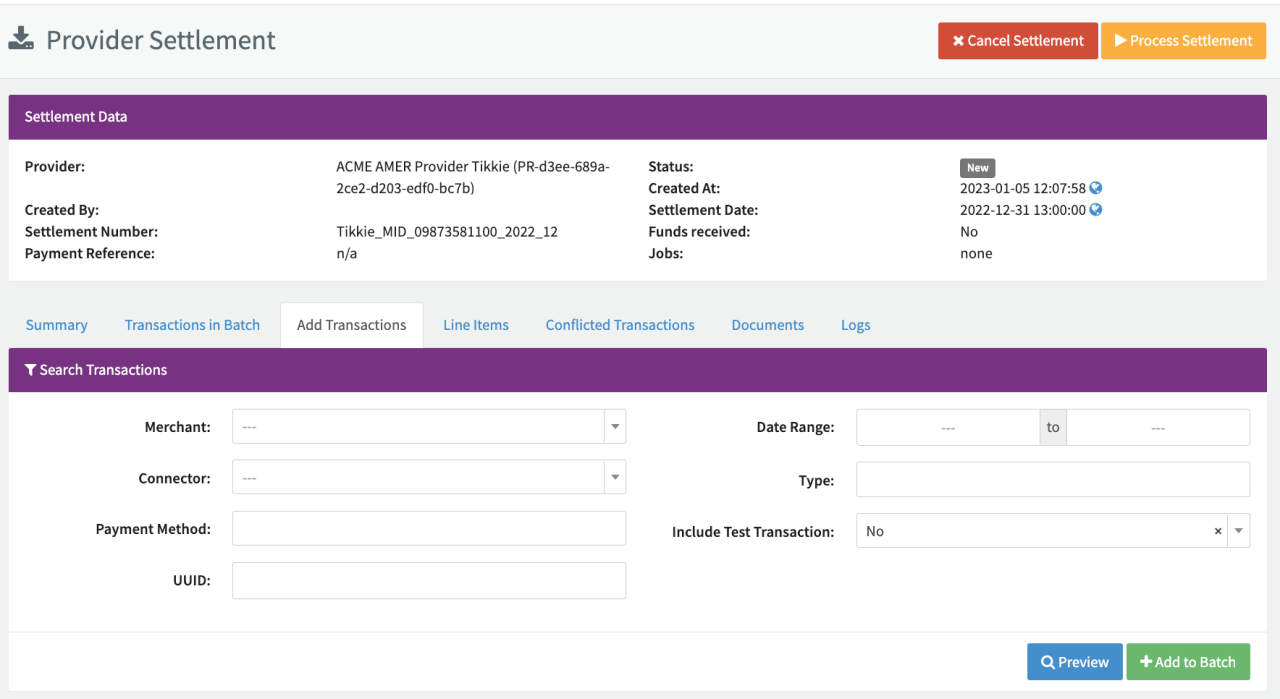
- Switch to the Add Transactions tab to add transactions to the settlement. Use the filters to search for the transactions you want to add to the batch. Click on Preview to view all matching transactions.
- Click on + Add to Batch to add the transactions to the settlement. You can add transactions incrementally using different filter and search criteria.
- Once you have added all transactions, click on Process Settlement to start processing the settlement (see Add Transactions screenshot). When creating manual settlements, all transactions are settled using the amounts and currency entered in the settlement.
You can cancel the settlement at any time by clicking Cancel Settlement (see Add Transactions).
Preview your filter and search results before adding the transactions to the settlement!
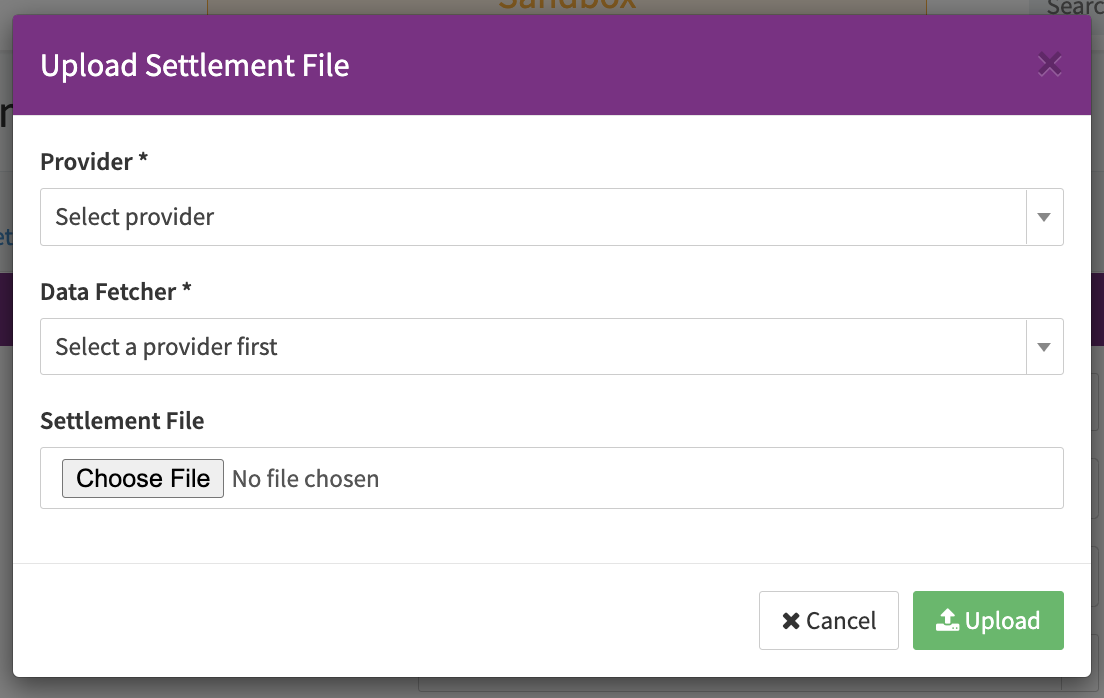
To upload a settlement file:
- Navigate to the Post Processing section, sub-section Provider Settlements
- Select + New and choose Upload Settlement from the dropdown
- In the Upload Settlement File modal:
- Select the Provider.
- Select the Data Fetcher you want to upload the settlement file for.
- Select Choose File to select the Settlement File.
- Select Upload.
The file format and size depends on the provider. The provider settlement file is processed in the same way as settlement files received via the provider settlement data fetcher.
The file format and size depends on the provider. Files are retained for 12 months and permanently deleted thereafter.
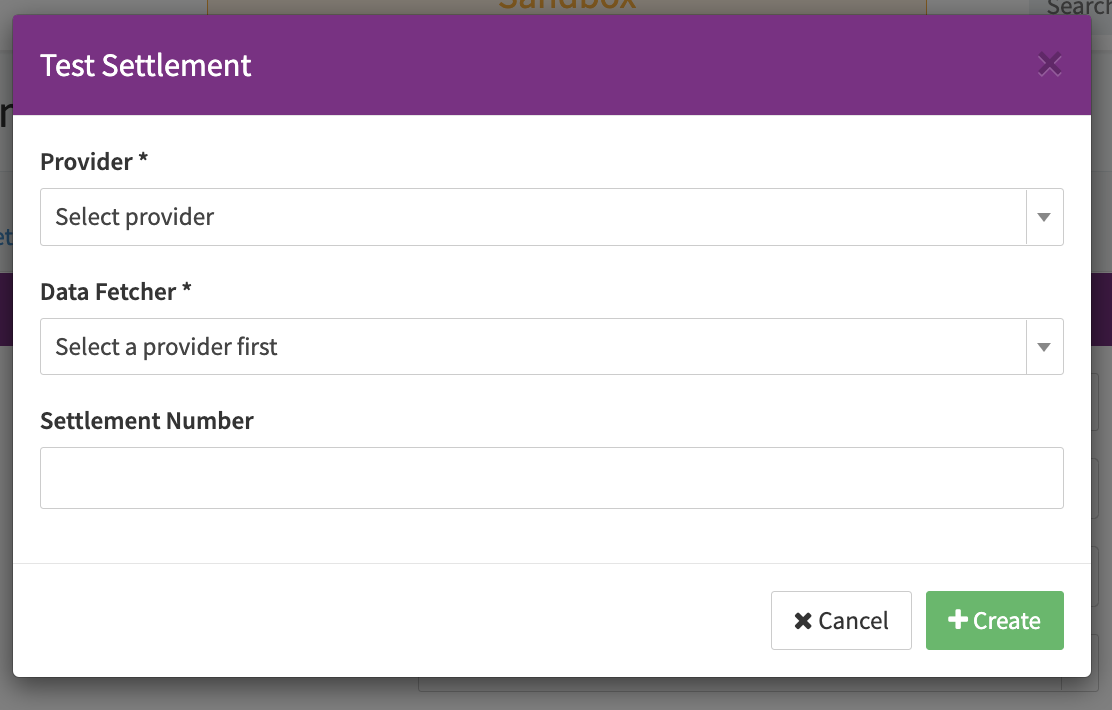
Test Provider Settlements
In order to to test Post Processing Jobs triggered by Provider Settlements you create a test provider settlement using a SimulatorPci adapter.
To create a Test Provider Settlement:
- Navigate to the Post Processing section, sub-section Provider Settlements (see Create Provider Settlement)
- Select + New and choose + Test Settlement from the dropdown
- In the Test Settlement modal:
- Select the Provider.
- Select the Data Fetcher
- Settlement Number
- Select + Create.
A Provider Settlement including 10 Transactions of different types and a output Settlement file is created in the Provider Settlements Overview.