Create and edit Merchant Profiles
Video: Create and Set up a Merchant Profile

How to create a new Merchant profile and how to set it up properly.
Create Merchant Profile
Create a new Merchant for your setup:
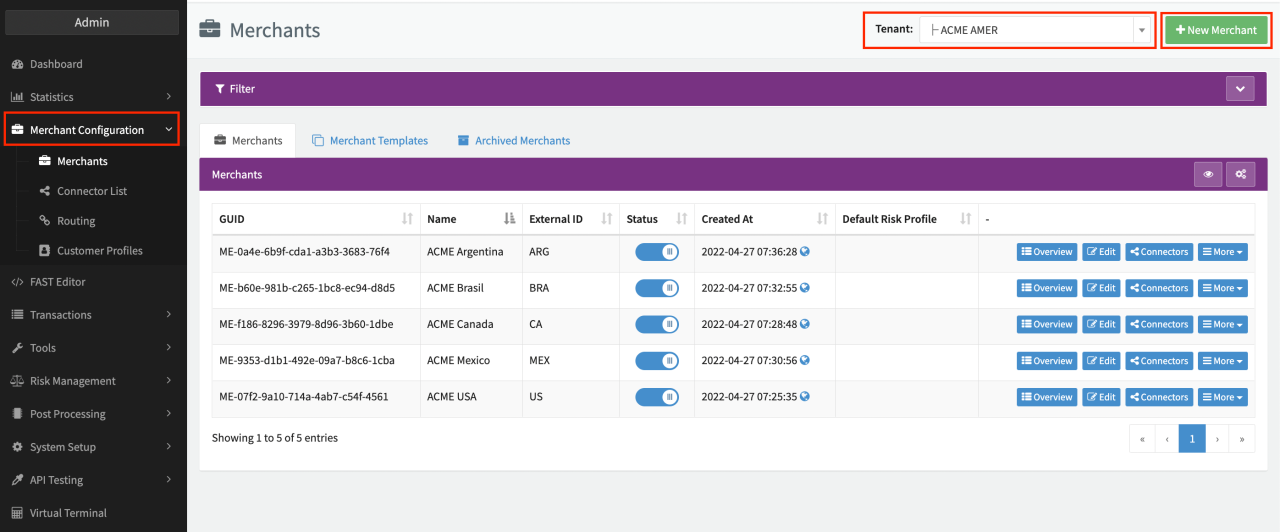
- Click + New Merchant in the Global Merchants Overview.
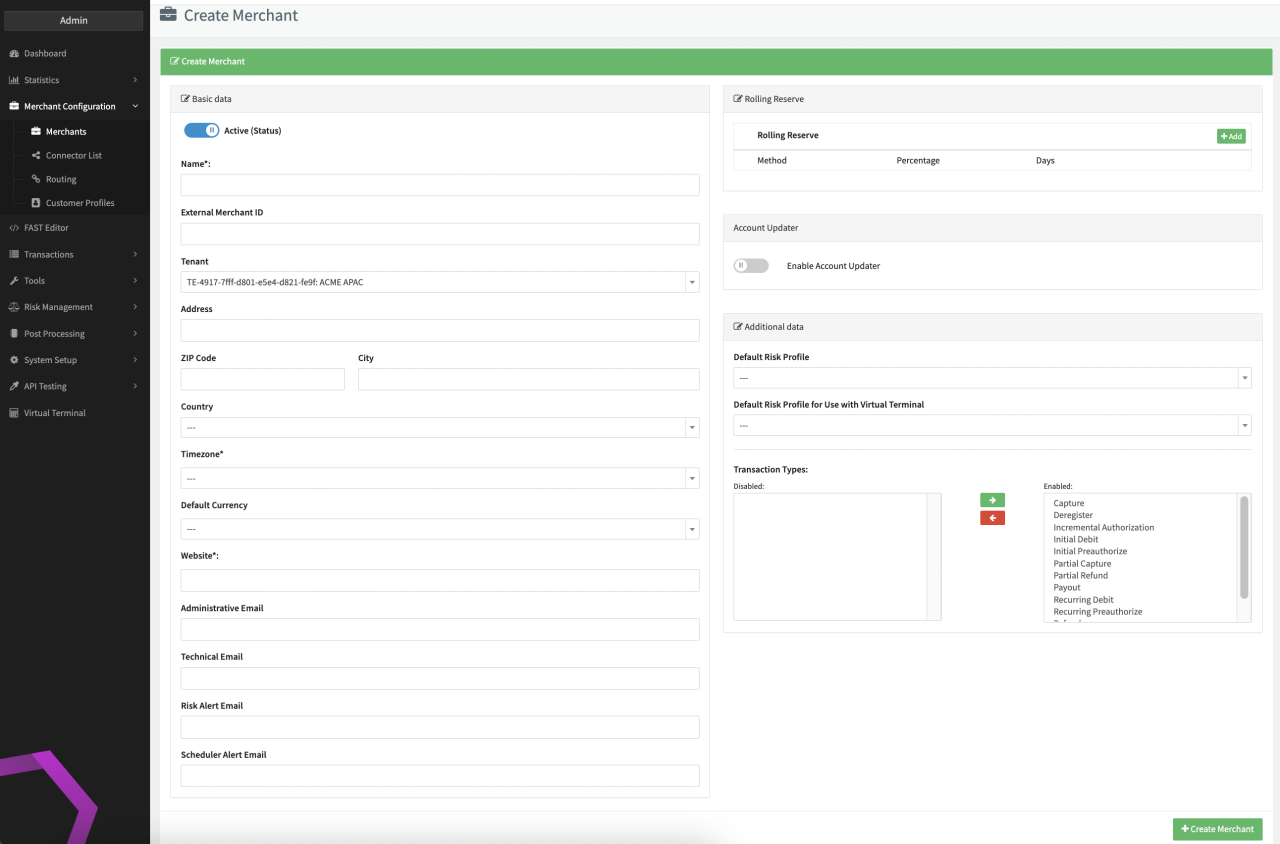
- Fill in the mandatory fields Merchants name, Timezone (used in data export, post processing jobs and fee management), Website.
- Fill in additional optional fields in the Basic data, Rolling Reserve and Additional data sections.
- Click + Create Merchant.
The newly created Merchant is enabled immediately and will show up in the Global Merchants Overview for further editing as well as associated configuration elements.
Fill in the Base Data:
- Name: Add a name for this new Merchant. (Company name, business name, shop name, etc…)
- External Merchant ID: Such as CRM system ID.
- Tenant: Assign the new Merchant to a Tenant account among the list. Per default the Merchant will be assigned to your Tenant.
- Please fill in all administrative fields such as Merchant's Address, Zip Code, City, Country, Timezone, Website, and Email contacts for Administrative, Technical, Risk Alert and Scheduler Alert purposes.
Fill in the Rolling Reserve:
- Rolling Reserve: The term Rolling Reserve stands for process of securing a certain percentage of the processed Transaction volume for a defined period of time to cover potential Risks, due to Chargebacks. In the IXOPAY platform the Rolling Reserve can be configured for each payment method individually and will be used in the Post Processing.
Fill in the Additional Data
- Default Risk Profile and Default Risk Profile for Use with Virtual Terminal: Assign a specific Risk Profile to a Merchant, if applicable. This can be edited at a later stage as well. For further information consult the Create a Risk Profile tutorial.
- Transaction types: Select the Transaction types your Merchant could or would use to process payments. Per default all Transaction types remain available.
Edit Merchant Profile
Create a new Merchant for your setup:
- Click Edit on the desired Merchant in the Global Merchants Overview
- Edit the data as desired
- Click Save Merchant
The Merchant Profile will be updated immediately.
Enable/Disable Merchant Profiles
Enable/disable a Merchant Profile:
- Click Edit on the desired Merchant in the Global Merchants Overview
- In the form an Active (Status) switch will be available in the basic data Section. Enable/Disable the switch
- Click Save Merchant
The Merchant Profile and associated configuration elements will be enabled/disabled immediately. You can also enable/disable a Merchant directly in the Global Merchant Overview by enable/disable the Status switch of the desired Merchant.