Global Settings
If you want to get access to all IXOPAY platform features you need to upgrade your plan. Please contact our Support Team in the IXOPAY Customer Experience Portal for more information.
Global Settings Permissions
Depending on your setup it can make sense to define some settings and conditions globally on tenant level for all your merchants and connectors. At the moment IXOPAY supports the following global settings:
- Global Connector Settings
- Global Routing Profiles
- (Merchant) User Roles
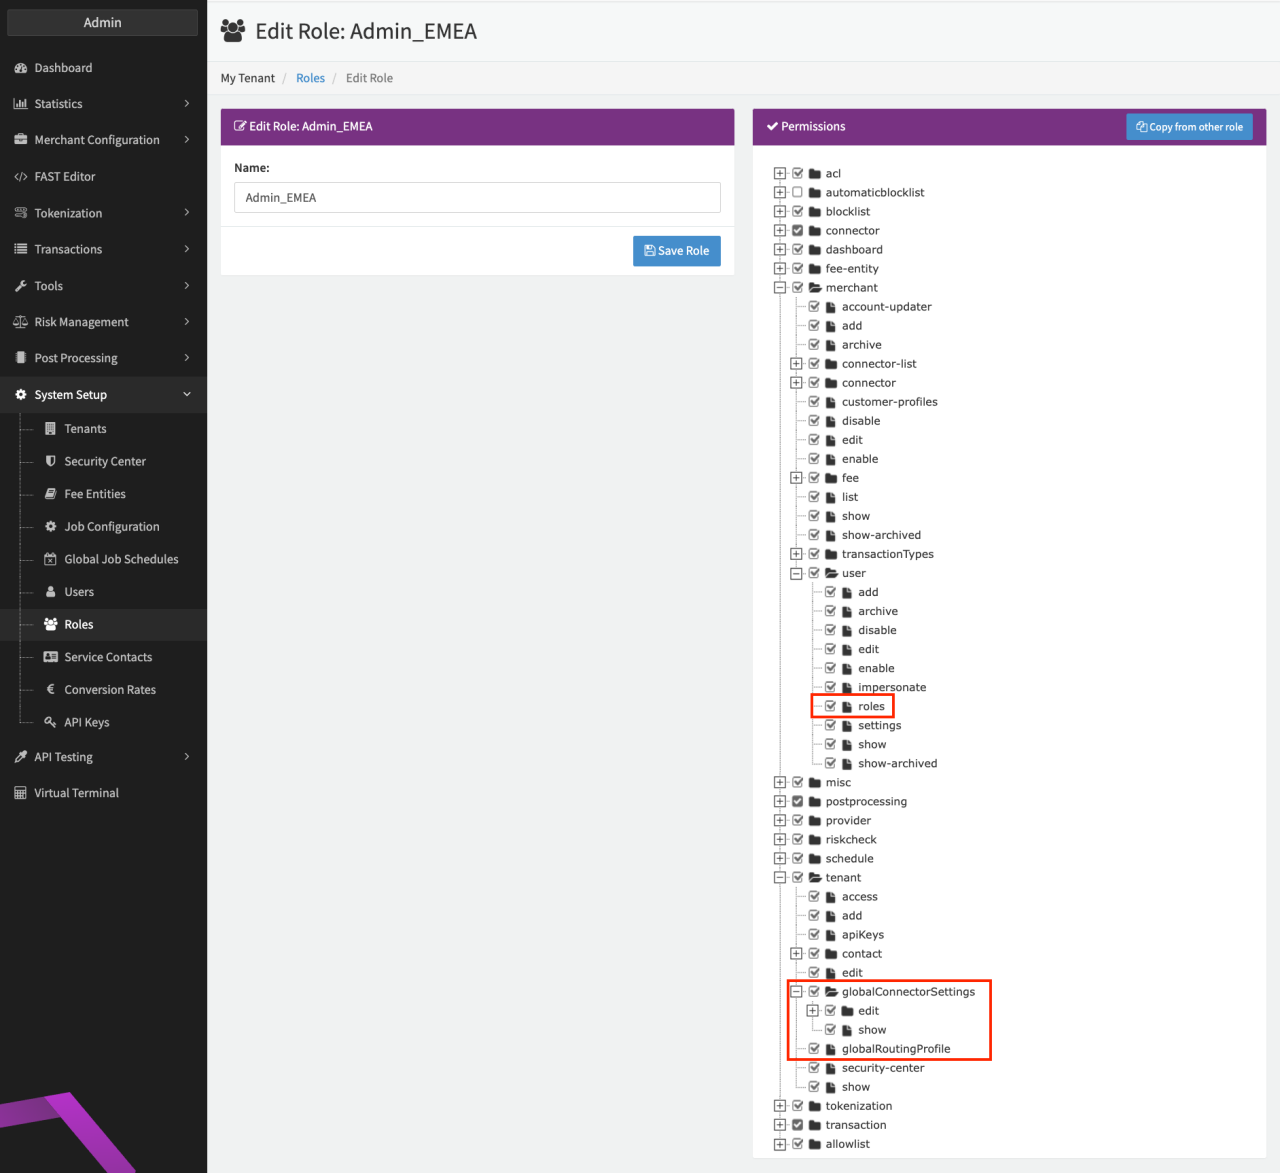
To be able to setup the feature, the permissions "tenant.globalConnectorSettings", "tenant.globalRoutingProfile" and "merchant.user.roles" must be enabled for your tenant and activated for your Admin User Role (see Permissions Admin User).
Global Connector Settings
Please note that once configured, Global Connector Settings are automatically applied to all existing connectors for this tenant. If you do not want the Global Connector Settings to be applied to certain existing connectors, enable the option Ignore Global Connector Settings at the connector level (see the Global settings in connector configuration screenshot) before configuring any Global Connector Settings.
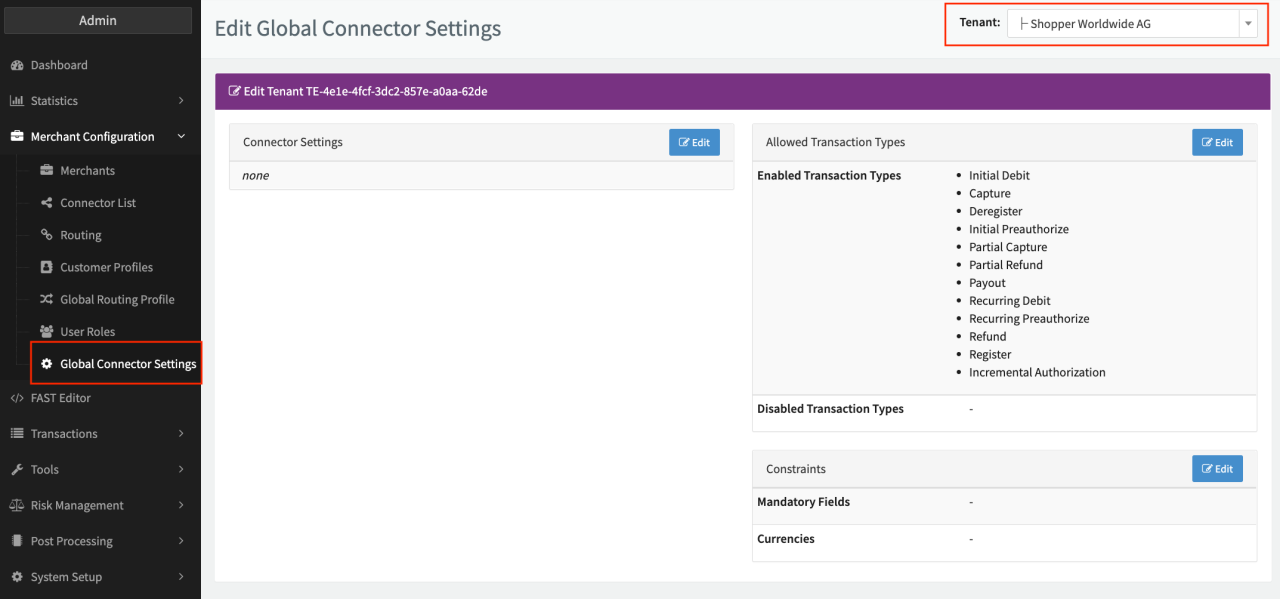
Once the permissions are set for your tenant and user, the Global Connector Settings section is displayed in the Merchant Configuration section (see the Global connector settings screenshot). In the top right corner, choose the tenant for which the global connector settings should be defined. The settings you can define globally are:
- Connector Settings (see also here)
- Risk Profiles and Customer Profile Container - pre-configured risk profiles can be selected for connectors, meta-connectors and use in virtual terminal, as well as a pre-defined customer profile container
- Allowed Transaction Types - all transaction types are enabled by default
- Constraints - Mandatory Fields and Currencies can be selected
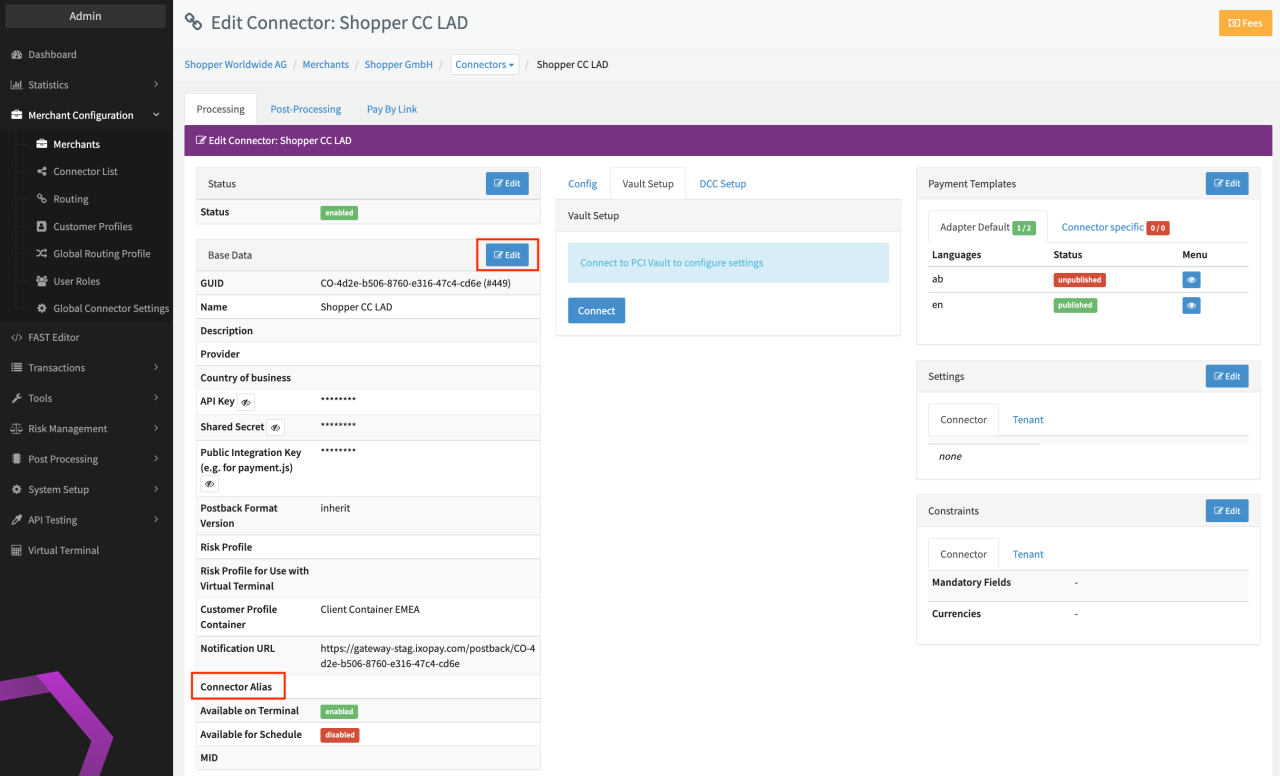
On connector level these settings are shown in the tenant tab and can be ignored for a specific connector by enabling the option Ignore Global Connector Settings (see Image Global settings in connector configuration).

Keep in mind that the global settings for allowed transaction types, connector settings and constraints can only be overruled at the connector level if you enable the option Ignore Global Connector Settings. To enhance the global settings per connector simply add the desired constraints, connector setting or disabled transaction type on connector level since the application aggregates the settings from tenant and connector level.
Global settings can be overruled for risk profiles and customer profile container. If risk profiles are configured at the merchant level, he setting overrules any risk profile at the tenant level for a connector of this merchant. If risk profiles and/or customer profile container are configured at the connector level, the setting overrules any risk profile and/or customer profile container at the tenant level respective merchant level.
Risk profiles must be created at the the correct (sub-)tenant level for you to be able to select them as a global setting. Customer profile containers can be shared with sub-tenants to make them available.
Global Routing Profiles
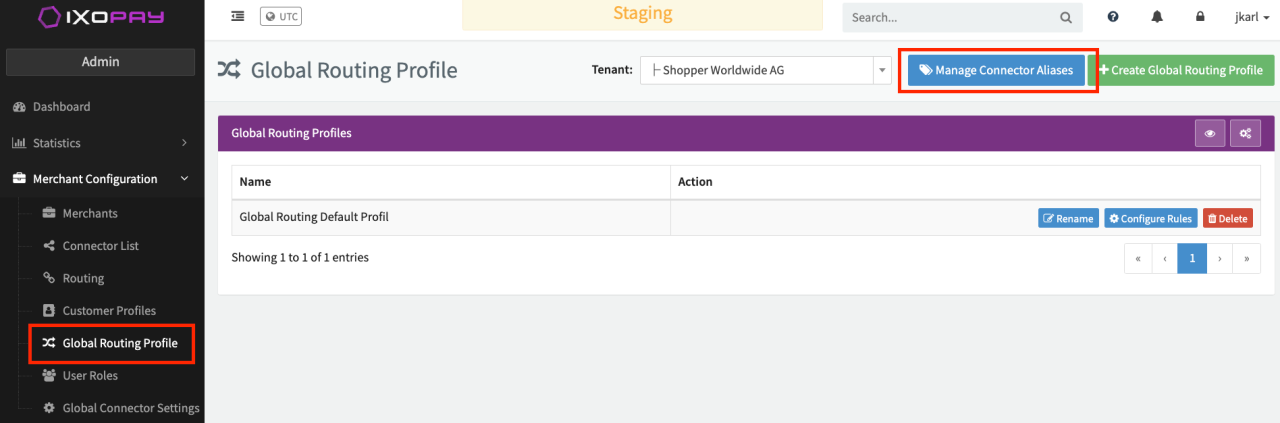
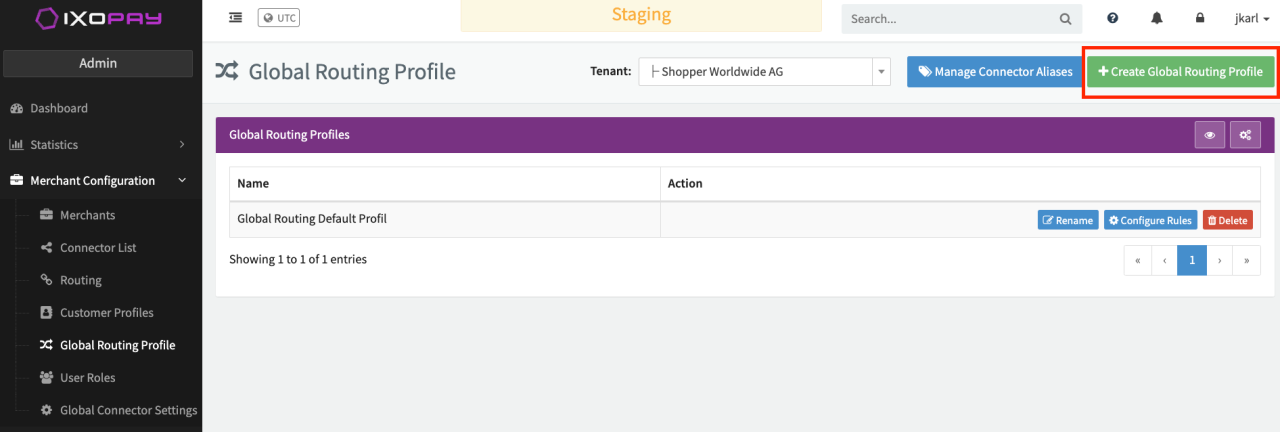
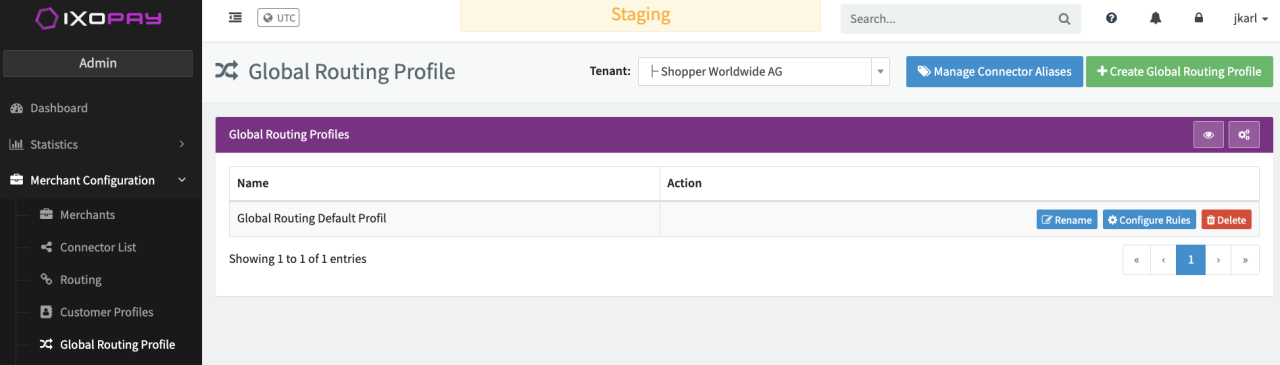
Once the permissions are set for your tenant and user, the Global Routing Profile section is displayed under the Merchant Configuration section (see Image Global routing settings). On the upper right choose the tenant for which global routing profiles should be defined. The settings you need to define on a global level are:
- Manage Connector Aliases
- New Global Routing Profile
Since every merchant will probably have a slightly different connector setup, IXOPAY uses aliases to achieve a layer of abstraction. These aliases are used to define global routing profiles to suffice any connector setup you may have. Therefore aliases will be mapped to connectors at the merchant level.
Manage Connector Aliases
Start by managing connector aliases:
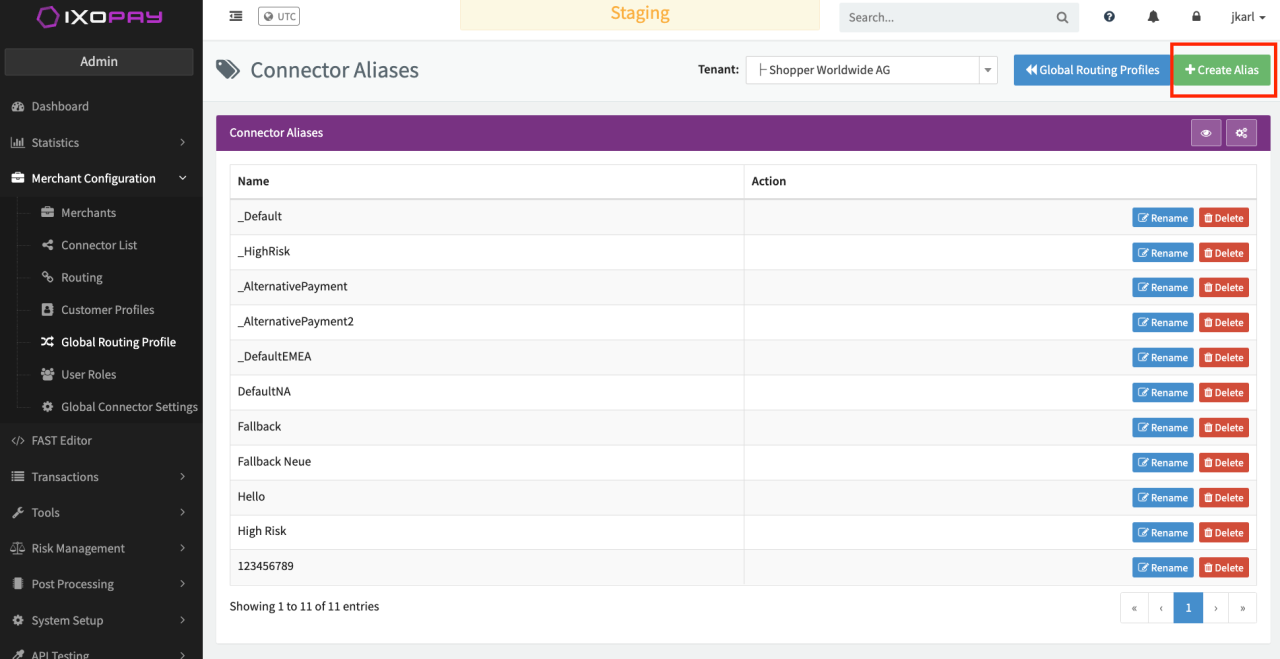
- Click on Manage Connector Aliases
- Click on + New Alias (see Image Adding alias)
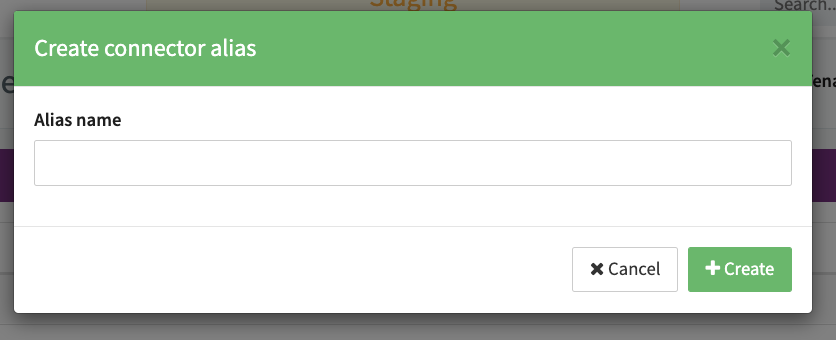
- Enter an alias name and click +Create (see Image Create alias) - Restriction: No blank spaces allowed?
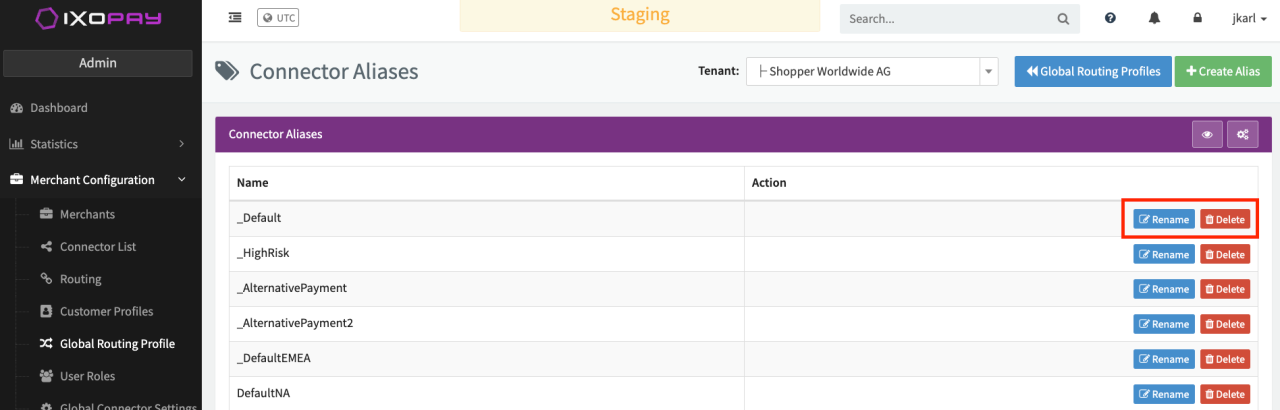
After creation, aliases can be renamed or deleted (see Image Editing aliases). Aliases that are already used in a global routing profile cannot be deleted. If you attempt this, IXOPAY will list the profiles that use it.
Characters that can be used for creating Aliases are:
Uppercase (A-Z); Lowercase (a-z); Numerical values (0-9); and the following special characters: _,
, (, ), [, ], blank space ( )
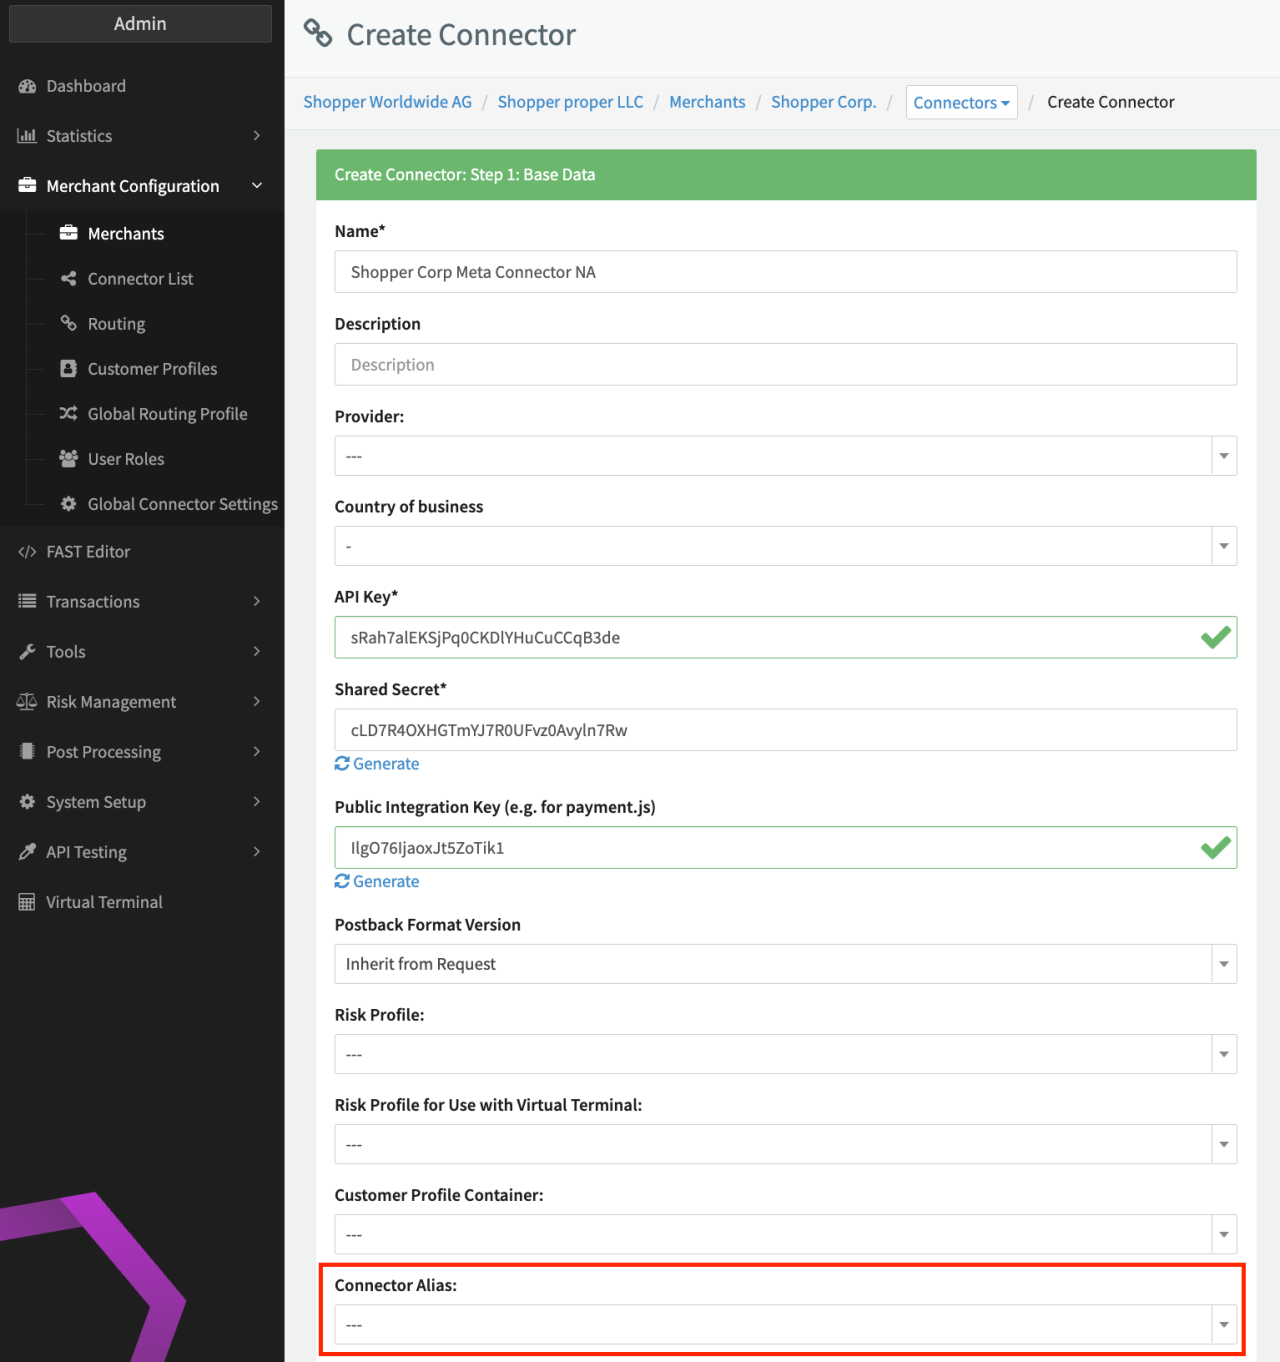
After creation, an alias can either be added to an existing connector or selected when creating new connectors.
New Global Routing Profile
Start by creating a new Global Routing Profile:
- Click on + New Global Routing Profile (see Image Global routing settings).
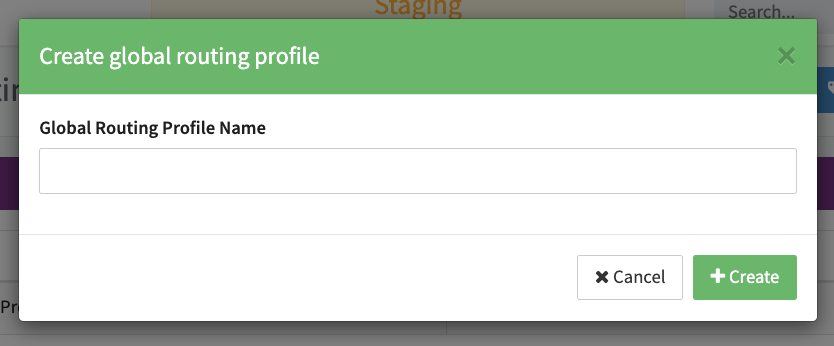
- Enter a Profile Name and click Save.
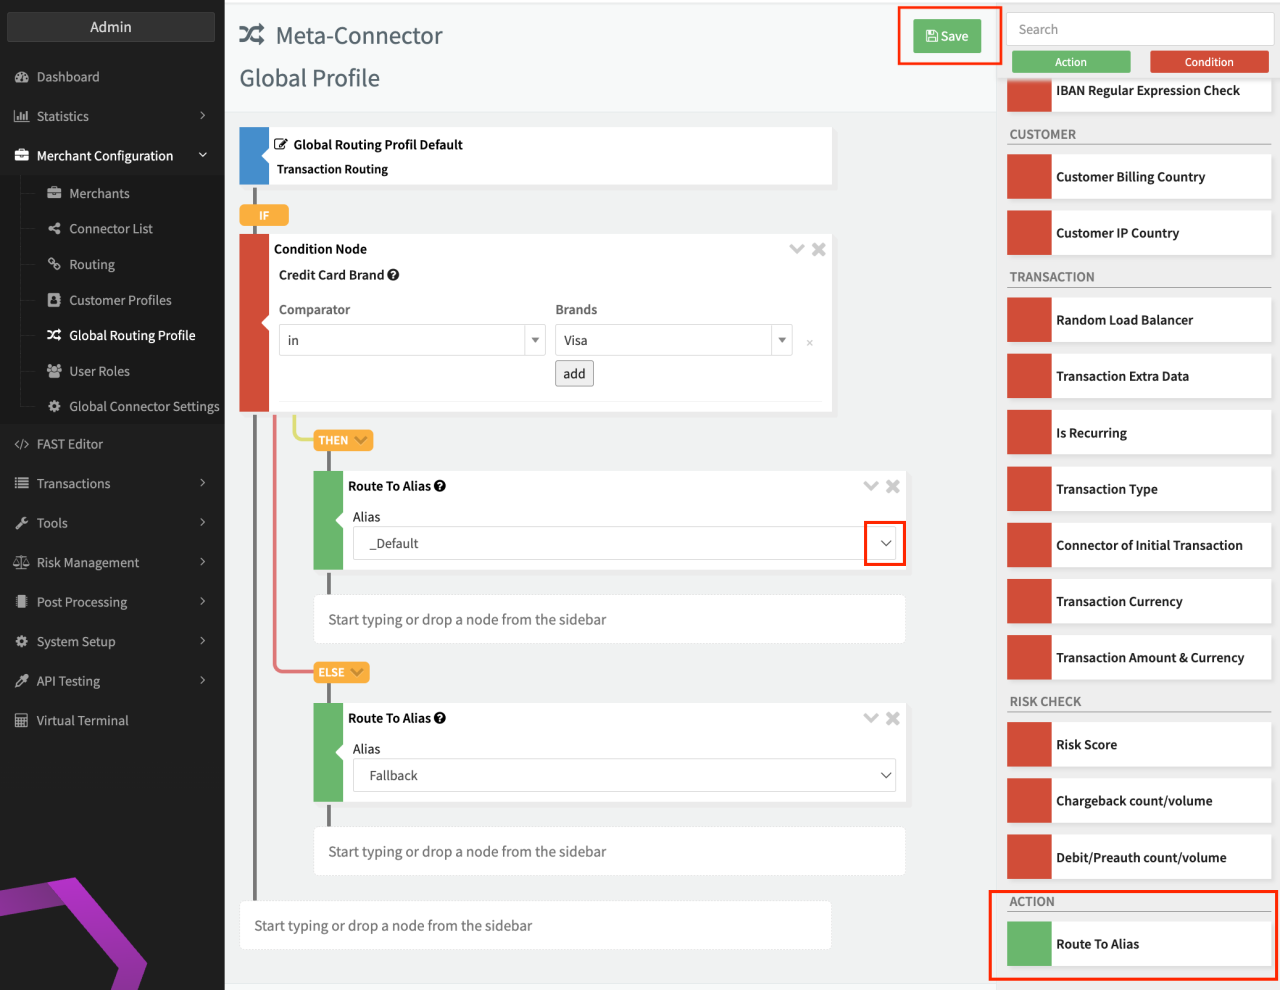
- Click on Configure Rules (see Image Meta Connector overview).
- Configure the Global Routing Profile as needed. The available Routing Conditions are described here, but instead of routing to a specific connector as an action, Route To Alias is also available (see Image Routing configuration). All created aliases are available from the drop down menu.
- Click Save to return to the Global Routing Profile overview.
After creation, Global Routing Profiles can be renamed or deleted (see Image Global Routing Profil Overview). Keep in mind that deleting profiles might have impact on your connectors.
You can create as many global routing profiles as you like.
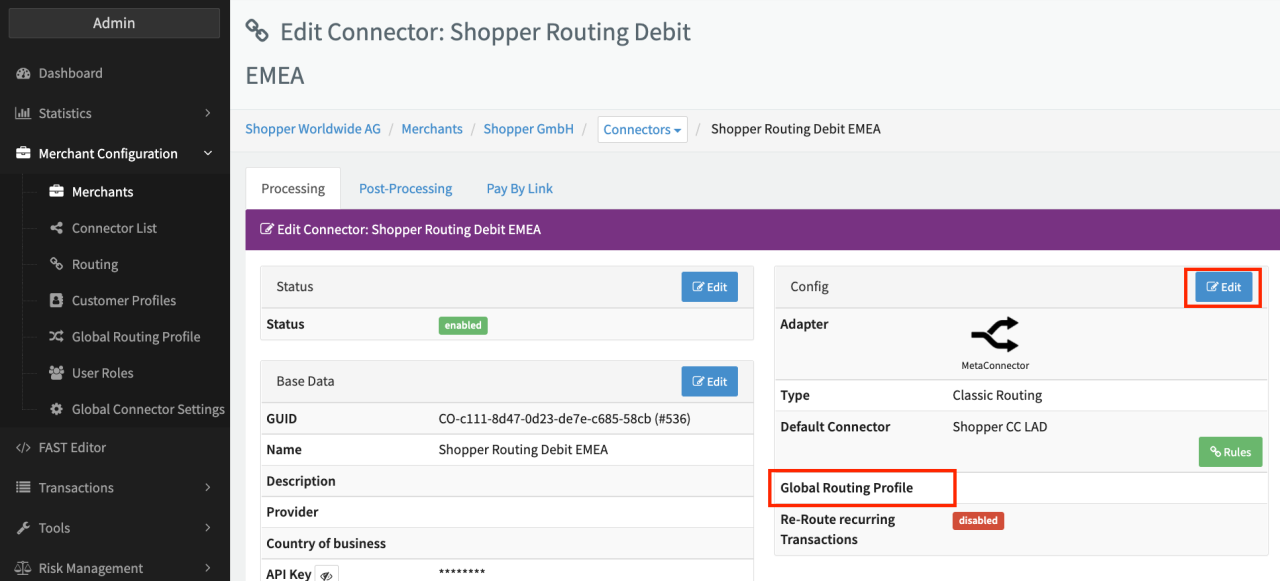
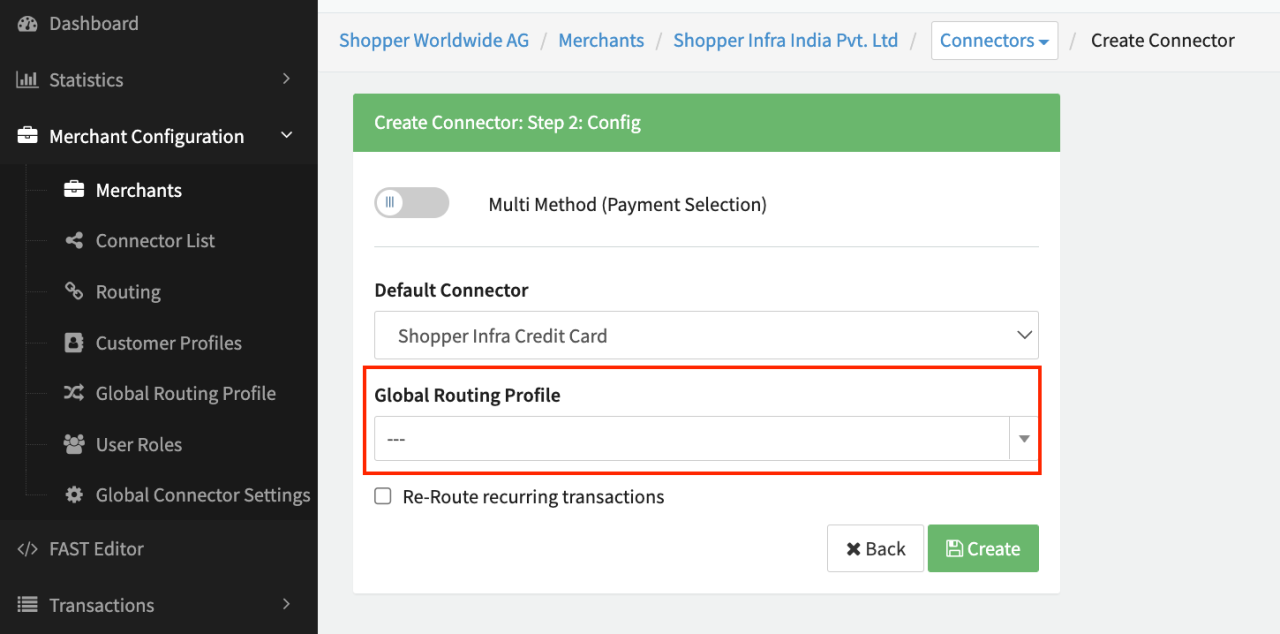
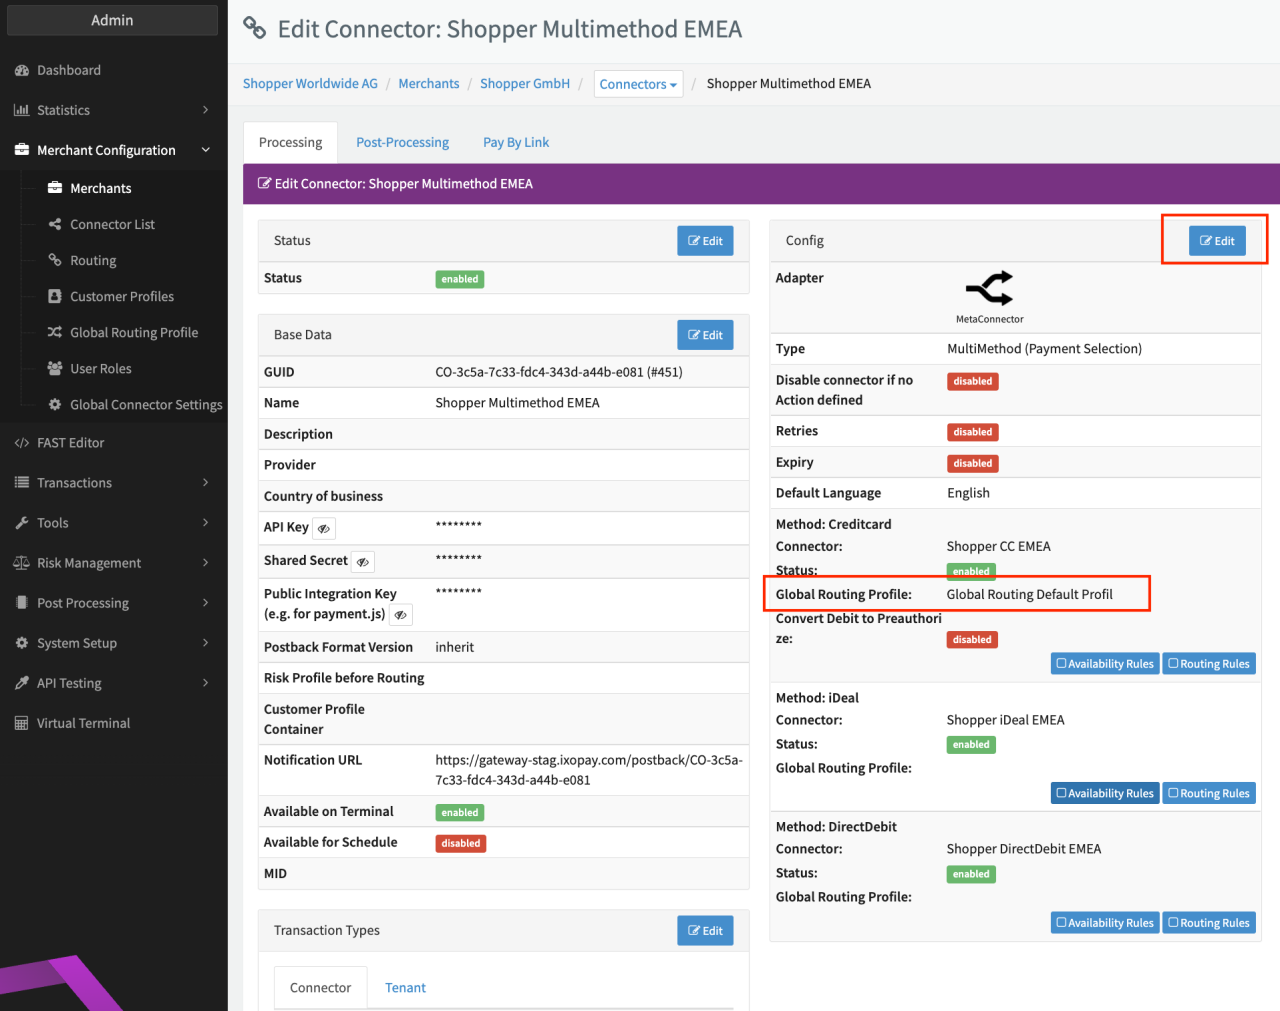
After creation, a Global Routing Profile can either be added to an existing Meta Connector or selected when creating new Meta Connectors. For Multi-Method Meta Connectors a Global Routing Profile can be selected per payment method.
User Roles
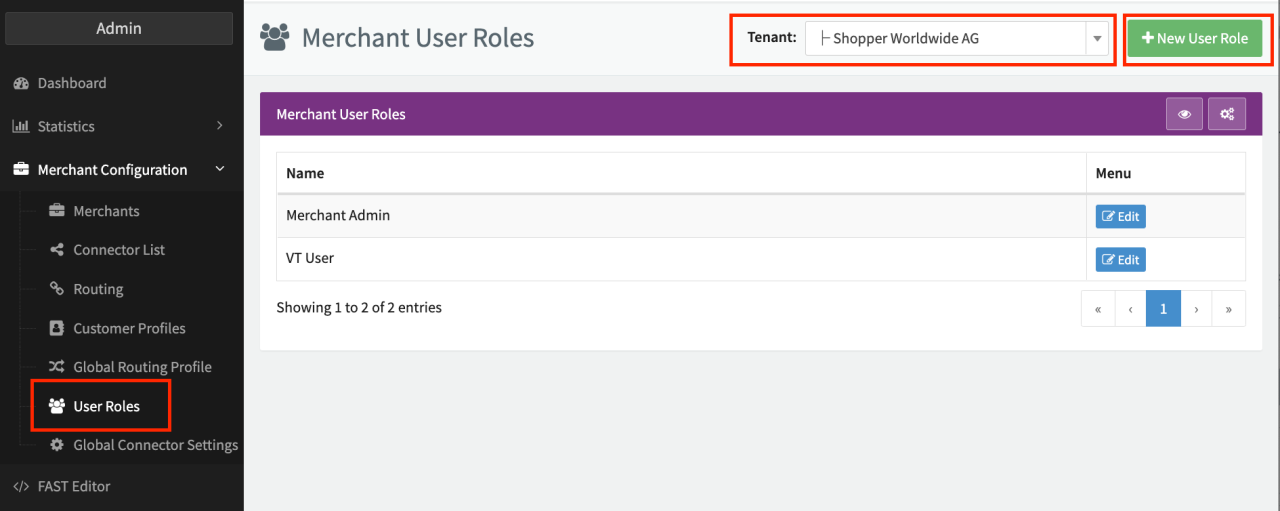
Once the permissions are set for your tenant and user the section User Roles will appear under the Merchant Configuration section (see Image User Roles). In the upper right portion of the screen choose the tenant for which user roles should be created. To create user roles follow these steps:
- Click on New User Role.
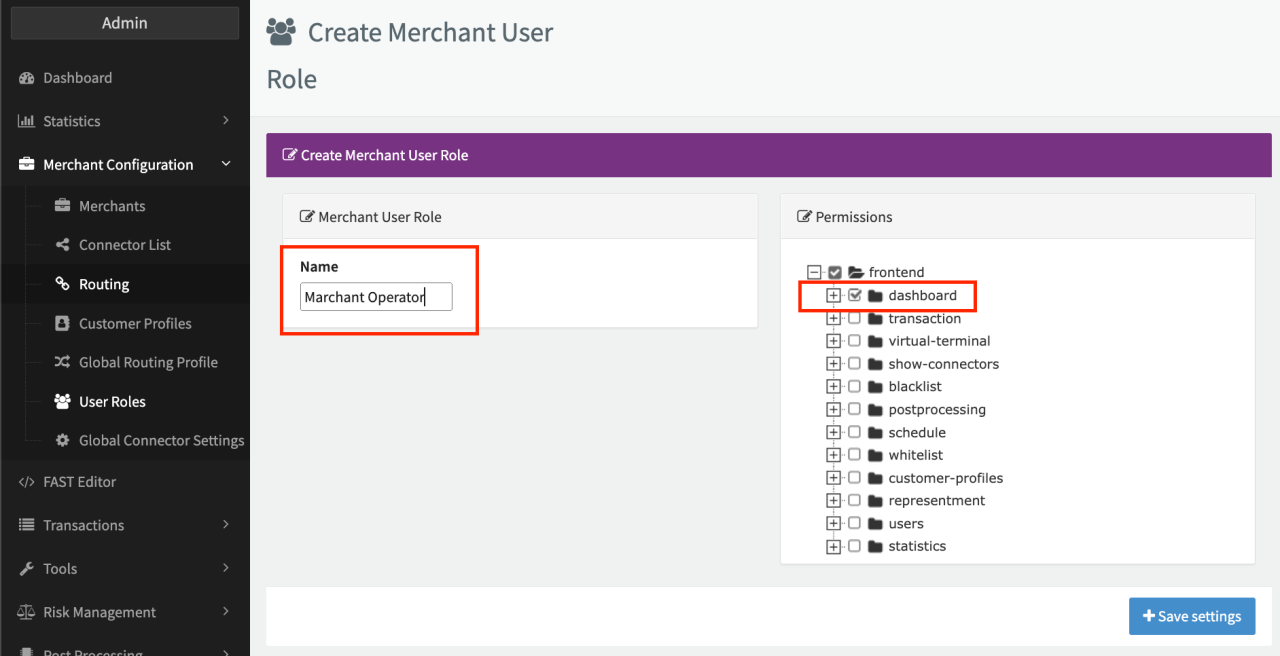
- Enter a name and choose the role specific permission (see Image User role details).
Permissions can be granted as described in the here.