Create and Assign Connectors & Adapters
In order to be able to process transaction through a PSP/Acquirer, each Merchant needs a technical integration configured specifically for it, a Connector. The IXOPAY platform offers a wide range of technical integrations, Adapters, with different PSPs/Acquirers enabling you to access and manage various payment methods from one single platform. This gives your Merchants the opportunity to expand their offer of available payment solutions.
For each combination of end-point, account/set of credentials from a PSP/Acquirer and used different payment methods, the Merchant needs to create a new Connector.
Video: Create and Configure a Connector

If you cannot choose the Adapter you want during creation, please check if the correct permission is enabled for your role. More about role permissions in Roles.
As a best practice we recommend to use a naming convention to make connectors better recognizable. For example: "ACME ARG CC Provider xyz", "ACME ARG DirectDebit Provider abc".
Create and configure a Connector
To create a new Connector please follow the instructions below:
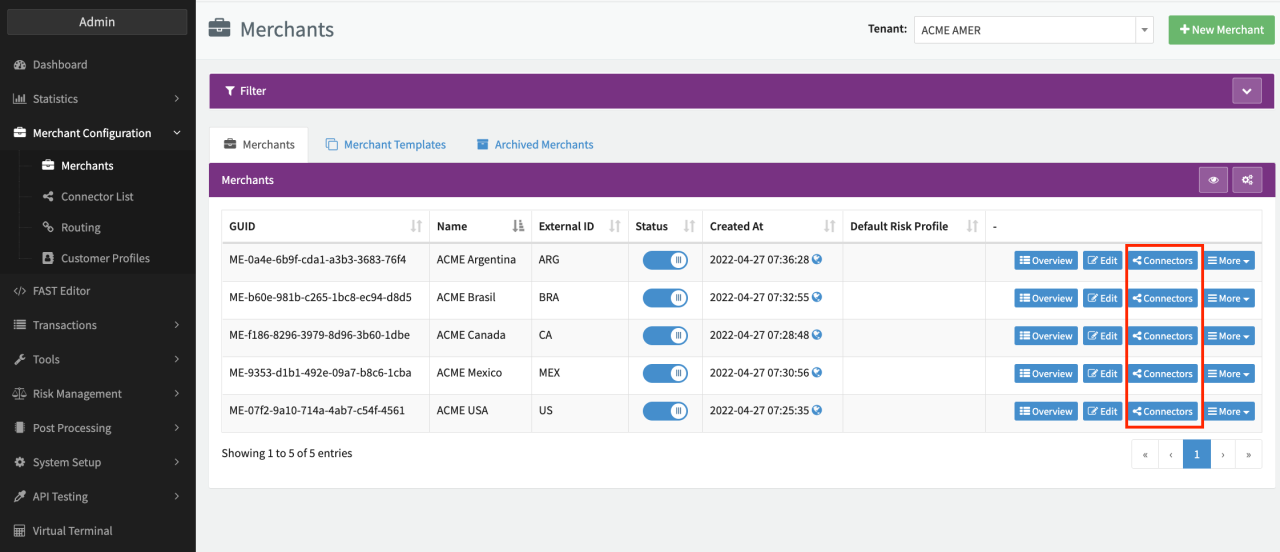
- Navigate to the Global Merchants Overview (see Global Merchants Overview)
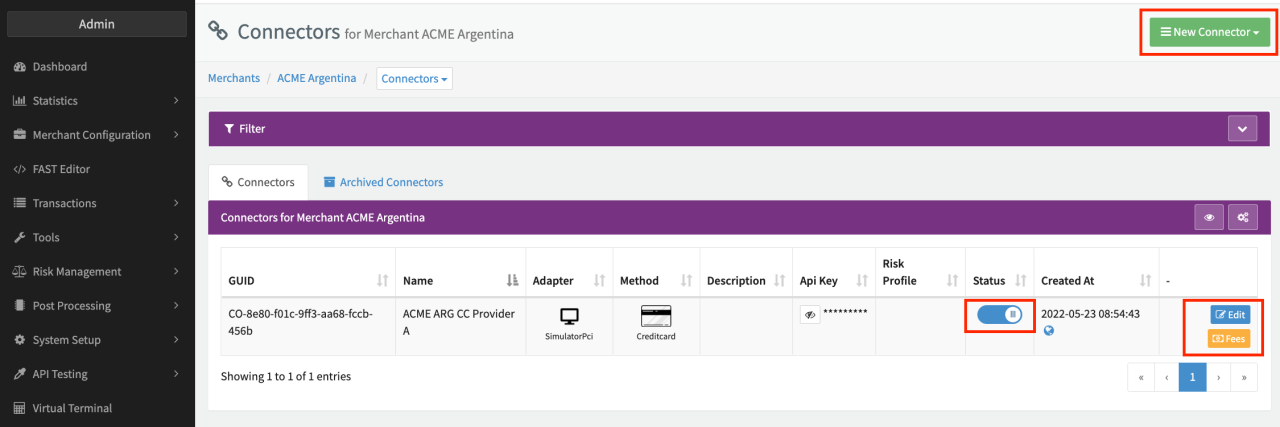
- Click on the button Connectors on the Merchant for which you want to create a new Connector
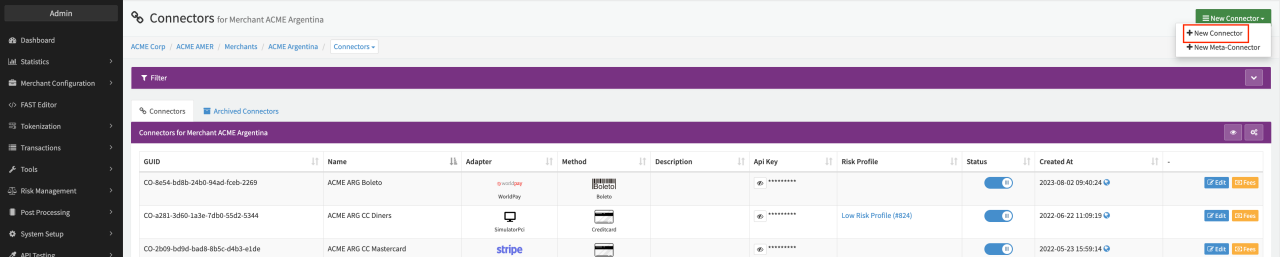
- Click on New Connector and select in the drop down menu + New Connector (see Connectors Overview)
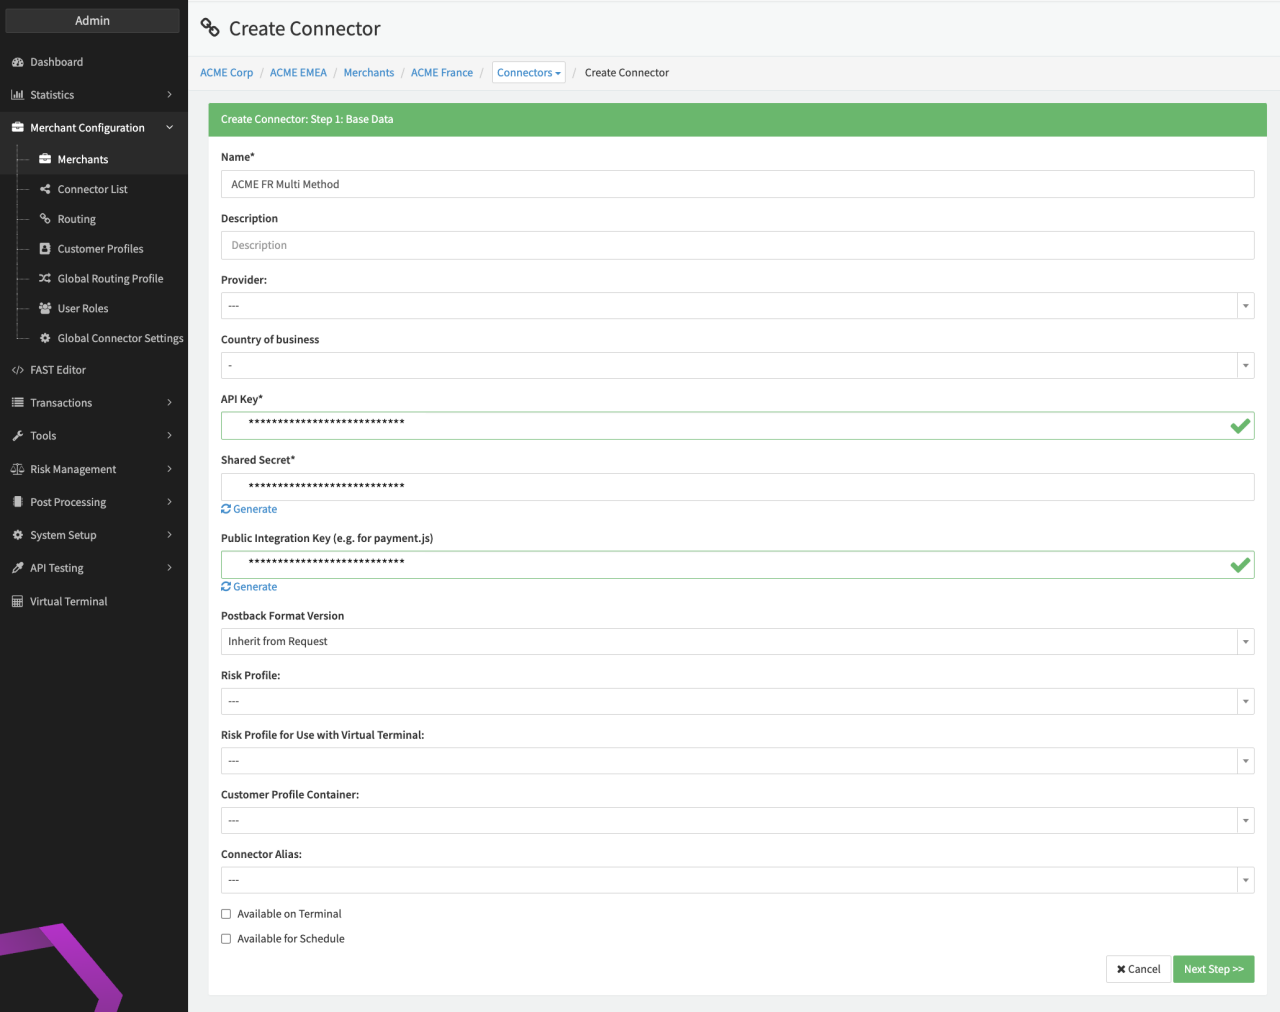
- Create Connector: Step 1: Base data (see Image Connector Base Data)
- Name: Mandatory input, make sure to chose a descriptive name (see Hint)
- Description: Optional field to further describe the Connector (e.g. payment method, platform aso.)
- Provider: Optional dropdown selection, see Provider
- Country of business: Optional dropdown selection
- API Key: Mandatory input, enter a unique Key name without blank spaces
- Shared secret and Public Integration Key (prefilled): Mandatory input, you can either enter a secret Key manually or simply click on Generate to receive a unique Key generate by the IXOPAY platform. The credentials need to be provided to the Merchant to enable him to communicate with the platform and send Transactions via the Transaction API.
- Postback Format Version: Mandatory dropdown selection, default value is Inherit from Request
- Risk Profile: Optional dropdown selection, assign your predefined Risk Profile to the Connector.
- Risk Profile for use with Virtual terminal: Optional dropdown selection, assign your predefined Risk Profile for Virtual terminal use
- Customer Profile Container: Optional dropdown selection, assign an existing Customer Profile
- Available on Terminal: Optional checkbox to make this Connector available for Virtual Terminal use
- Available for Schedule: Optional checkbox to make this Connector available for Schedules.
- Save inputs by clicking Next Step. You can edit the Base Data afterwards by clicking Edit in the Connectors Overview or Connector Detail Overview.
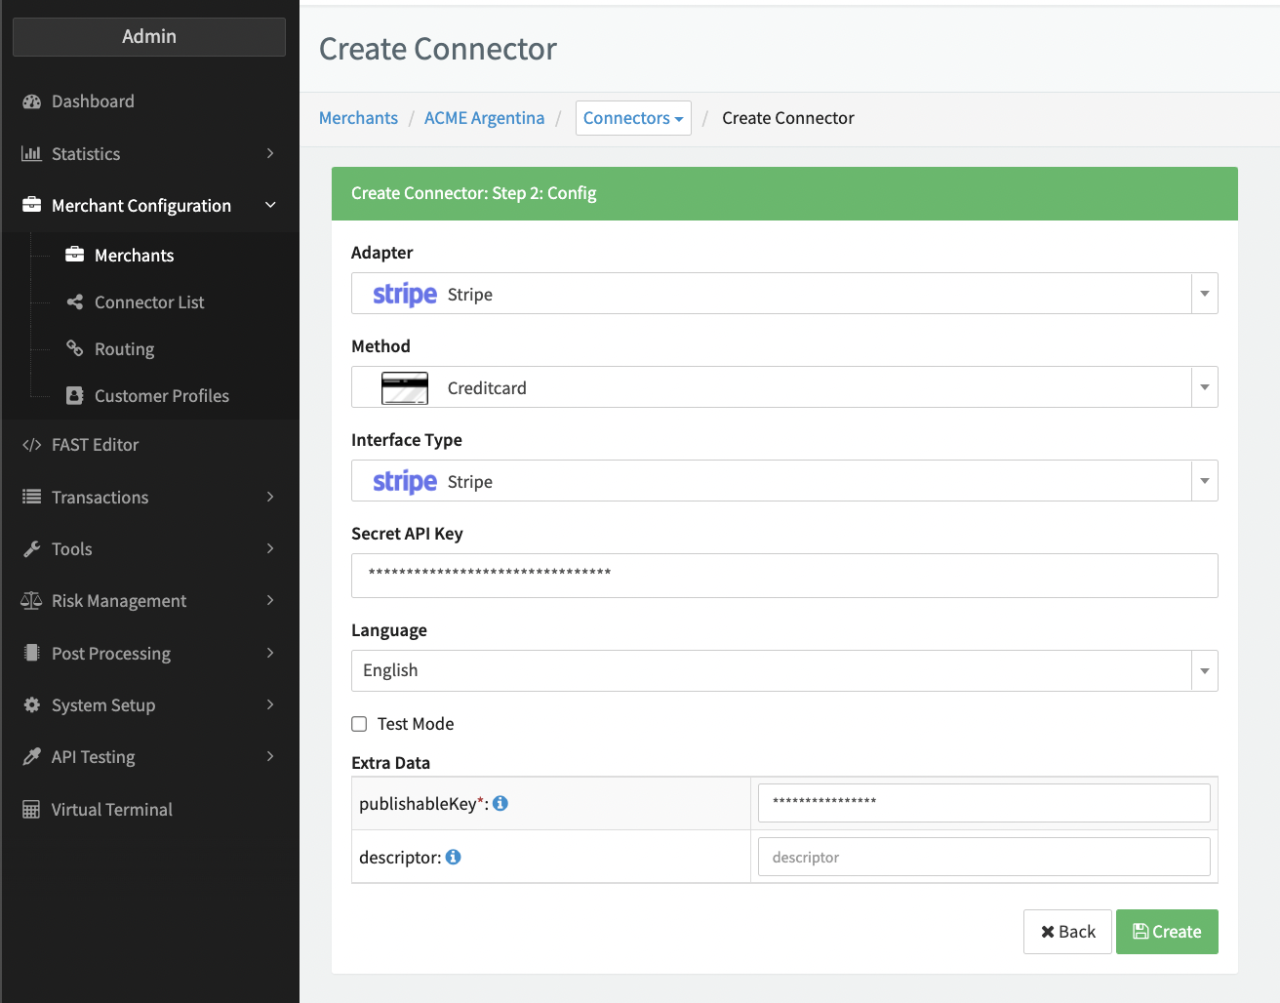
- Create Connector: Step 2: Config (see Connector Config)
- Adapter: Choose an Adapter you want to configure among the offered list (see Info for missing Adapters)
- Method: Select the Payment Method you want to configure
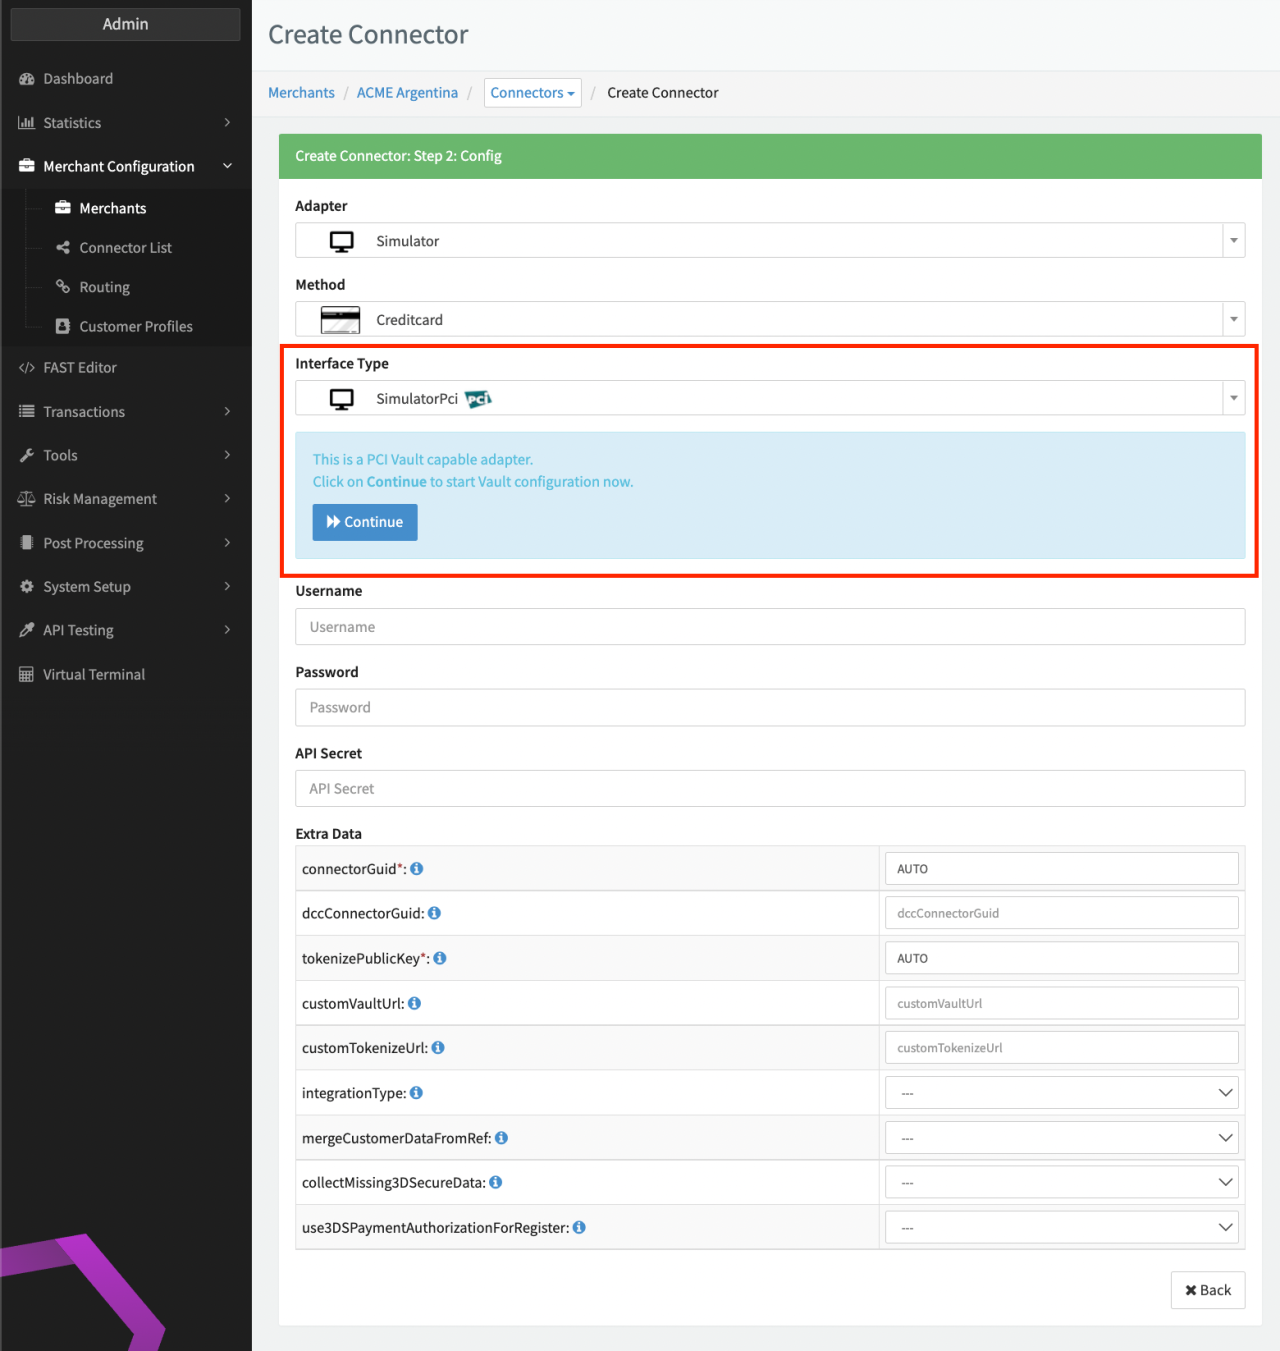
- Interface Type: This field will only appear if the chosen Adapter and its payment method offer several API connections. Please select your chosen API. (for Adapter requiring PCI compliance see next section)
- Enter the credentials needed to connect with the PSP/ Acquirer and thus allow Transactions.
Each Adapter needs individual settings. For more information please consult your PSP/ Acquirer.
- Username/Customer Number/Account ID
- Password
- API secret
- Certificate Path
- Certificate password
- Language: Select a default language that should be displayed in case the selected User language is not available
- Test Mode: Enable this feature if you want to send Test Transactions (see Testing - Transaction API)
- Extra Data: Additional mandatory and optional input fields required depending on the individual Adapter (see Adapter-specific Guides)
- Save by clicking Create.
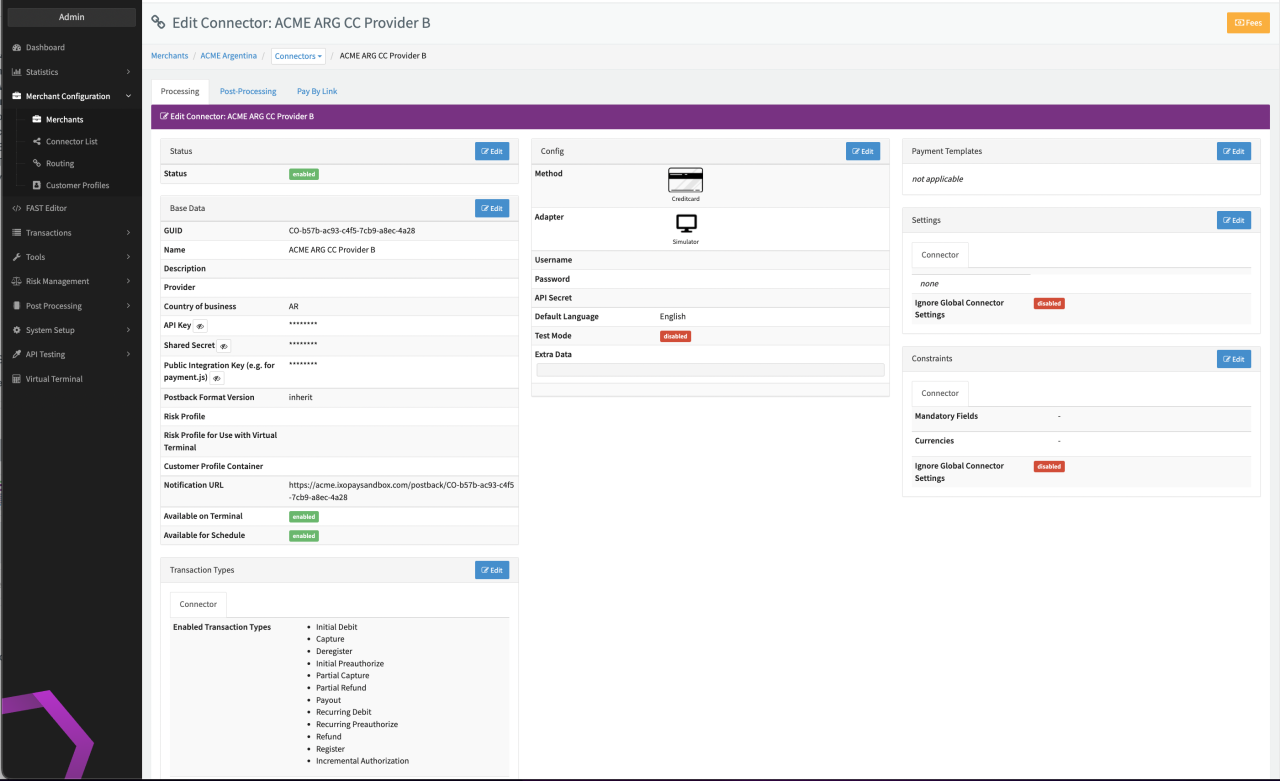
You'll be redirected to the Connector Detail Overview of the created Connector (see Connector Detail Overview). You can edit the Connector Config afterwards by clicking Edit in the Connectors Overview or in the corresponding section in the Connector Detail Overview.
If you've chosen an Adapter requiring PCI compliance, you will be asked to start the PCI Vault configuration. You are highly encouraged to do so by clicking Continue. You will be re-directed to the Connector Detail Overview.
Configure a PCI compliant Connector
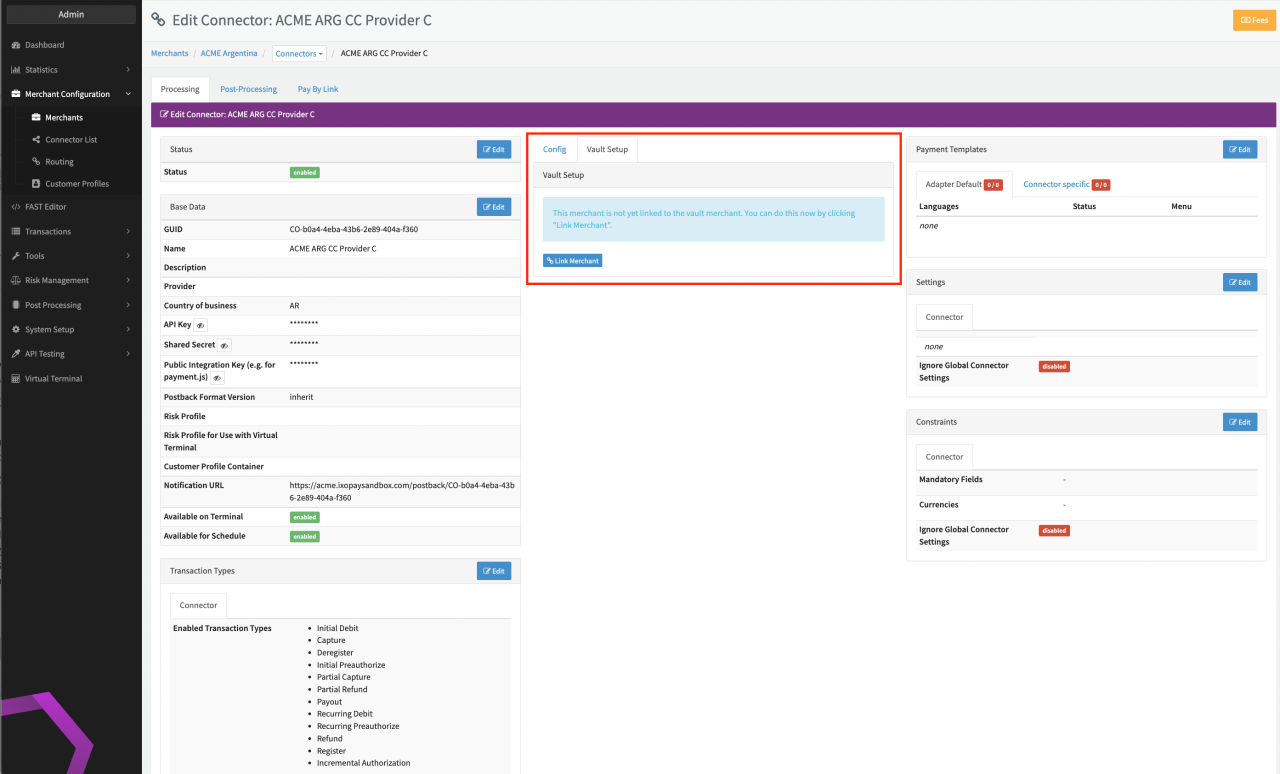
If the current Connector is the first PCI-compliant one within this Merchant, you first have to link the Merchant with the PCI environment:
- Click Link Merchant (see Link Merchant)
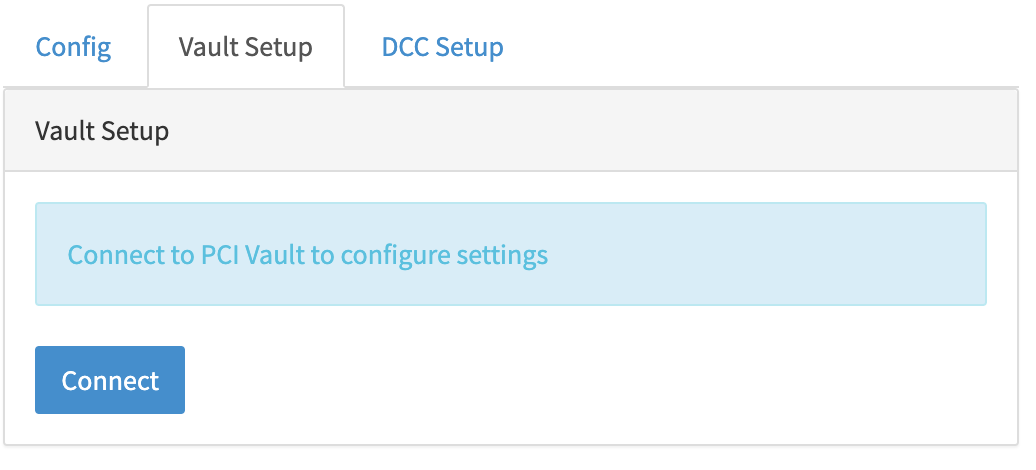
Configuring PCI Connectors requires you to connect to the PCI Vault (due to PCI regulations).
- Click on Connect (see Connecting to PCI Vault)
After that the IXOPAY platform will present you with a different configuration screen (see PCI Vault Configuration).
- Each Adapter needs individual settings. For more information please consult your PSP/ Acquirer (see Adapter-specific Guides)
- Click Save to save the configuration
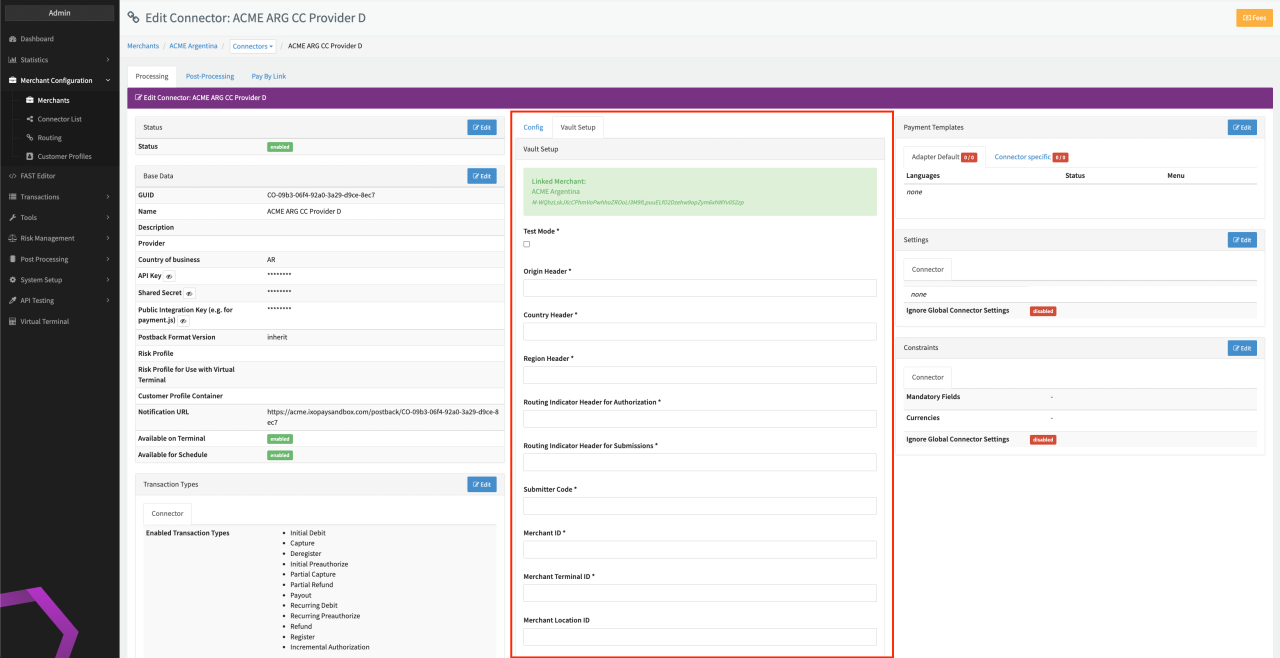
During the Vault Configuration you may also switch tabs to Config to add or change parameters there. However do not change Parameters ConnectorGUID and tokenizePublicKey, as these parameter are necessary to connect to the Vault environment and changing will destroy the mapping.
Once saved, Connectors are enabled by default. Archiving an enabled Connector will disable it automatically.
3D-Secure Configuration
The IXOPAY platform enables you to add an additional layer of security for your Credit Card payments by configuring 3D-Secure authentication for Adapters if supported. You can either use our IXOPAY-hosted 3D-Secure authentication service or use an external one. For further information see 3D-Secure Configuration.
Additional Configurations
Once created you can add and change additional Configurations per Connector: