Schedule API
As available for the Transaction API, you can also run tests against the Schedule API (part of the Transaction API). Either use the API Testing directly in the IXOPAY platform or see our Schedule API documentation for further information. For more information in general about Schedules, check out the Transaction Schedules section in the User Manual.
To use the API Testing in the IXOPAY platform, follow these steps:
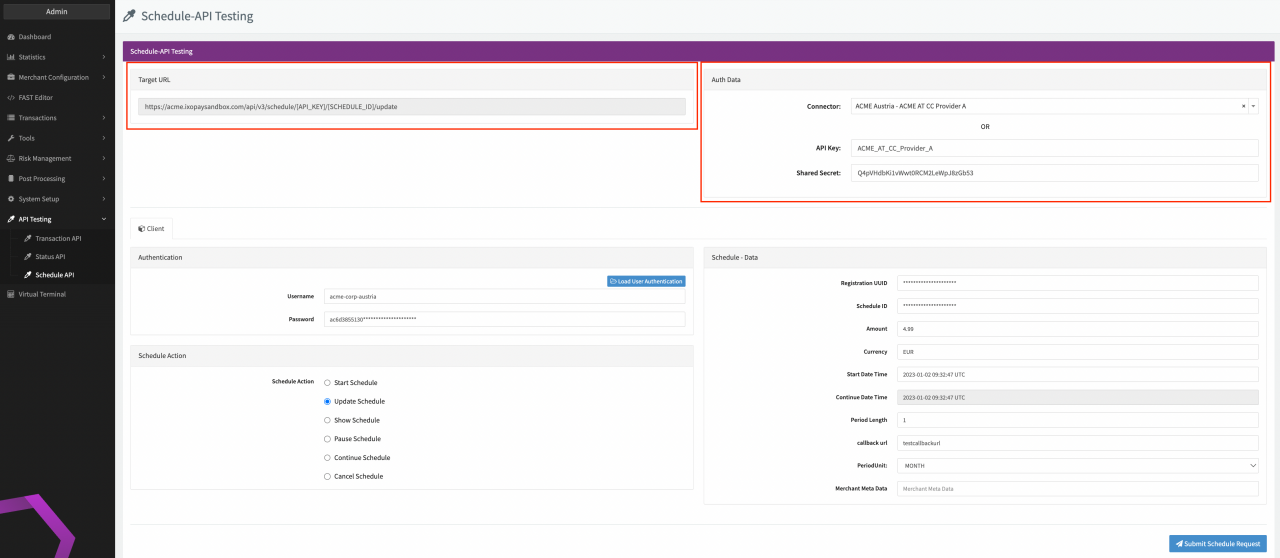
- Navigate to the API Testing section, sub-section Schedule API
- Select a Connector from the list (API Key and Shared Secret will be filled automatically) or
- Fill in the API Key and Shared Secret (see Create and Assign Connectors & Adapters section)
- Select User in dropdown list
The Target URL is pre-filled with the URL to the appropriate IXOPAY platform instance and usually does not require any further adjustments. No matter how you test your set up, please keep the following notes in mind:
Before you start your tests, please consider that requests using the same Schedule ID and IP address have a rate limit of 10 requests per 60 seconds.
In addition, a general rate limit of 100 request per 60 seconds applies for the Schedule API and Status API combined, either for the logged-in API user or used domain in combination with the originating IP.
Schedule API client
Fill in the necessary parameters for the testing in the Client Form:
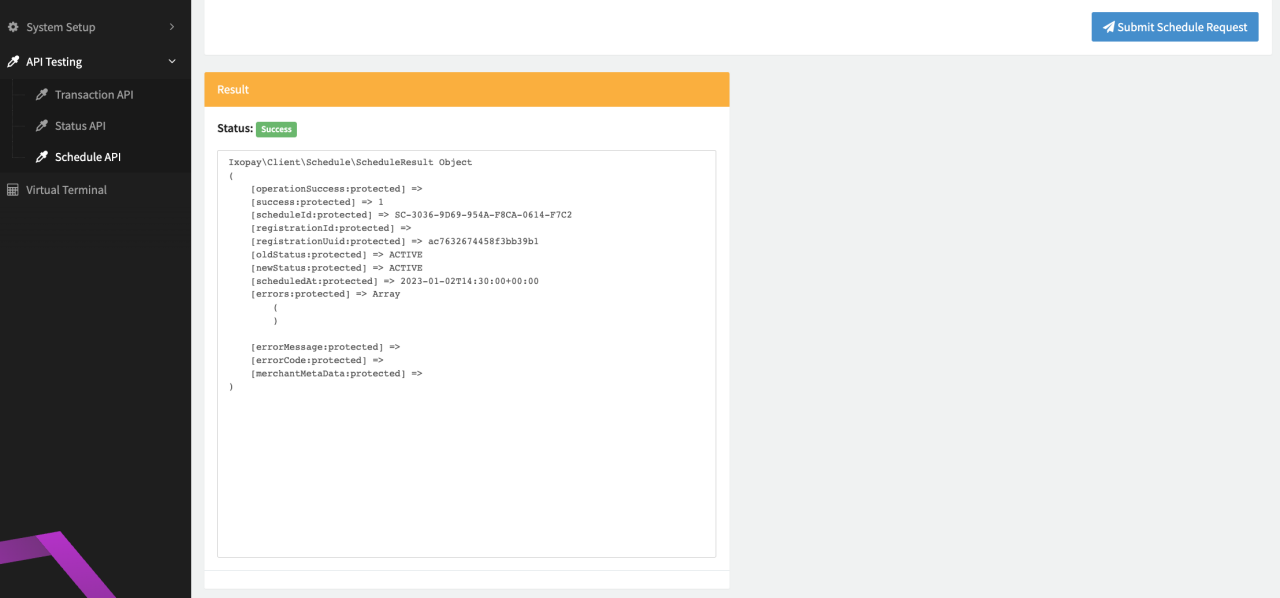
Once you are ready click Submit Schedule Request. The Result Box will display the response containing information about the request (e.g. current state). Depending on your entered information the request can be successful or result in errors due to missing fields or invalid data.
Schedule Action
Select the Action you want to test:
- Start Schedule
- Updated Schedule
- Show Schedule
- Pause Schedule
- Continue Schedule
- Cancel Schedule

The Actions to be performed depend on the Schedule Status (see Transaction Schedules section).
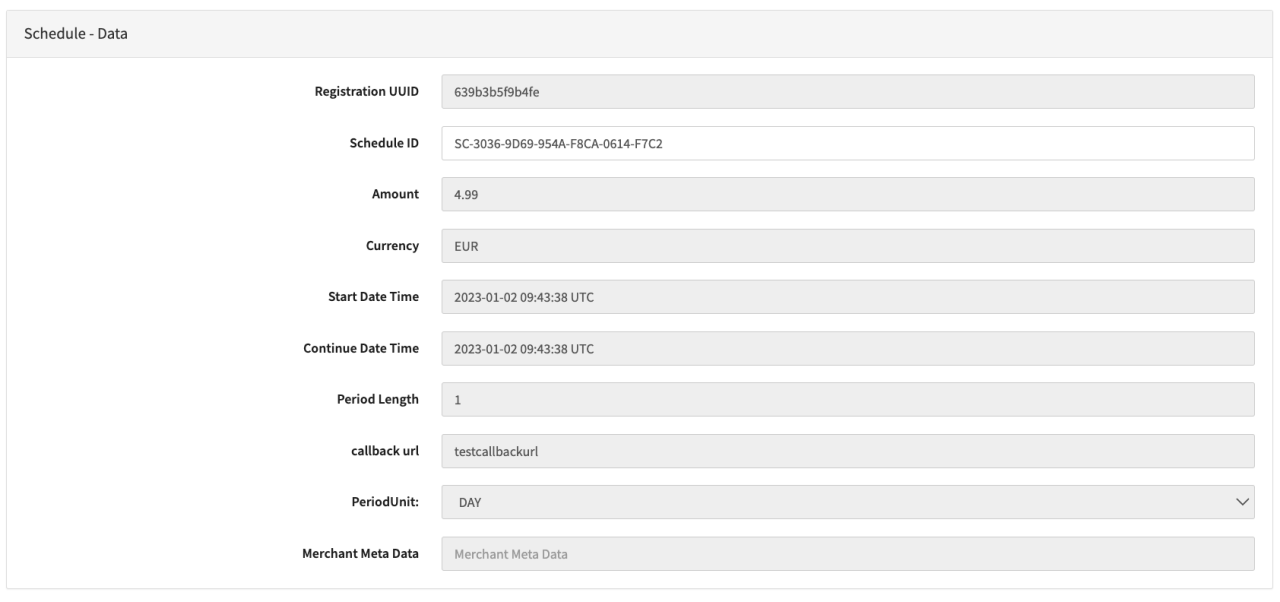
Schedule Data
In this section you can fill in additional Schedule — data (see also Create a Schedule and Pause, Continue, Retry or Cancel Schedules section). Depending on the chosen action different parameters might be grayed out.
- Registration ID: Fill in the Transaction UUID of a Register
- Schedule ID: Fill in the GUID of a Schedule
- Amount: Fill in an amount for your Transaction
- Currency: Fill in a 3-letter currency. (e.g EUR for Euro).
- Start Date Time: Fill in the Start Date and Time for the Schedule to start with the first Recurring Debit
- Continue Date Time: Fill in the Continue Date and Time for a paused Schedules to resume with the next Recurring Debit.
- Period Length: Fill in a Period Length. The interval between recurring transactions will be defined by the period length and unit
- PeriodUnit: Fill in the Period Unit. The interval between recurring transactions will be defined by the period length and unit
- Callback URL: Prefilled Callback URL the platform will send status notifications
- Merchant Meta Data: Not available by default: Fill in additional Merchant Meta Data (string, max. length of 255 characters)
In order to be able to create a new schedule for a register transaction, make sure the Connector processing the transactions is configured to be Available for Schedule (see Create and Assign Connectors & Adapters)