Nuvei
Creditcard (Nuvei PCI)
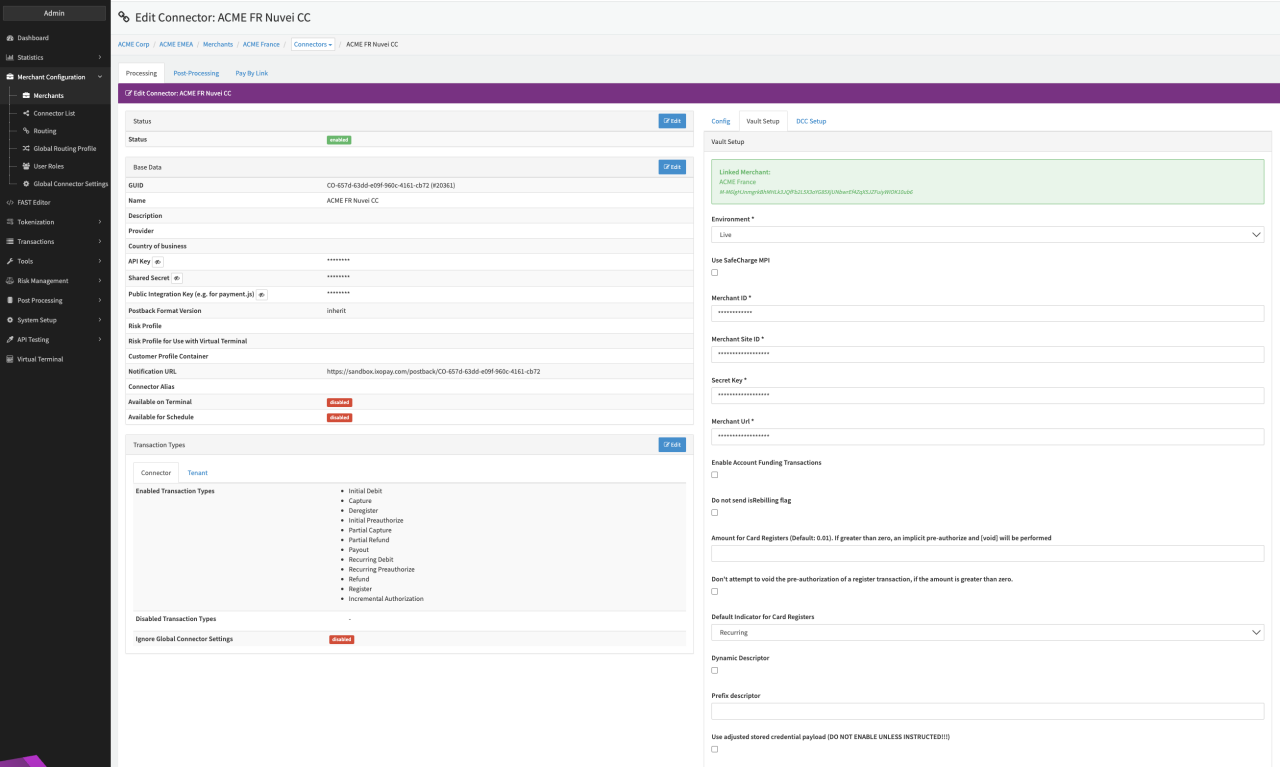
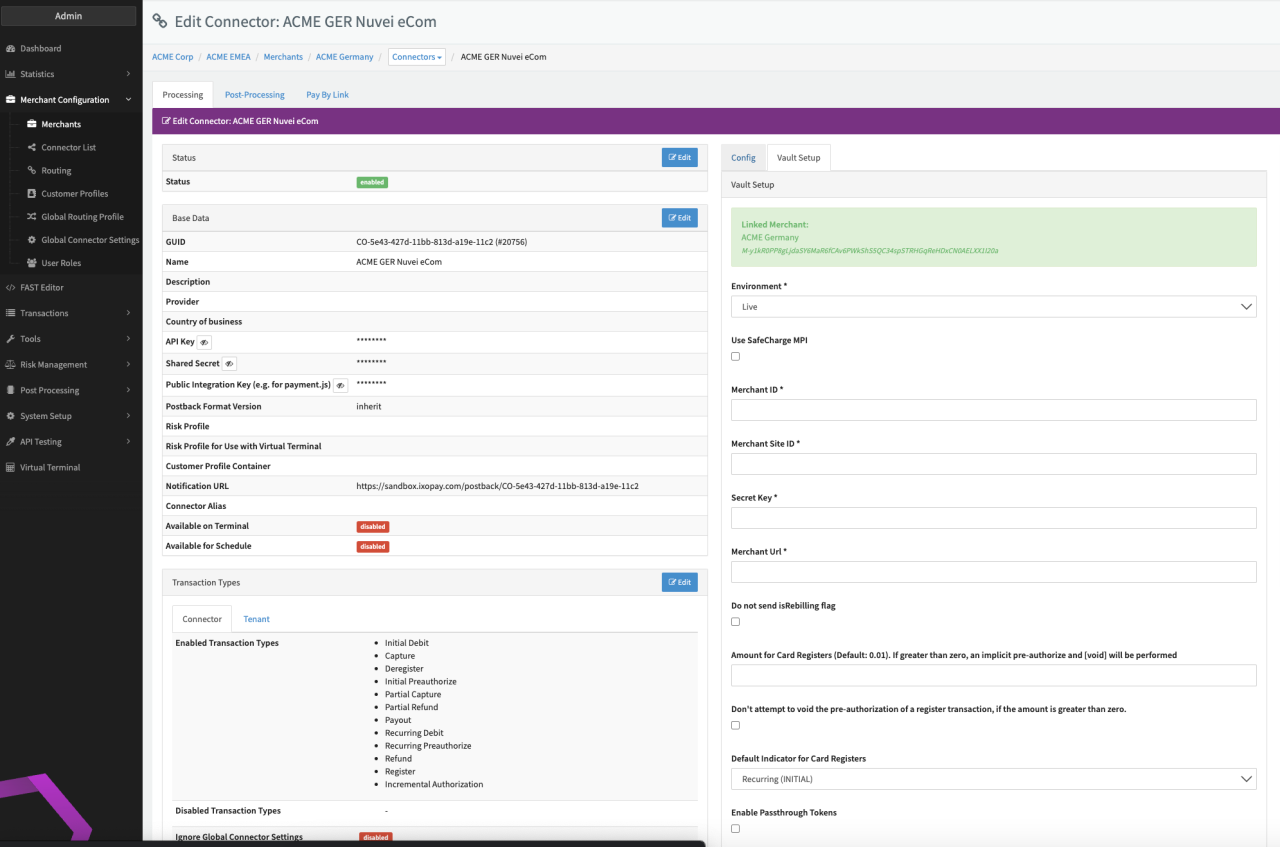
Configure the following parameters for the Connector (see Connector Detail Overview - Nuvei - Vault Configuration):
- Select the mandatory Environment: Live, Sandbox
- Select the option Use Safecharge MPI
- Fill in the mandatory Merchant ID
- Fill in the mandatory Merchant Site ID
- Fill in the mandatory Secret Key
- Fill in the mandatory Merchant Url
- Enable the option Enable Account Funding Transactions to flag transactions as AFT
- Select the option Do not send isRebilling flag
- Fill in the optional Amount for Card Registers (Default: 0.01). If greater than zero, an implicit pre-authorize and [void] will be performed
- Select the option Don't attempt to void the pre-authorization of a register transaction, if the amount is greater than zero.
- Select the optional Default Indicator for Card Registers — Recurring (INITIAL), Unscheduled (FIRST-CARDONFILE)
- Enable the option Dynamic Descriptor (see Dynamic Descriptor)
- Fill in the Prefix descriptor (see Dynamic Descriptor)
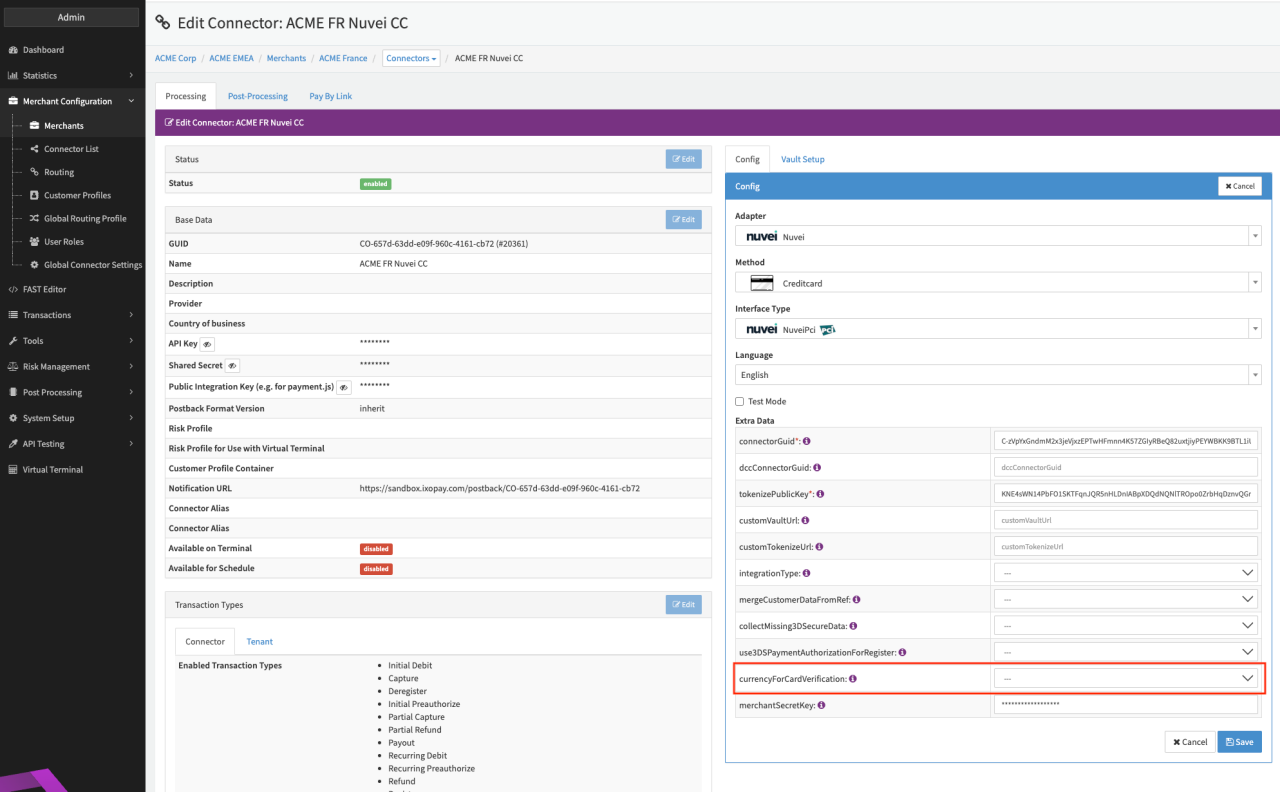
Please make sure to set the Connector Config Extra Data: currencyForCardVerification to the correct Currency for your Connector in case it differs from the Merchant Default Currency
Dynamic (Transaction) Descriptor
A dynamic transaction descriptor provides additional information about a specific payment to help customers locating and recognizing it on bank statements or online banking interfaces.
The descriptor text consists of 2 parts:
- Prefix - a static text value up to 12 characters long (minimum 3 characters) that is identical for every transaction.
- followed by The dynamic value — provided by the Merchant with the transaction description.
In order to setup Dynamic Descriptors raise a support ticket in the Nuvei dashboard to request that this feature be enabled for your Terminal IDs.
Once enabled configure your Connector by enabling Dynamic descriptor and entering a Prefix descriptor. For all Transaction processed by this Connector, the IXOPAY platform will concatenate the entered Prefix Descriptor with the transaction description.
Please note that the total length of the dynamic descriptor must not exceed 22 characters. The IXOPAY platform will strip off all subsequent characters automatically. The Prefix Descriptor can have a length of minimum 3 characters and a maximum of 12 characters.
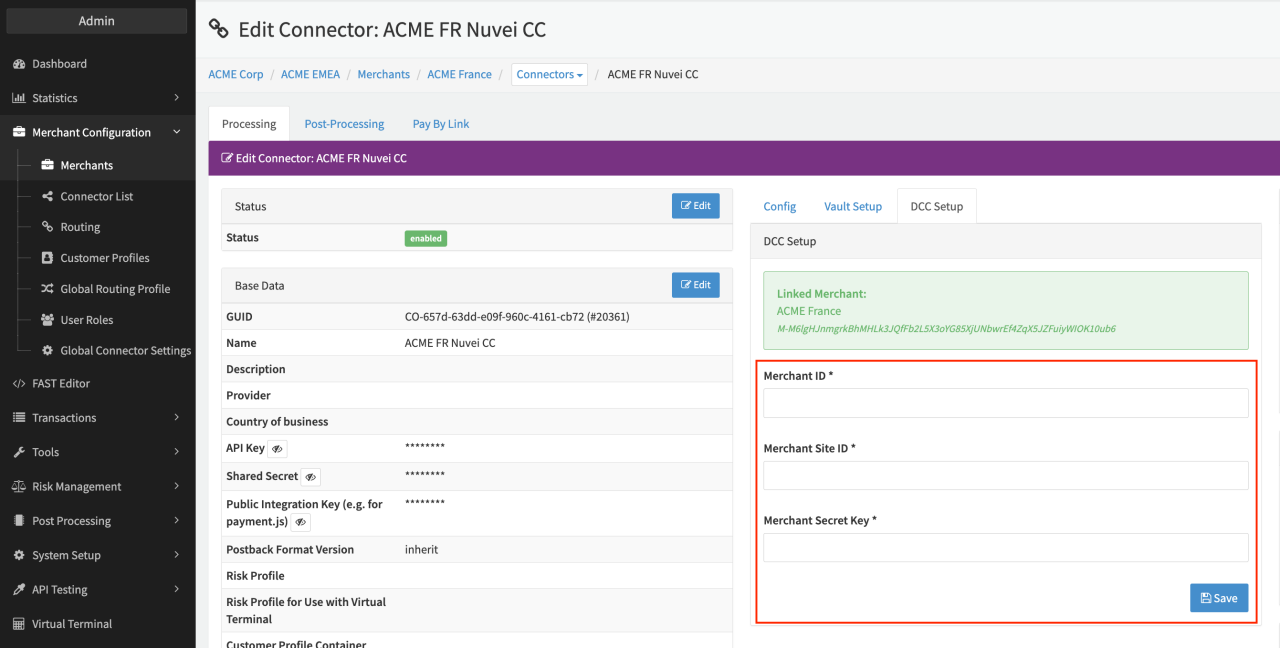
DCC Setup
In order to use the Nuvei Dynamic Currency Conversion, the DCC setup must be configured for the Nuvei PCI connector.
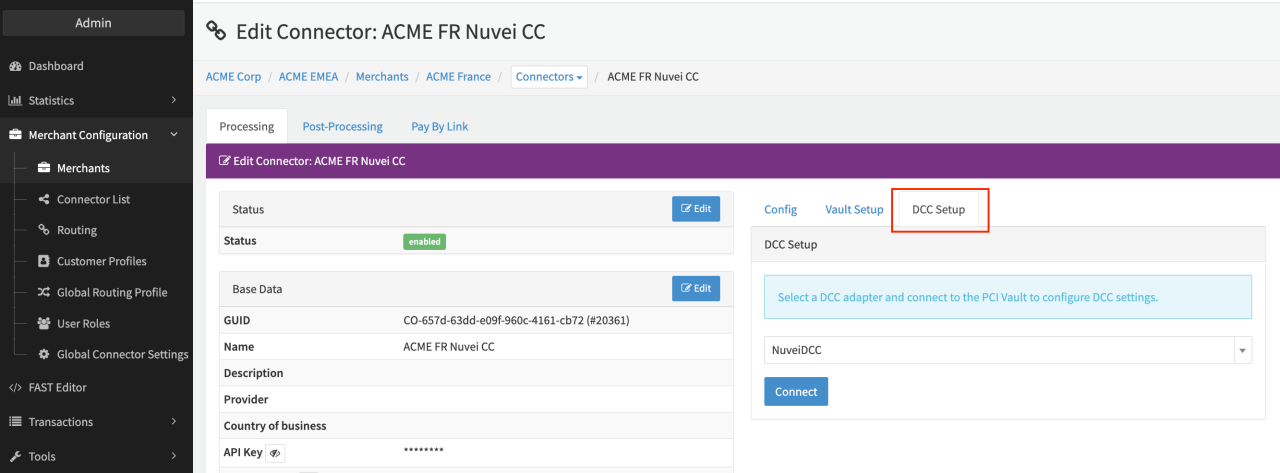
Configure the following parameters to enable Dynamic Currency Conversion (DCC) for the Connector (see Connector Config - DCC Setup):
- Navigate to the DCC Setup Tab
- Select NuveiPCI from the dropdown
- Click Connect
- Fill in the mandatory Merchant ID
- Fill in the mandatory Merchant Site ID
- Fill in the mandatory Merchant Secret Key
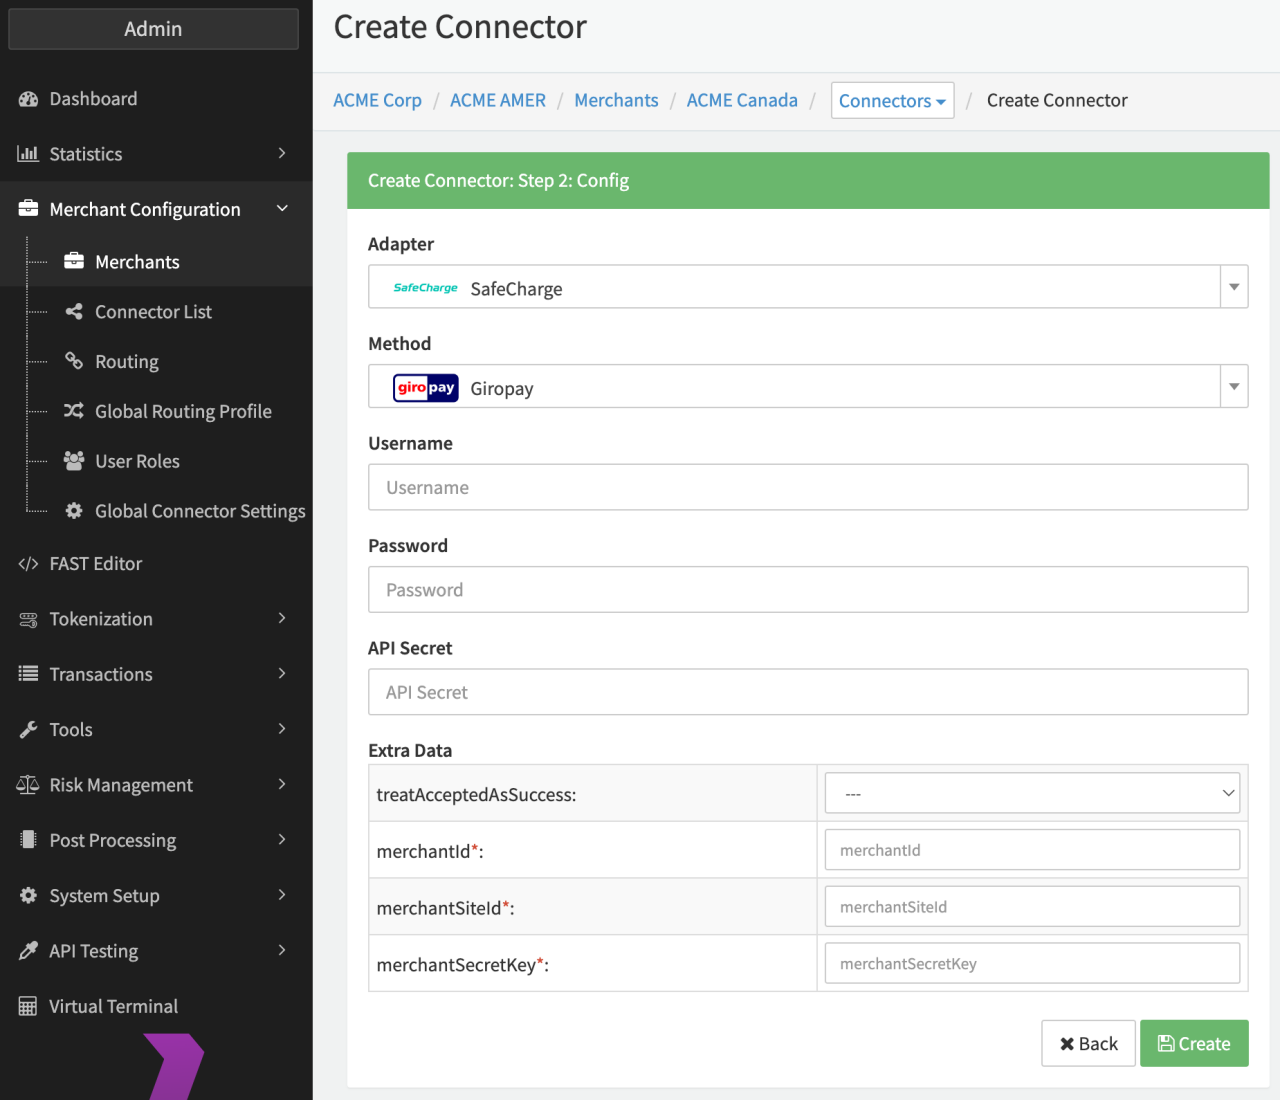
Nuvei APM
The Nuvei APMs can be found inIXOPAY platform selecting the Safecharge adapter. Configure the following parameters for the Connector (see Nuvei APM - Connector Config):
- Fill in the optional Username
- Fill in the optional Password
- Fill in the optional API Secret
- Select the optional Extra Data: treatAcceptedAsSuccess — true, false: In case transactions with callback accepted should be changed to "success" instead of "pending"
- Fill in the mandatory Extra Data: merchantID
- Fill in the mandatory Extra Data: merchantSiteID
- Fill in the mandatory Extra Data: merchantSecretKey
POS
Configure the following parameters for the Connector (see Connector Config):
- Fill in the mandatory TPN — Terminal Number, to be provided by Nuvei
- Fill in the mandatory Token
- Fill in the mandatory AuthKey
- Select the mandatory Extra Data: currency — USD, CAD
- Select the optional Extra Data: defaultPaymentType — Card, Debit, Credit
- Fill in the optional Extra Data: printReceipt — Yes - Both merchant and customer copies, Yes - Merchant copy only, Yes - Customer copy only, No - receipt wont be printed on terminal
- Fill in the optional Extra Data: getReceipt
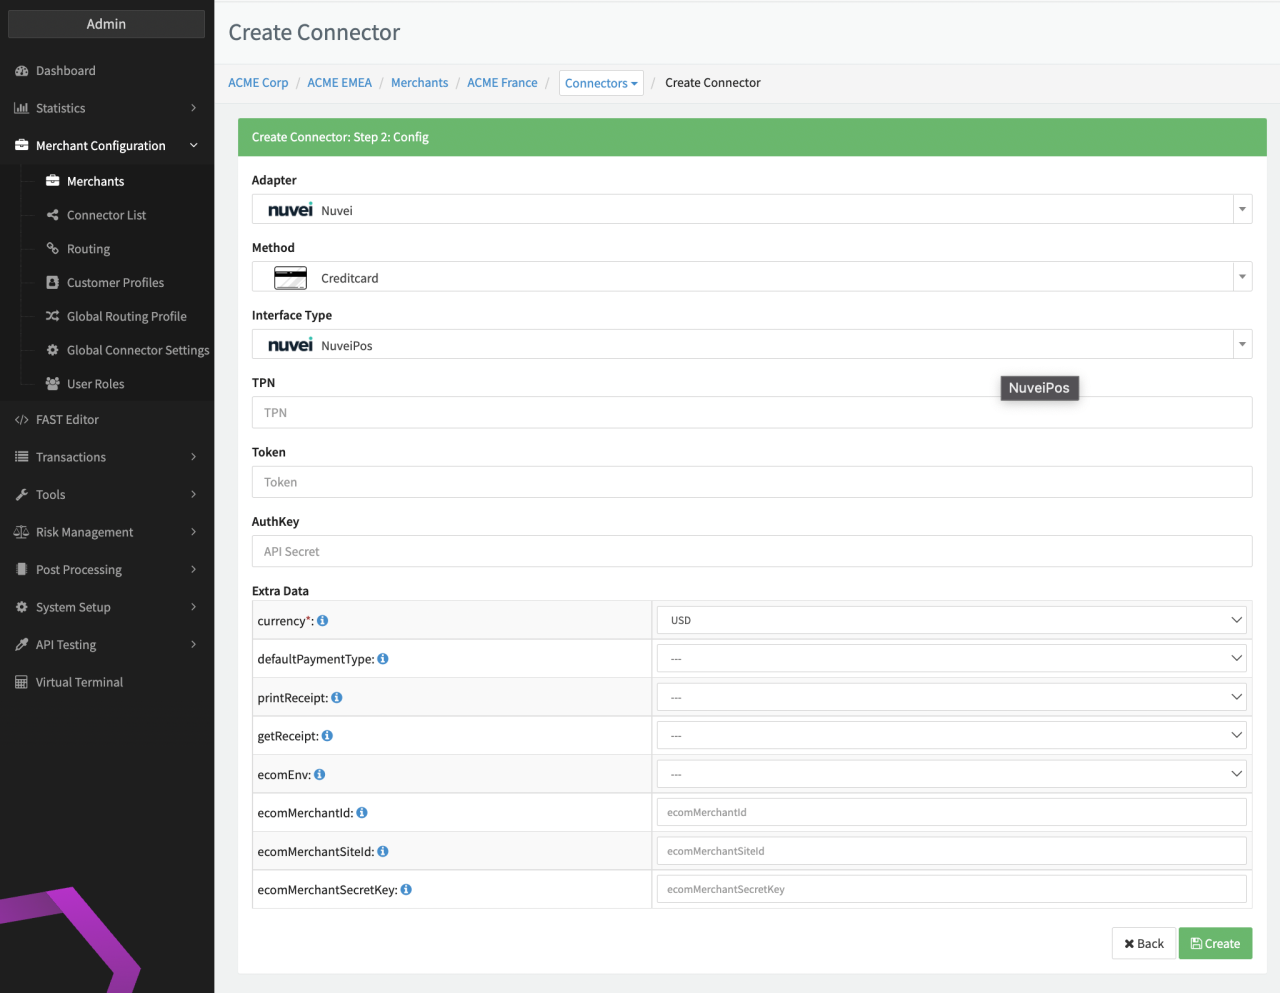
The additional options:
- Select the optional Extra Data: ecomEnv
- Fill in the optional Extra Data: ecomMerchantID
- Fill in the optional Extra Data: ecomMerchantSiteID
- Fill in the optional Extra Data: ecomMerchantSecretKey
Are not relevant for clients using the Adapter. For further information see also the adapter-specific API Documentation: Nuvei POS
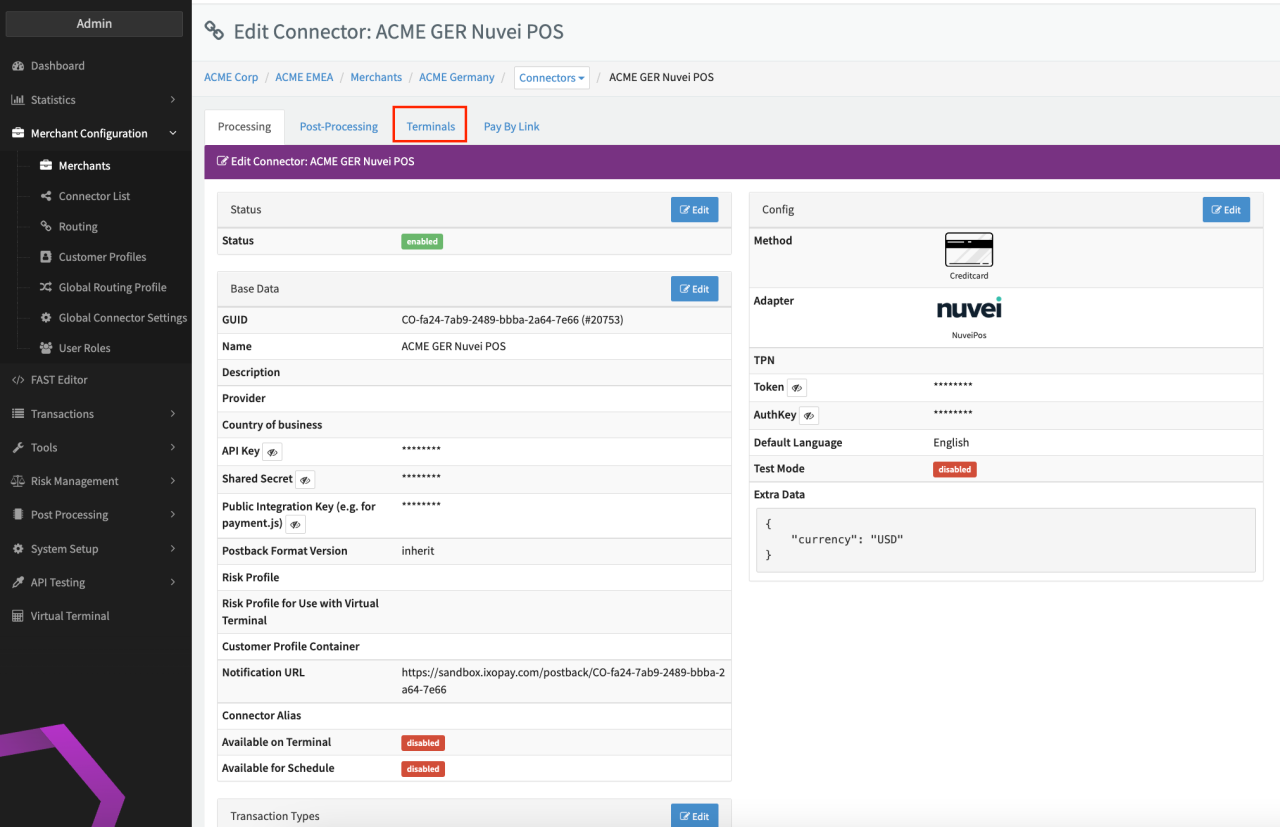
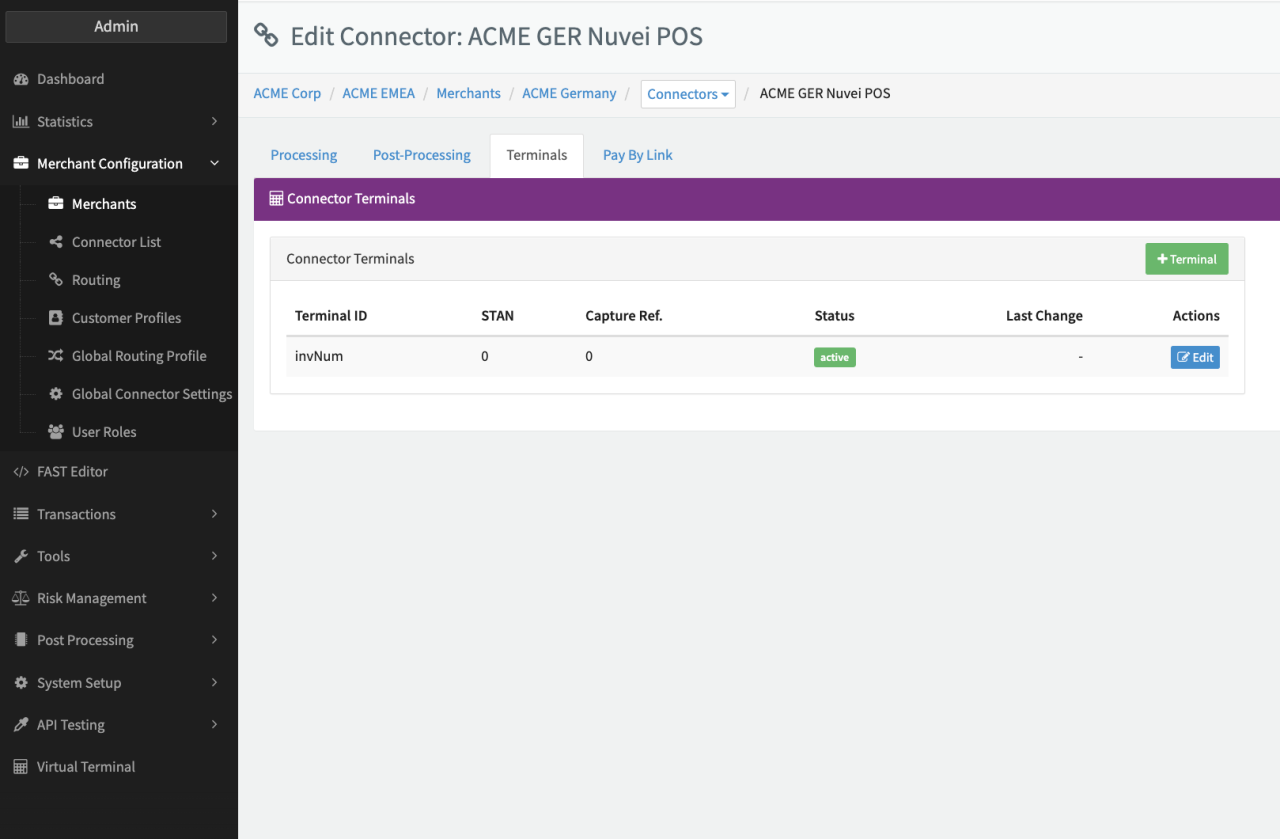
Further the Terminal Configuration for this adapter is needed:
- Navigate in the Tab Terminals
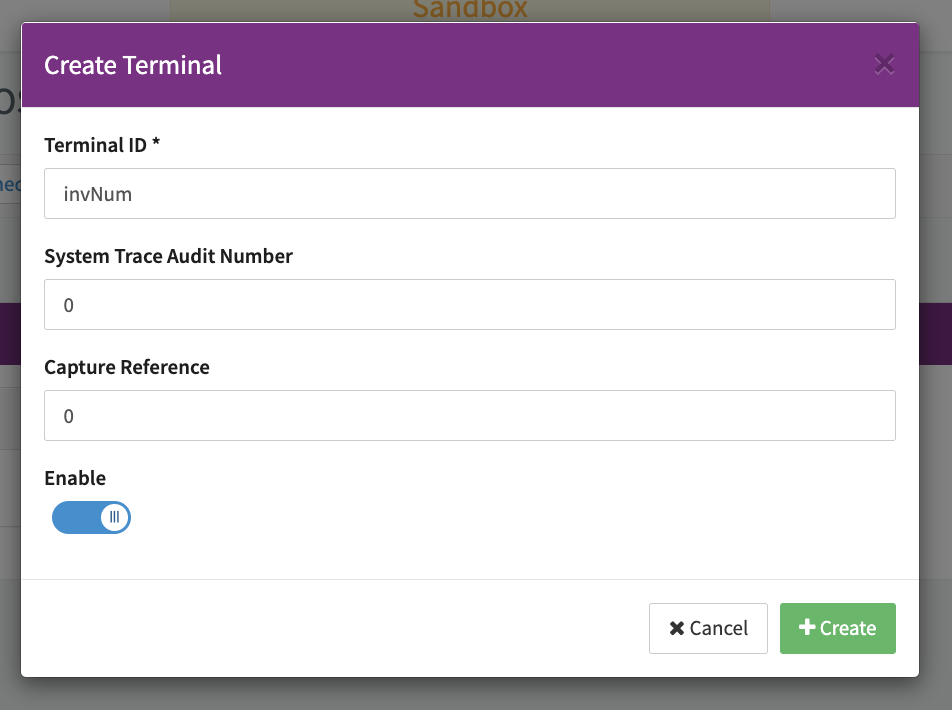
- Select + Terminal to create a new Terminal for this Connector (see New Terminal)
- Fill in the Configuration Parameters (see New Terminal Configuration)
- Terminal ID with the parameter invNum
- System Trace Audit Number — default 0
- Capture Reference - default 0
- Activate the switch to Enable the Terminal
- Click + Create
Keep in mind, that the System Trace Audit Number must be unique among all connectors using the same provider account for every transaction.
Nuvei POS and Nuvei PCI
In order to be able to use both Nuvei POS and Nuvei PCI in combination (e.g. recurring transactions with Nuvei PCI with initial transaction vie Nuvei POS) a view additional configuration steps are necessary:
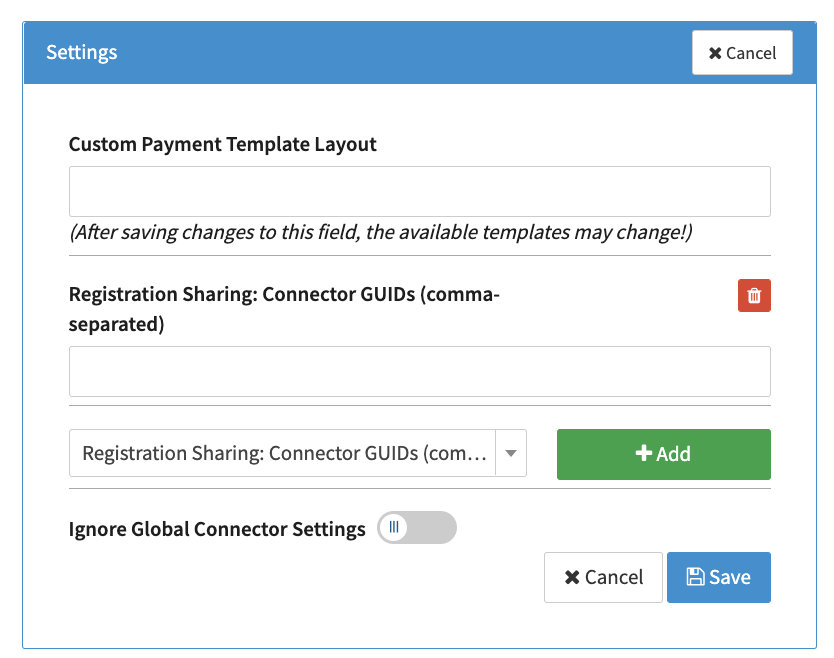
In the Nuvei POS
- Select the Connector Setting Registration Sharing: Connector GUIDs
- Insert the Connector GUIDs (comma separated) of the Nuvei PCI Connectors, that should be able to initiate transactions using Register Transactions processed by the Nuvei POS Adapter.
In the Nuvei PCI Configuration:
- Enable the Option Enable Passthrough Tokens (see Connector Detail Overview - Nuvei - Vault Configuration)
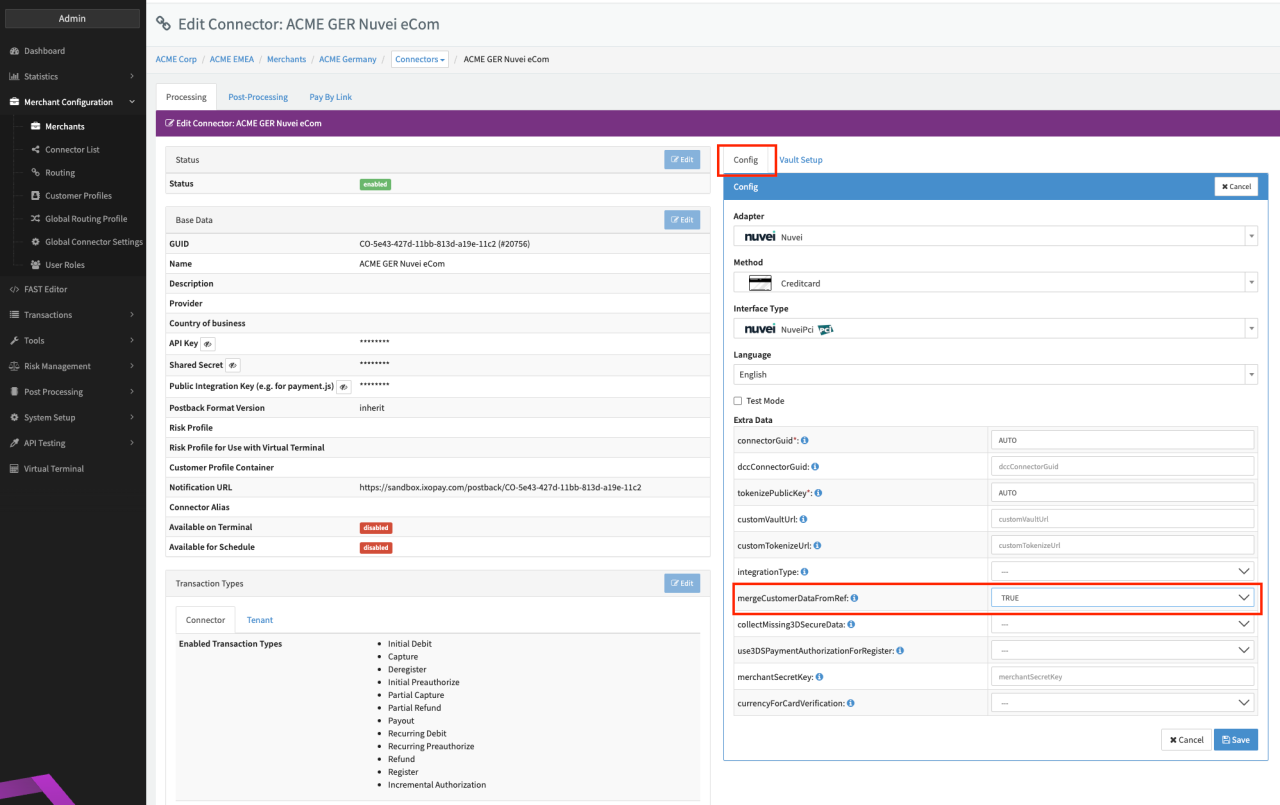
- Select mergeCustomerDataFromRef to True (see Connector Detail Overview - Nuvei - Configuration)
Data Fetcher Configuration
You have the option to configure Data Fetchers (see section Enable and Set Up Reconciliation on the Provider Level) either on Provider or on Connector Level, depending on which setup works better for your provider.
Reconciliation & Provider Settlement
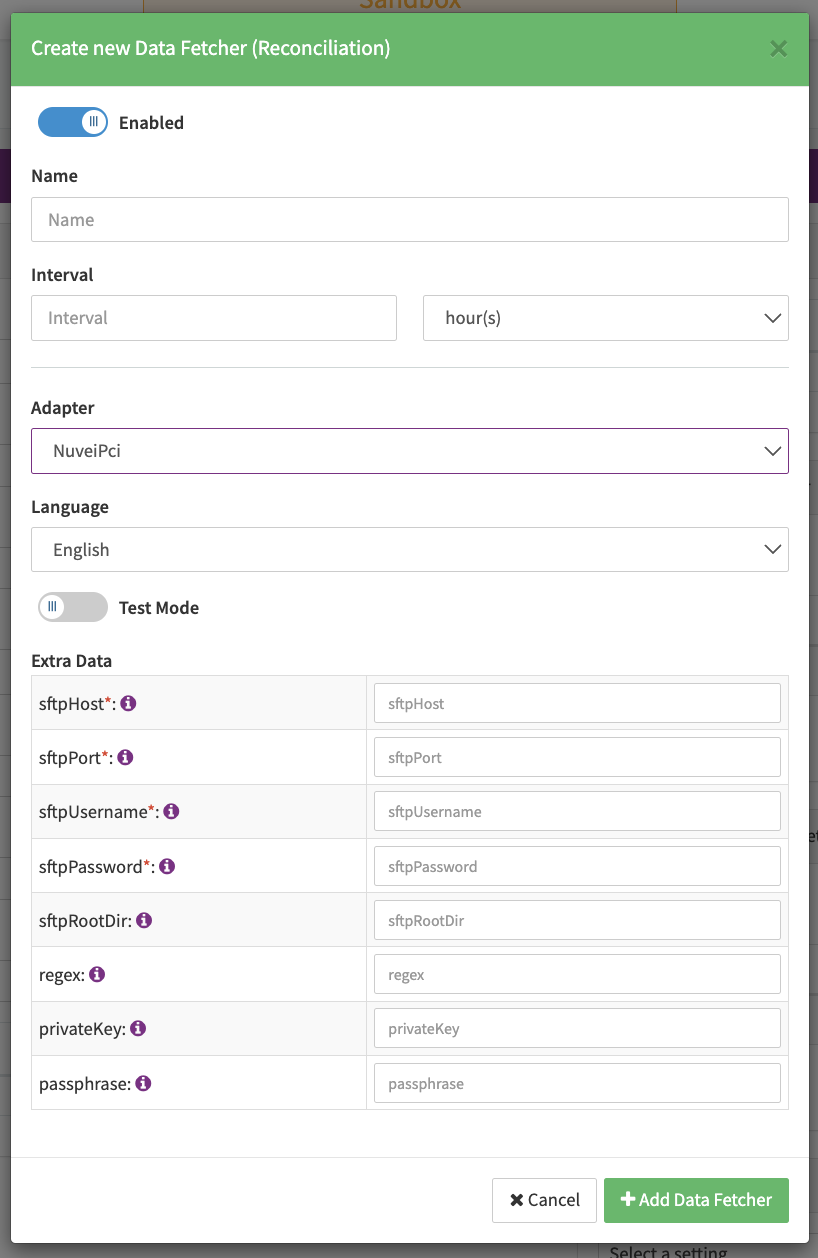
The data fetcher configuration for both, reconciliation and provider settlements, is the same. Configure the following Parameters to fetch Reconciliation and Provider Settlement files (transaction_report format) via SFTP (see Reconciliation Data Fetcher Provider Level):
- Fill in the optional Name for the Data Fetcher
- Fill in the expected Interval in which the Reconciliation / Provider Settlement File should be fetched - days, hours
- Select the Adapter NuveiPci
- Test Mode: this setting is irrelevant for this adapter because there is no production nor test endpoint as the files are always fetched from the given SFTP.
- Fill in the mandatory Extra Data: sftpHost used to connect to the SFTP server
- Fill in the mandatory Extra Data: sftpPort used to connect to the SFTP server
- Fill in the mandatory Extra Data: sftpUsername used to connect to the SFTP server
- Fill in the mandatory Extra Data: sftpPassword used to connect to the SFTP server
- Fill in the optional Extra Data: sftpRootDir used to specify the directory where the files are deposited.
- Fill in the optional Extra Data: regex used to specify the file pattern
- Fill in the optional Extra Data: privateKey can be used to authenticate to the SFTP server. The key must be base64 encoded
- Fill in the optional Extra Data: passphrase used in combination with the private key should the key be secured with a passphrase