Ingenico / Worldline / Ogone
Configuration Ingenico
In order for the Ingenico Direct Adapter to work you need to configure the following settings in the Ingenico Portal.
- Navigate to Configuration > Technical Information > Ingenico Direct Settings (see Ingenico Portal)
- Insert as Endpoint Urls the Notification URL of the configured Ingenico Connector (to be found in the Connector Base data, see e.g. Connector Detail Overview - Ingenico Creditcard - Vault Configuration)
- Save the API Key, API Secret, Webhook Key and the Webhook Secret to be used in the Connector configuration

You can create the IXOPAY platform connector using dummy input parameters in order to generate the Notification URL to be inserted for the Webhook Key creation in the Ingenico Portal.
Connector Configuration
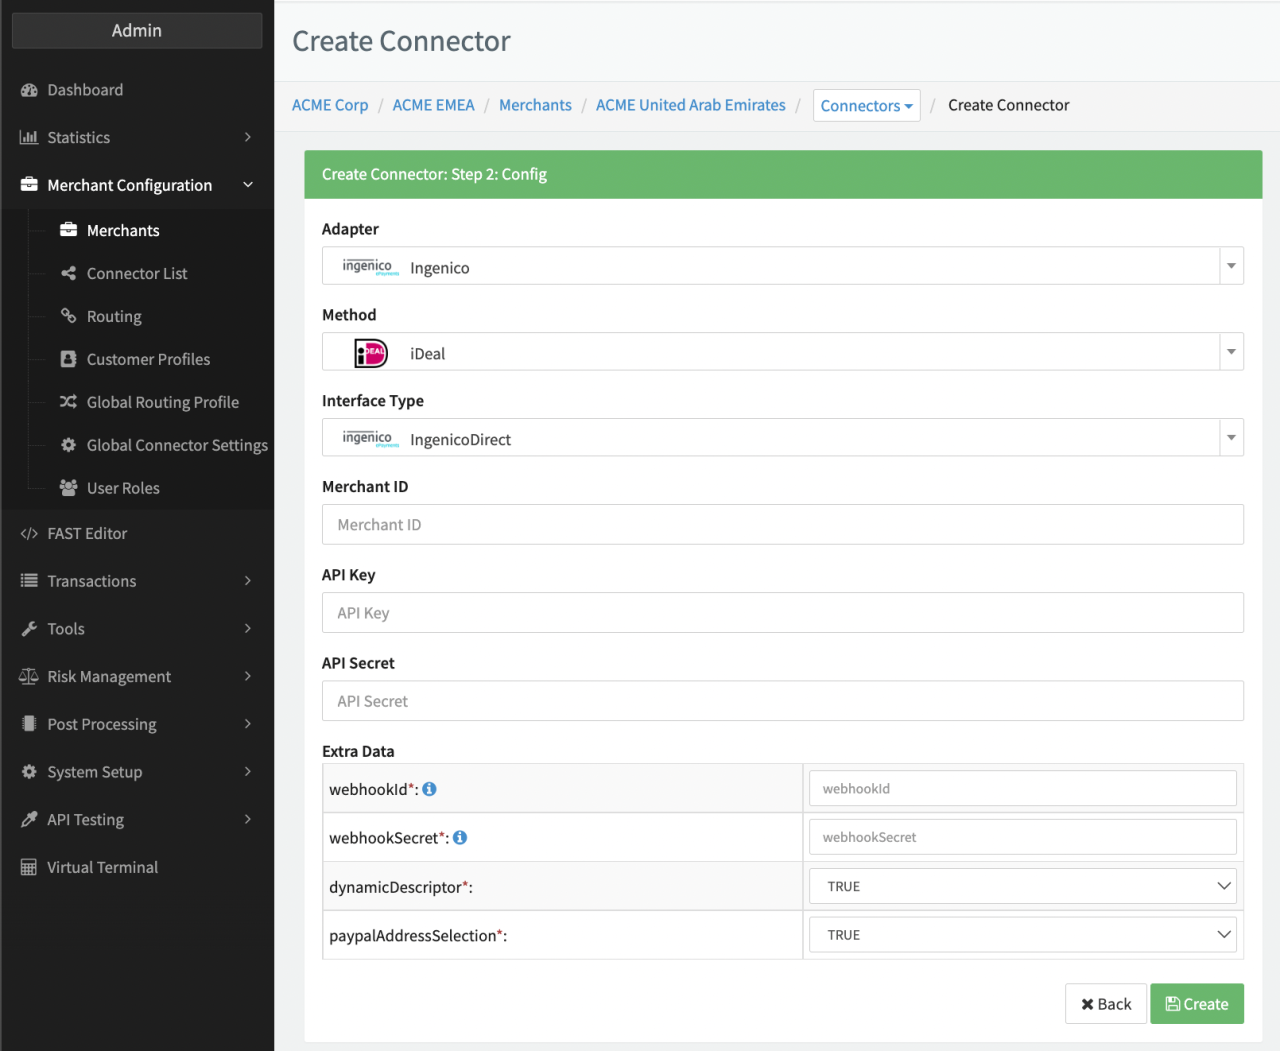
Configure the following parameters for the Connector, depending on the selected Payment Method and Ingenico Endpoint (see Connector Config - Ingenico Direct):
- Fill in the mandatory Merchant ID
- Fill in the mandatory API Key
- Fill in the mandatory API Secret
- Fill in the mandatory Extra Data: webhookID
- Fill in the mandatory Extra Data: webhookSecret
- Select in the mandatory Extra Data: dynamicDescriptor: True, False
- Select in the mandatory Extra Data: paypalAddressSelection: True, False
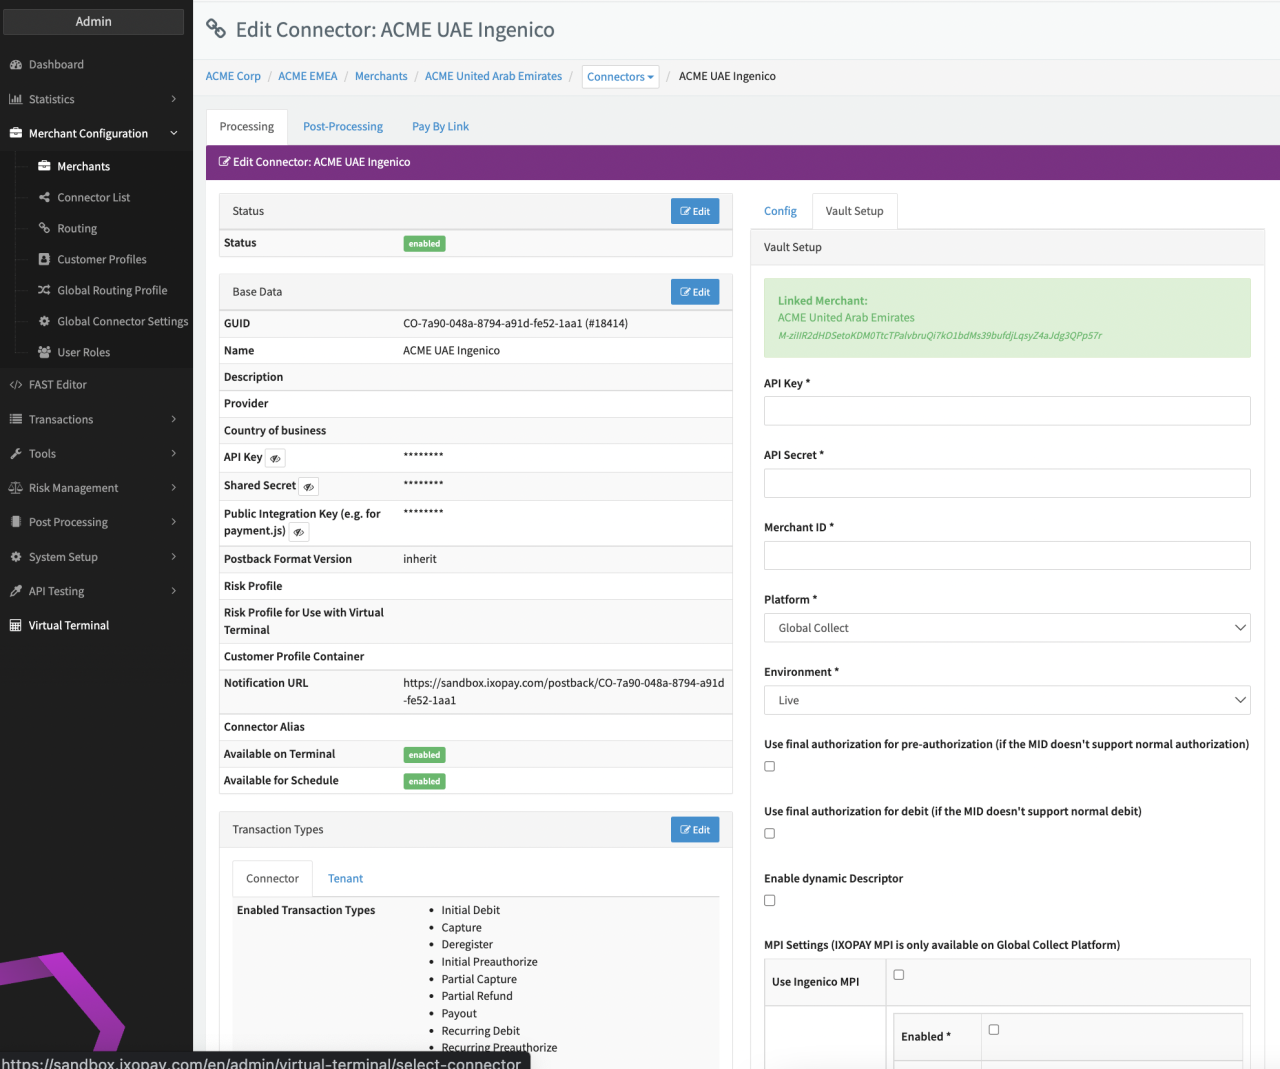
Additional parameters to be configured (see Connector Detail Overview - Ingenico Creditcard - Vault Configuration):
- Select the mandatory Platform Global Collect, Ogone
- Select the mandatory Environment Live, Pre-Production, Sandbox
- Check the optional Option Use final authorization for pre-authorization (if the MID doesn't support normal authorization)
- Check the optional Option Use final authorization for debit (if the MID doesn't support normal debit)
- Check the optional Option Enable dynamic Descriptor
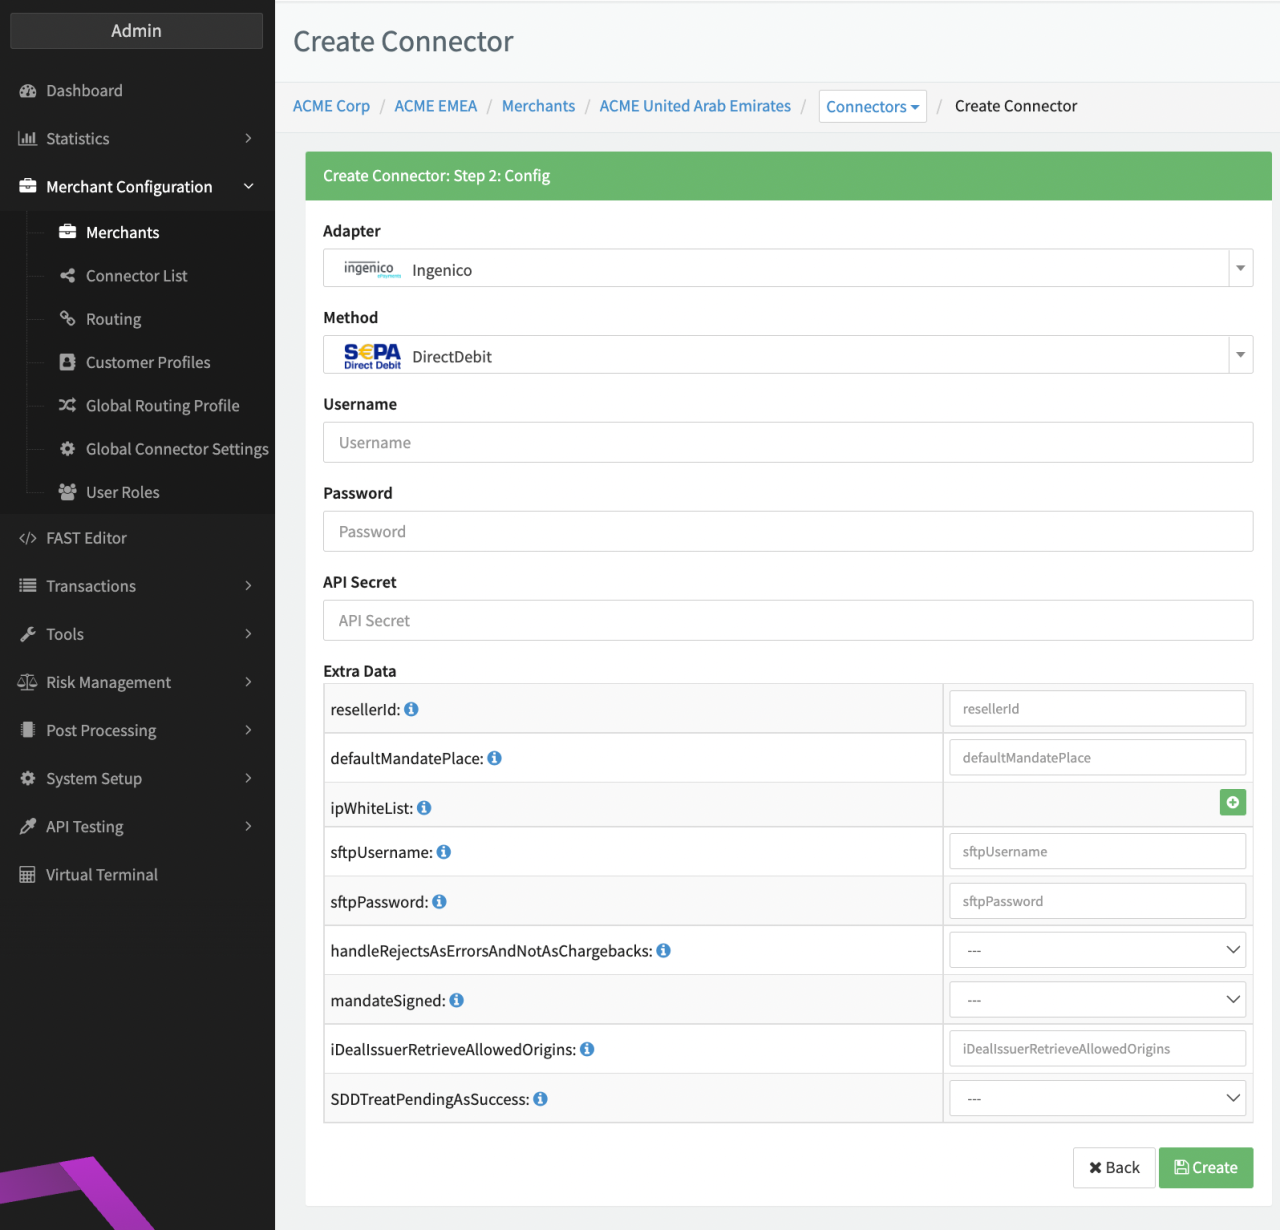
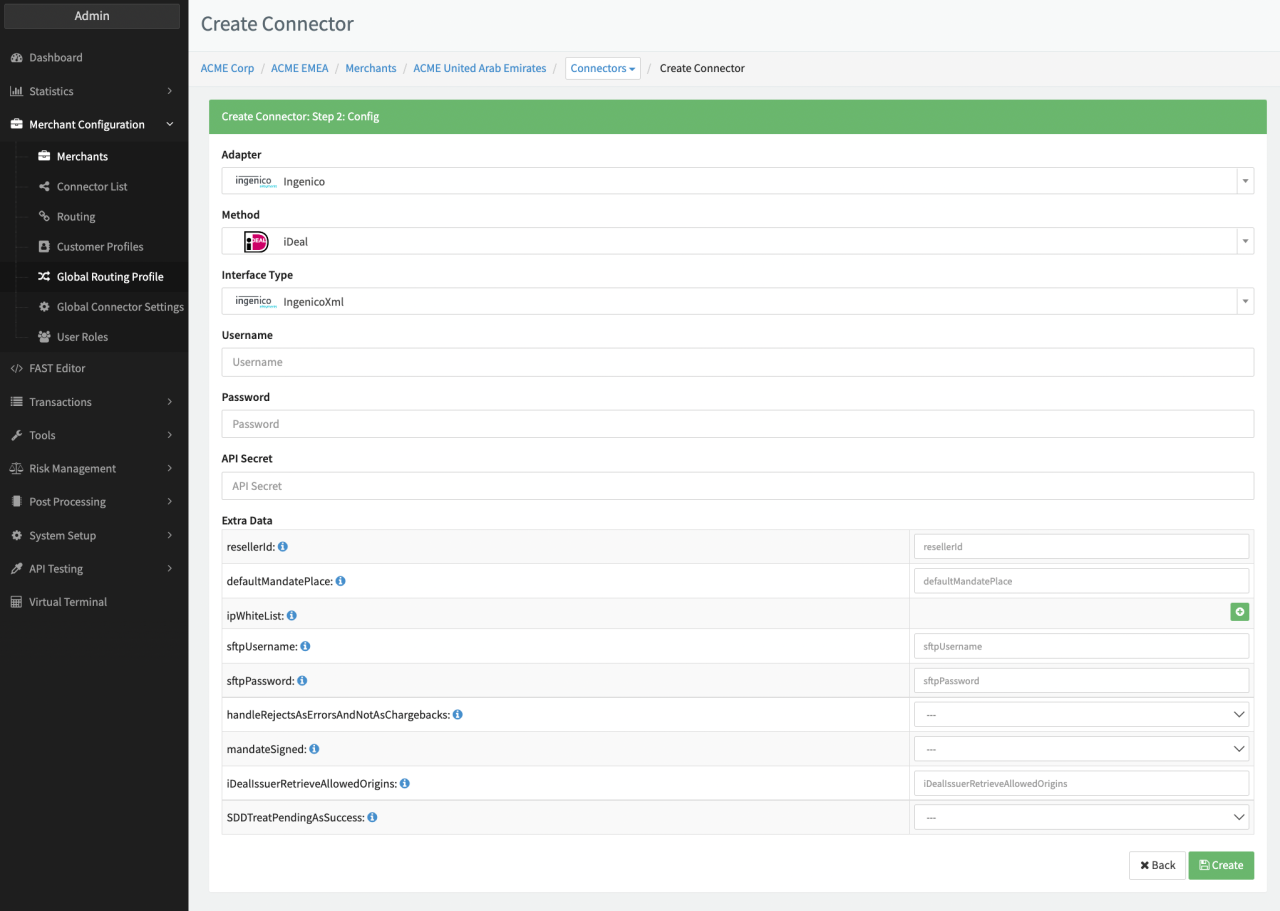
Configure the following parameters (see Connector Config - Ingenico SEPA, Connector Config - Ingenico iDeal XML):
- Fill in the mandatory Username
- Fill in the mandatory Password
- Fill in the mandatory API Secret
- Fill in the mandatory Extra Data: apiKeyId
- Fill in the mandatory Extra Data: merchantId
- Fill in the optional Extra Data: resellerId
- Fill in the optional Extra Data: defaultMandatePlace
- Fill in the optional Extra Data: IpWhiteList
- Fill in the optional Extra Data: sftpUsername
- Fill in the optional Extra Data: sftpPassword
- Select the optional Extra Data: handleRejectsAsErrorsAndNotAsChargebacks: True, False
- Select the optional Extra Data: mandateSigned: True, False
- Fill in the optional Extra Data: iDealIssuerRetrieveAllowedOrigins
- Select the optional Extra Data: SDDTreatPendingAsSuccess: True, False
Additional configuration specifics can be found in the Adapter-specific API Documentation
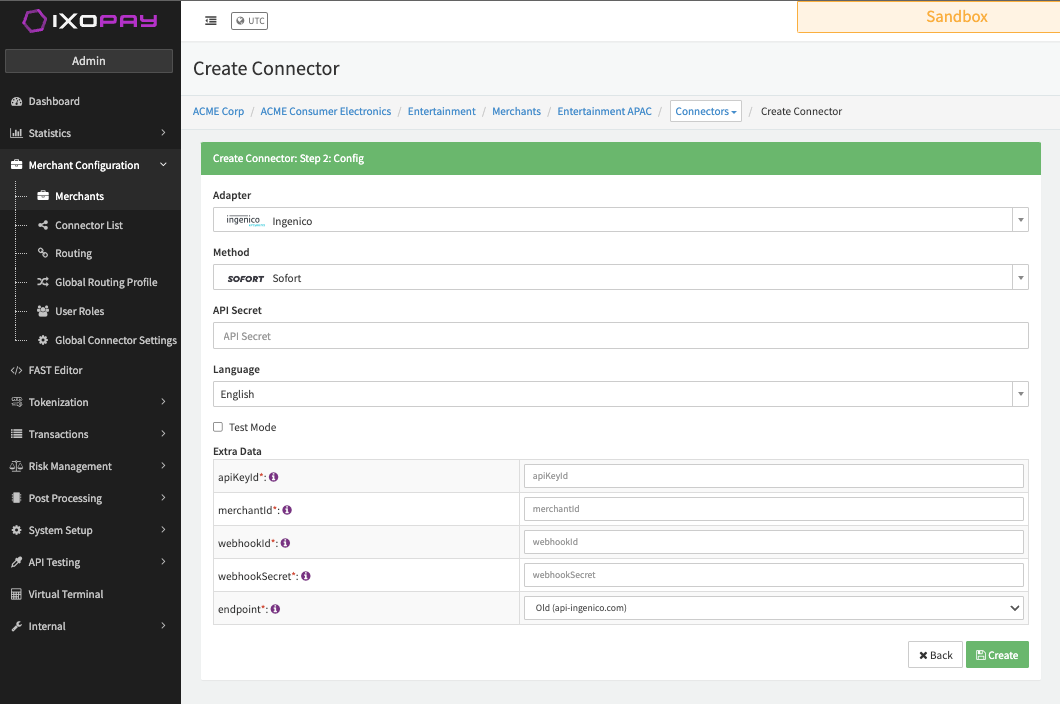
Configure the following parameters for the Connector, depending on the selected Payment Method and Ingenico Endpoint (see Connector Config - Ingenico Sofort):
- Fill in the mandatory Extra Data: apiKeyID
- Fill in the mandatory Extra Data: merchantID
- Fill in the mandatory Extra Data: webhookID
- Fill in the mandatory Extra Data: webhookSecret
- Fill in the mandatory Extra Data: webhookSecret
- Select in the mandatory Extra Data: endpoint
Depending on which Ogone endpoint you are using, you either need to configure the Igenico or the WorldlineOgone Adapter. Contact your Customer Success Manager or contact our support in the IXOPAY Customer Experience Portal if you have any questions.
WorldlineOgone Connector Configuration
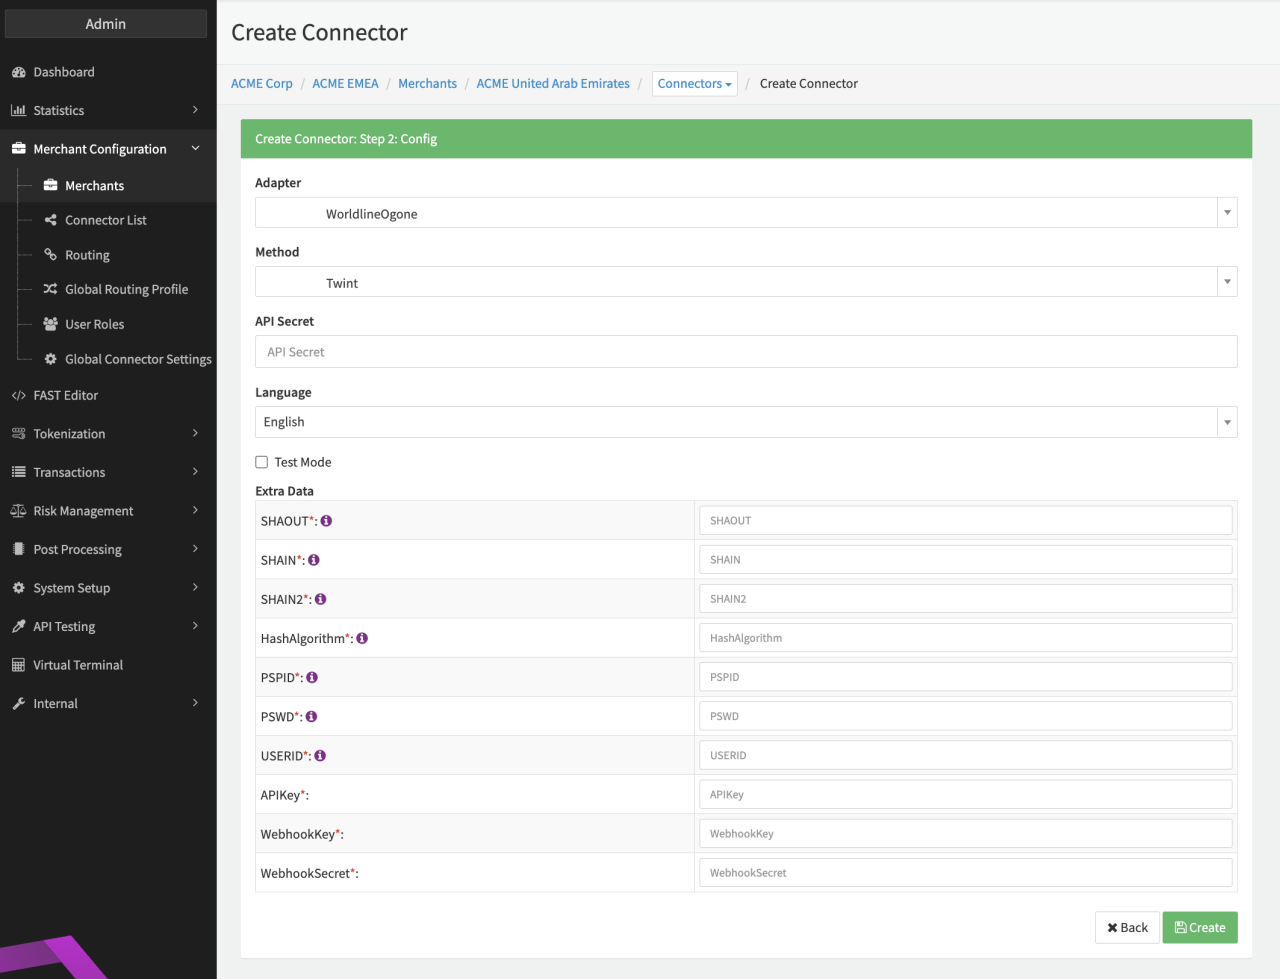
Configure the following parameters for the Connector (see Connector Config - WorldlineOgone):
- Fill in the mandatory API Secret
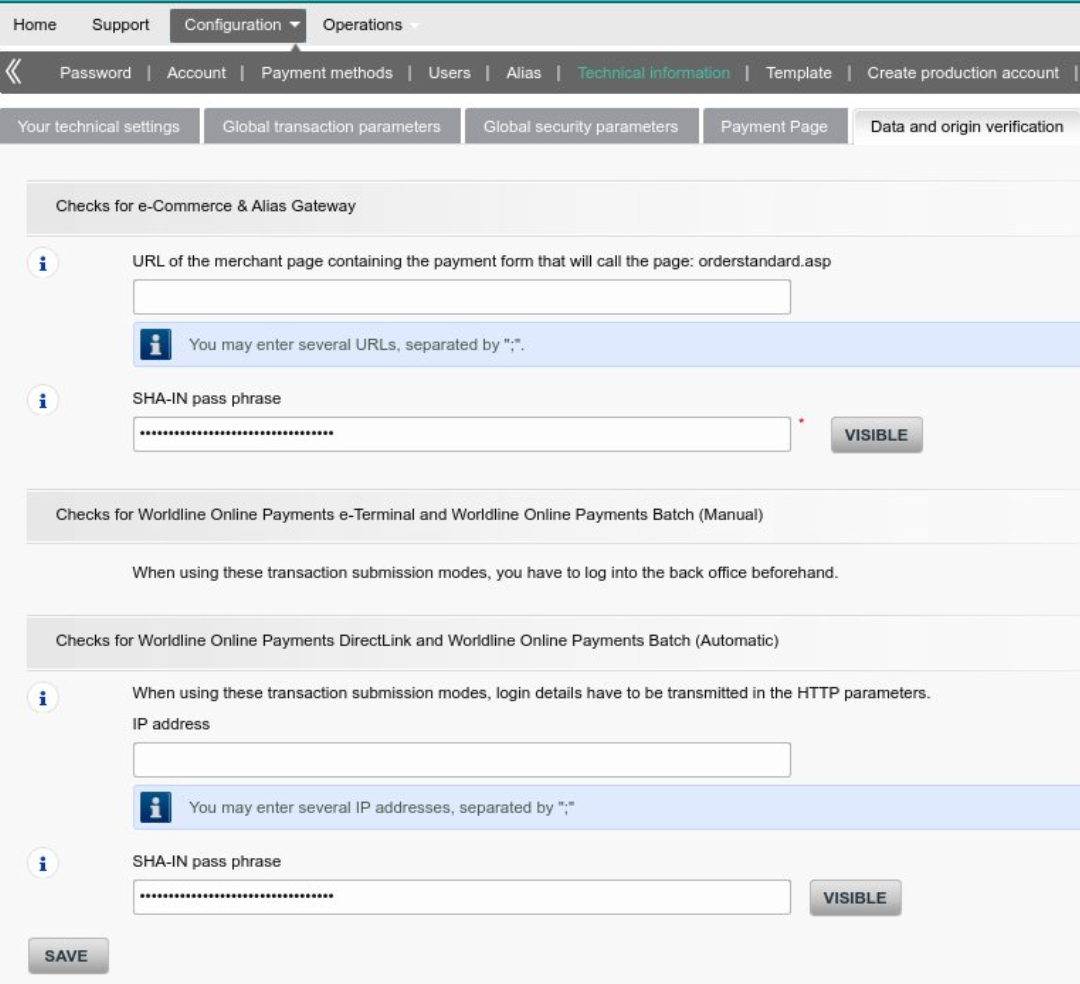
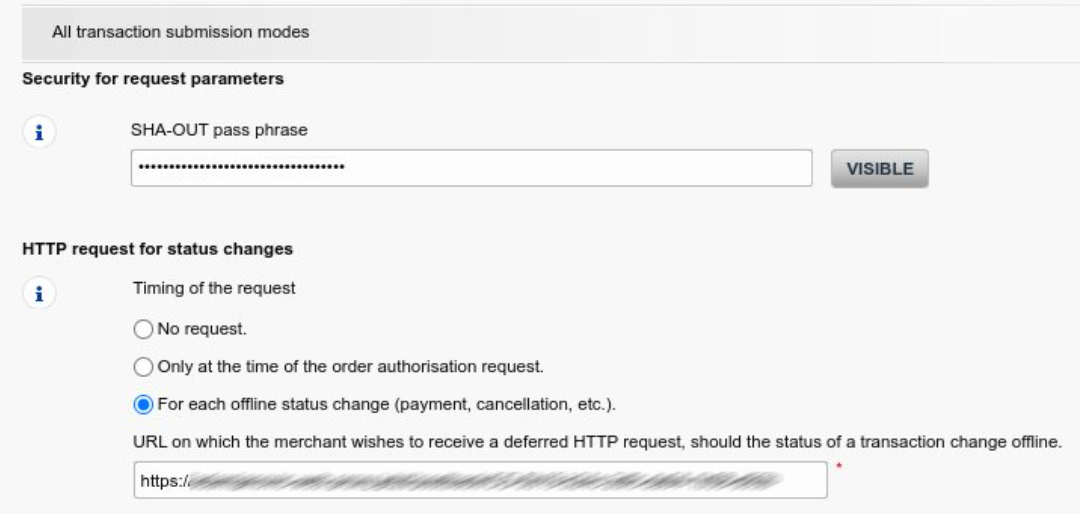
- Fill in the mandatory Extra Data: SHAOUT — Ogone Backoffice Parameter (see Ogone Backoffice - …; Configuration -> Technical Information -> Transaction feedback Under "Security for request parameters" -> "SHA-OUT pass phrase")
- Fill in the mandatory Extra Data: SHAIN — Ogone Backoffice Parameter (see Ogone Backoffice - SHAIN)
- Fill in the mandatory Extra Data: SHAIN2 — Ogone Backoffice Parameter (see Ogone Backoffice - SHAIN)
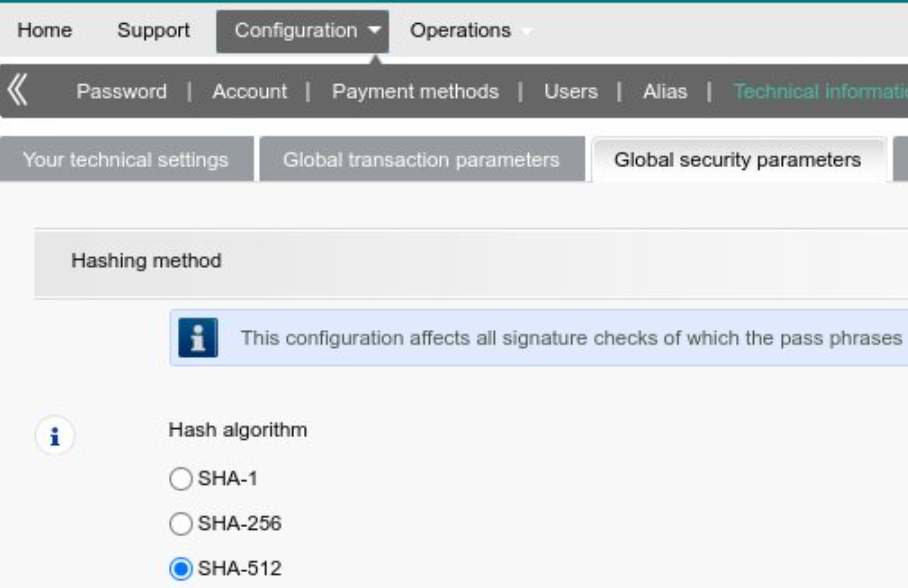
- Fill in the mandatory Extra Data: Hashalgorithm (lowercase and without dash, example: sha512) — Ogone Backoffice Parameter (see Ogone Backoffice - Hash)
- Fill in the mandatory Extra Data: PSPID — Your PSP ID
- Fill in the mandatory Extra Data: PSWD — API user password
- Fill in the mandatory Extra Data: USERID — API user username
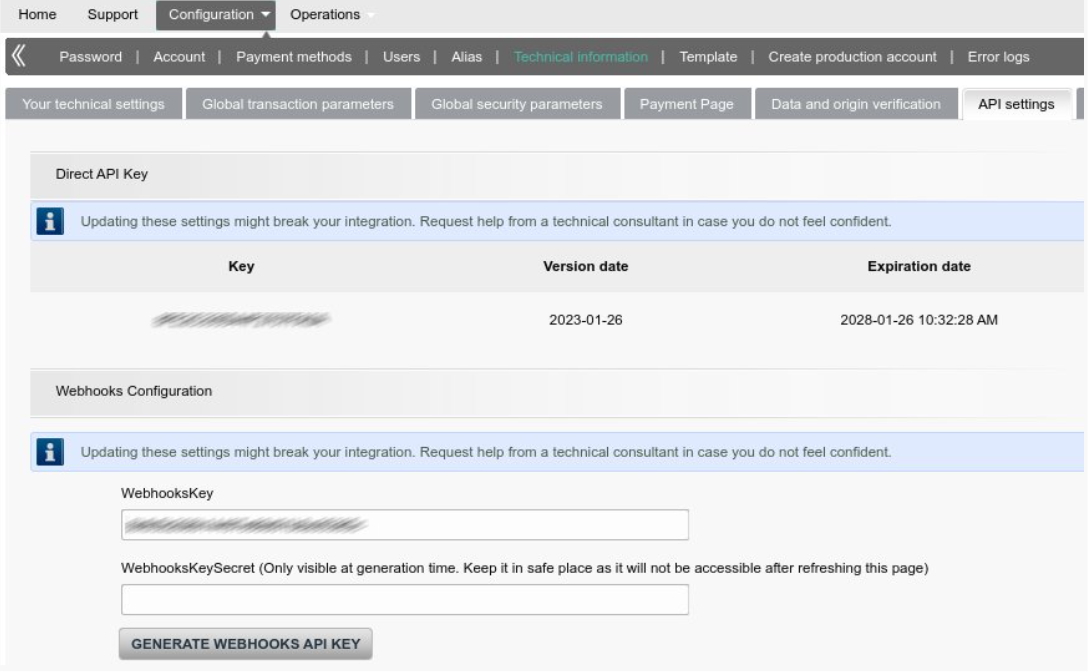
- Fill in the mandatory Extra Data: APIKey — Ogone Backoffice Parameter (see Ogone Backoffice - API & Webhook)
- Fill in the mandatory Extra Data: WebhookKey — Ogone Backoffice Parameter (see Ogone Backoffice - API & Webhook)
- Fill in the mandatory Extra Data: WebhookSecret — Ogone Backoffice Parameter (see Ogone Backoffice - API & Webhook)
Ogone Backoffice Configurations
Configure the following settings in your Ogone Backoffice for the Connector to work properly:
Setup Postback URL
Configuration -> Technical Information -> Transaction feedback, configure:
- HTTP request for status change select option For each offline status change (payment, cancellation, etc.) (see Ogone Backoffice - HTTP request for status change) and fill in the requested Postback URL
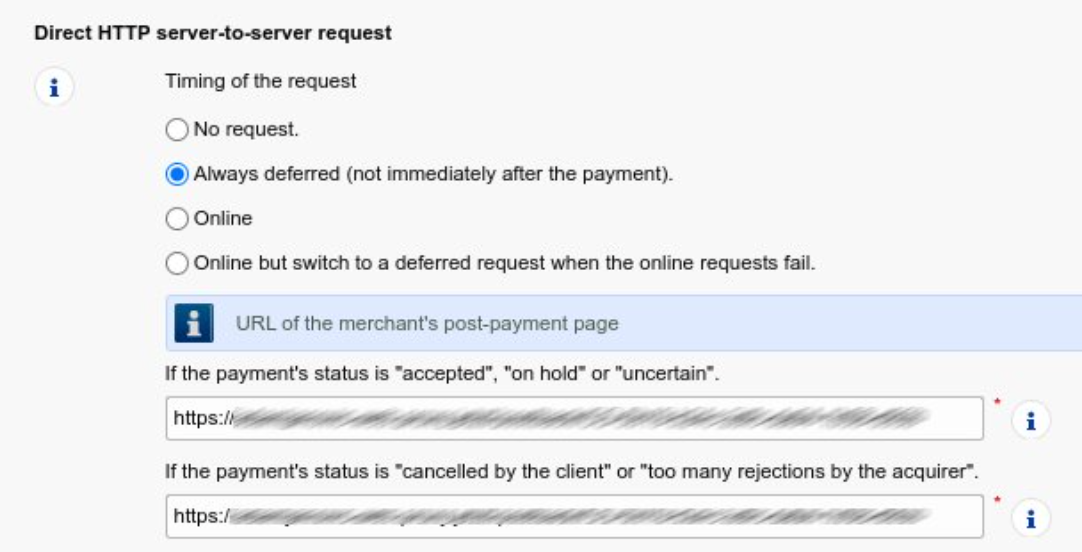
- Direct HTTP server-to-server request select option Always deferred (not immediately after the payment) (see Ogone Backoffice - Direct HTTP server-to-server) and fill in the requested Postback URLs
Activate "Alias Manager" and "Refunds"
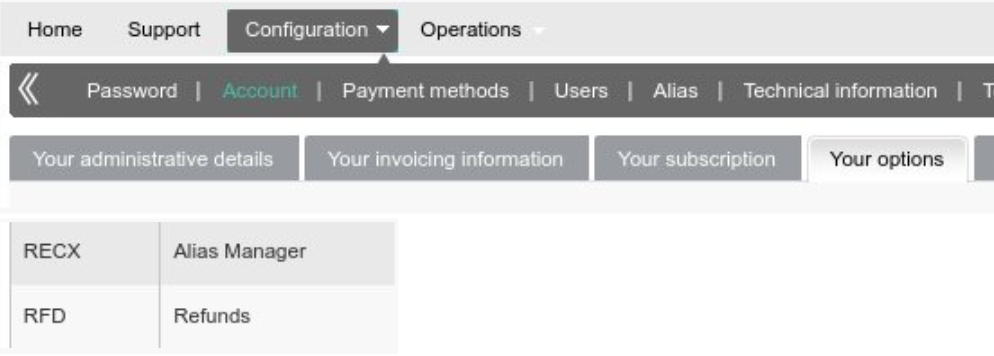
Configuration -> Account -> Your options, activate:
- RECX - Alias Manager (see Ogone Backoffice - Alias Manager and Refunds)
- RFD - Refunds (see Ogone Backoffice - Alias Manager and Refunds)
PAYIDSUB for Recurring Payments
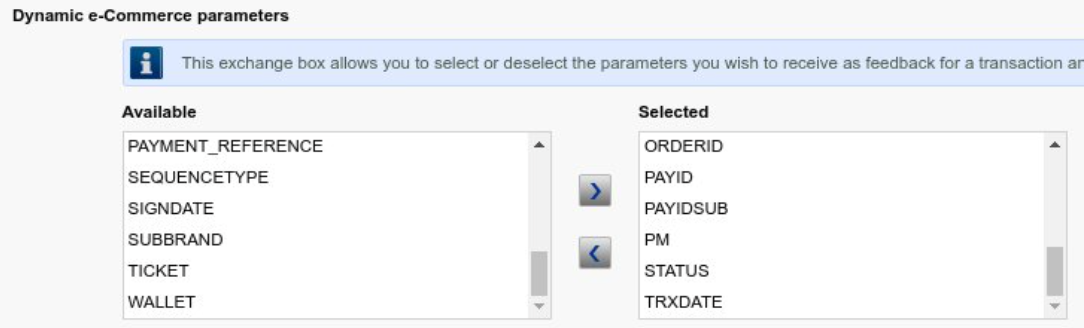
Configuration -> Technical Information -> Transaction feedback, configure "PAYIDSUB" in Dynamic e-Commerce parameters for referenced Transactions:
- Dynamic e-Commerce parameters add the parameter PAYIDSUB (see Ogone Backoffice - Dynamic e-Commerce parameters)
Data Fetcher Configuration
You have the option to configure Data Fetchers (see section Enable and Set Up Reconciliation on the Provider Level) either on Provider or on Connector Level, depending on which setup works better for your provider.
Reconciliation
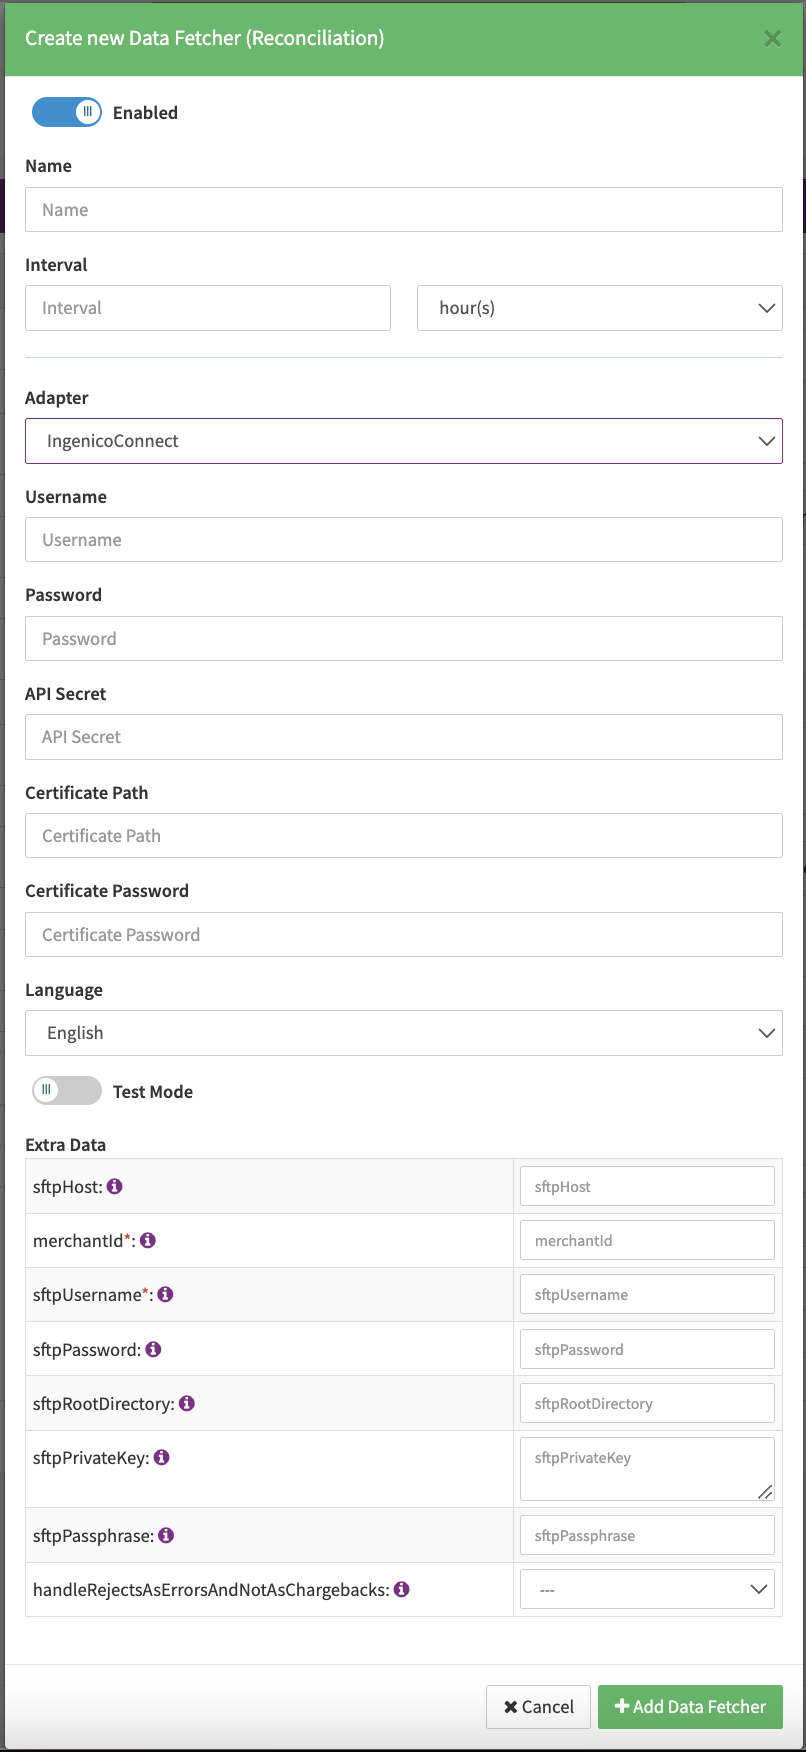
Configure the following Parameters for the Reconciliation Data Fetcher to fetch Reconciliation (xml format) via an SFTP (see Reconciliation Data Fetcher Provider Level):
- Fill in the expected Interval in which the Reconciliation File should be fetched - days, hours
- Select the Adapter IngenicoPci, IngenicoConnectPci, IngenicoConnect or IngenicoXml
- Enable Testmode to fetch Reconciliation staging files (files starting with
wxt.- only available if enabled from Igenico) from the SFTP Server, disabled production files (files starting withwx1.) are fetched from the SFTP Server - Fill in the mandatory Extra Data: merchantId (string) — Merchant ID provided by Ingenico required to retrieve the WX Report Files.
- Fill in the mandatory Extra Data: sftpUsername (string) — SFTP Username required for the Authorization.
- Fill in the mandatory Extra Data: sftpPassword (string) — SFTP Password required for the Authorization
- Fill in the optional Extra Data: sftpRootDirectory (string) — Root folder on the SFTP Server where the WX report files are available
- Select the optional Extra Data: handleRejectsAsErrorsAndNotAsChargbacks (boolean): true, false — to determine if a rejected transaction should be handled as chargeback or not
Provider Settlement
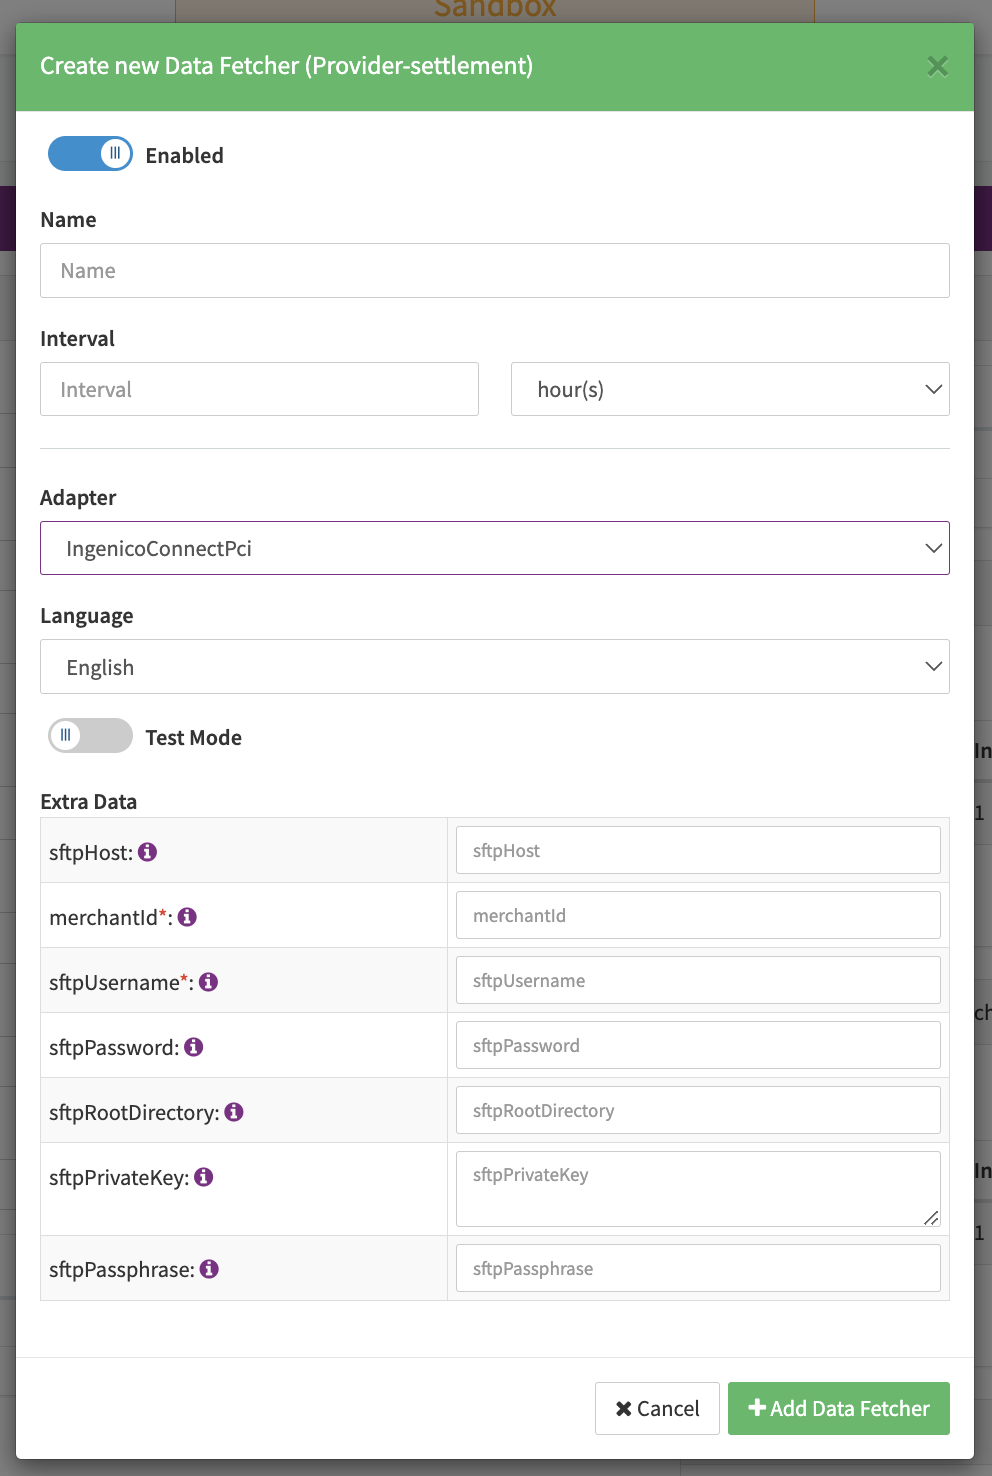
Configure the following Parameters for the Settlements Provider Data Fetcher to fetch Settlement (xml format) via SFTP (see Edit Provider Settlement Data Fetcher Provider Level):
- Fill in an optional Name
- Fill in the expected Interval in which the Provider Settlement File should be fetched - days, hours
- Select the Adapter IngenicoConnectPci or IngenicoConnect
- Enable Testmode to fetch Provider Settlement staging files (files starting with
wxt.- only available if enabled from Igenico) from the SFTP Server, disabled production files (files starting withwx1.) are fetched from the SFTP Server - Fill in the mandatory Extra Data: sftpHost (string) — SFTP Host name required for the Authorization
- Fill in the mandatory Extra Data: merchantId (string) — Merchant ID provided by Ingenico required to retrieve the WX Report Files.
- Fill in the mandatory Extra Data: sftpUsername (string) — SFTP Username required for the Authorization.
- Fill in the mandatory Extra Data: sftpPassword (string) — SFTP Password required for the Authorization
- Fill in the optional Extra Data: sftpRootDirectory (string) — Root folder on the SFTP Server where the WX report files are available
- Fill in the optional Extra Data: sftpPrivateKey: (string) — SFTP private Key required for Authorization
- Fill in the optional Extra Data: sftpPassphrase (string) — SFTP Passphrase required for Authorization
WorldlineOgone Data Fetcher Configuration
Provider Settlement
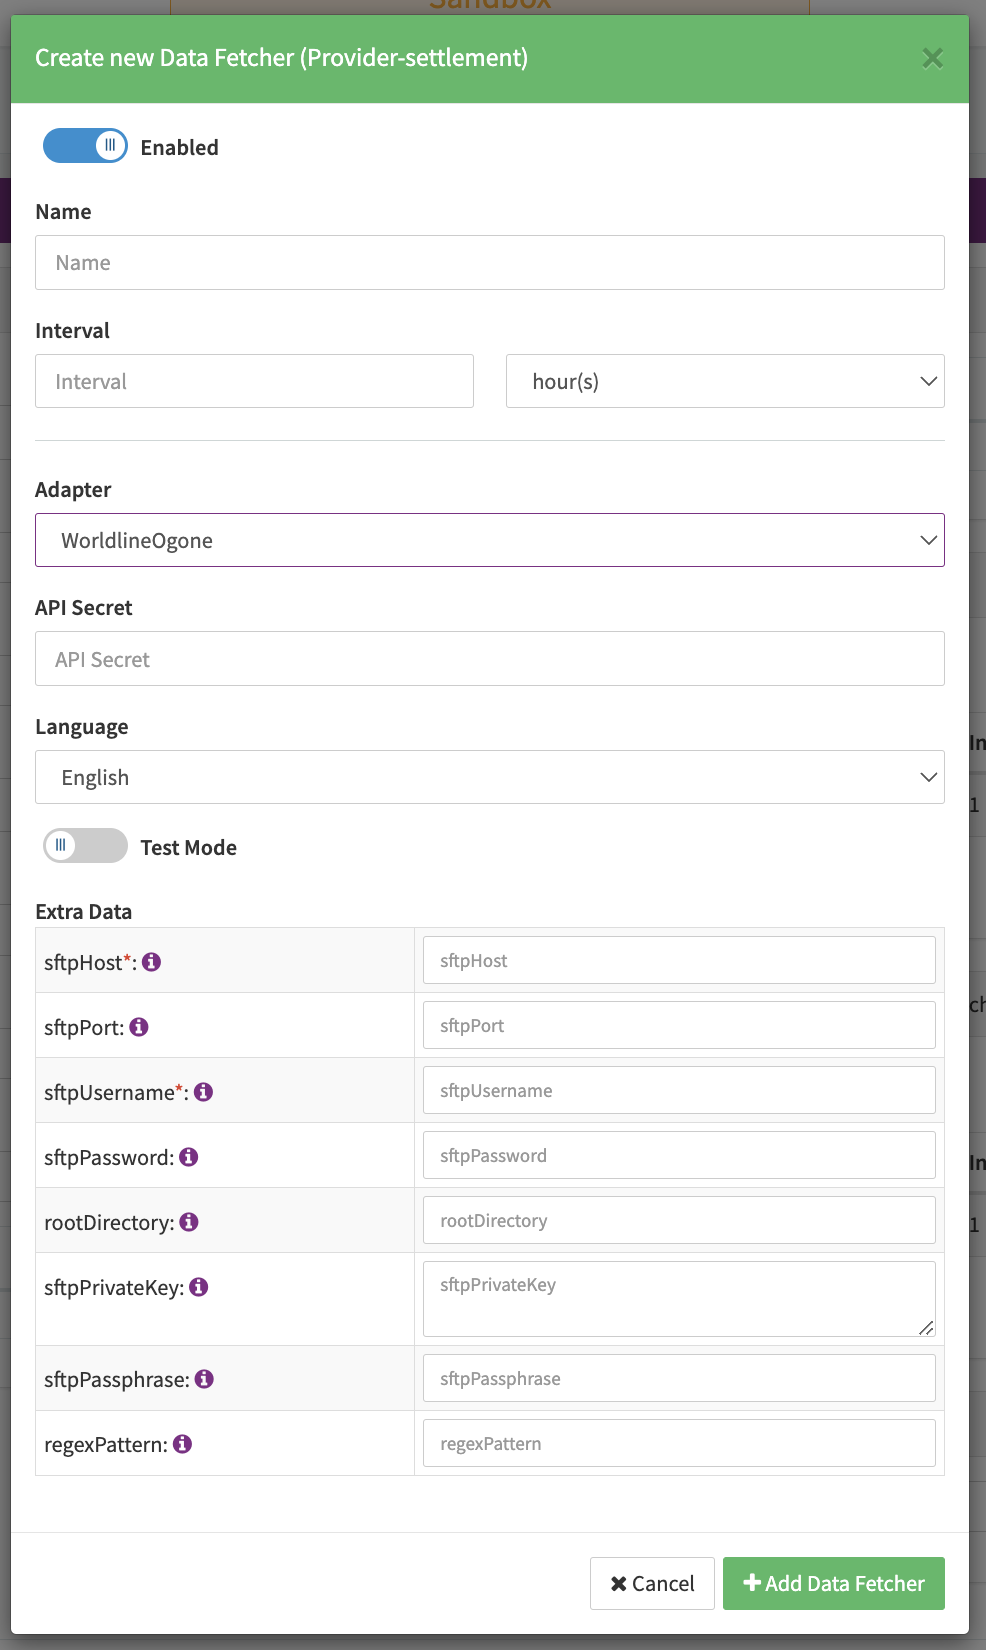
Configure the following Parameters for the Settlements Provider Data Fetcher to fetch Settlement (csv & xml format) via SFTP (see Edit Provider Settlement Data Fetcher Provider Level):
- Fill in the optional Name
- Fill in the expected Interval in which the Provider Settlement File should be fetched - days, hours
- Select the Adapter WorldlineOgone
- The Setting Testmode is irrelevant for this adapter
- Fill in the mandatory Extra Data: sftpHost (string) - SFTP Server Host
- Fill in the optional Extra Data: sftpPort (string)
- Fill in the mandatory Extra Data: sftpUsername (string): SFTP Username required for the Authorization
- Fill in the mandatory Extra Data: sftpPassword (string): SFTP Password required for the Authorization
- Select the optional Extra Data: rootDirectory — The root directory to fetch from; required if not (
/). - Fill in the optional regexPattern: To specify which files should be fetched
In case Postfinance files and Twint files are not in the same directory/path you should set up two data fetchers.