HNCB
Configuration
The HNCB adapter requires a variety of different configuration parameters depending on the payment method. Each parameter is appended with a suffix indicating whether the parameter is required for the corresponding payment method.
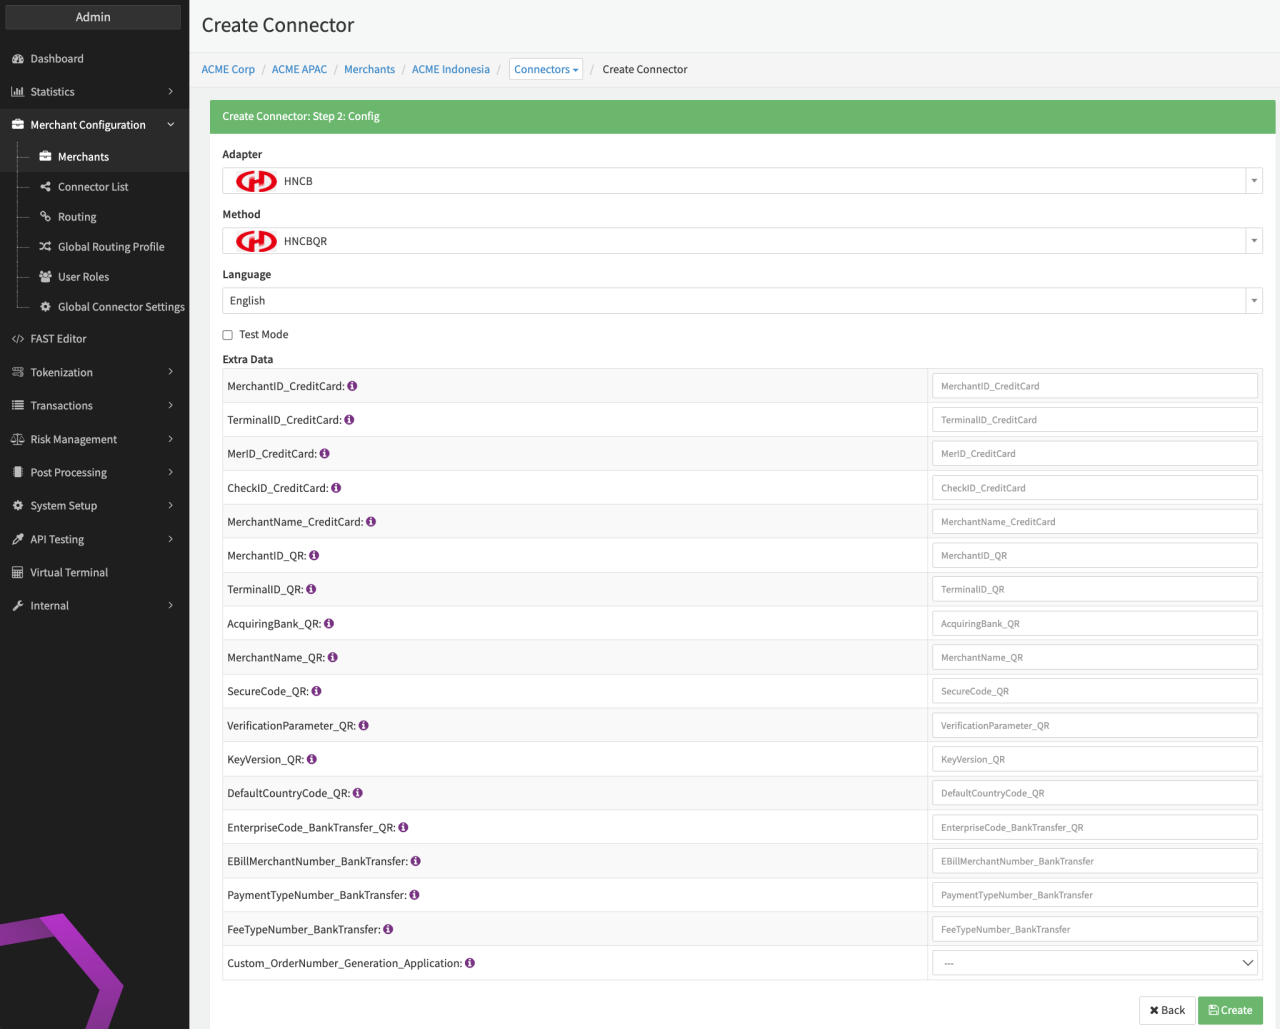
Configure the following parameters for the Connector (see Connector Config - HNCB):
- Fill in the Extra Data: MerchantID_CreditCard — also referred to as "StoreID"
- Fill in the Extra Data: TerminalID_CreditCard
- Fill in the Extra Data: MerID_CreditCard
- Fill in the Extra Data: CheckID_CreditCard
- Fill in the Extra Data: MerchantName_CreditCard — Merchant name to be displayed during checkout process
- Fill in the Extra Data: MerchantID_QR
- Fill in the Extra Data: TerminalID_QR
- Fill in the Extra Data: AcquiringBank_QR
- Fill in the Extra Data: MerchantName_QR —Merchant name used for QR code generation
- Fill in the Extra Data: SourceCode_QR
- Fill in the Extra Data: VerificationParameter_QR — 32 character hexadecimal string; shared between the merchant and HNCB and required for the QR encryption
- Fill in the Extra Data: KeyVersion_QR
- Fill in the Extra Data: DefaultCountryCode_QR — Required for the QR code generation - usually consists of three numbers.
- Fill in the Extra Data: EnterpriseCode_BankTransfer_QR — also referred to as "Virtual Account"
- Fill in the Extra Data: EBillMerchantNumber_BankTransfer
- Fill in the Extra Data: PaymentTypeNumber_BankTransfer
- Fill in the Extra Data: FeeTypeNumber_BankTransfer
- Select the Extra Data: Custom_OrderNumber_Generation — true, false
Terminal Setup
The HNCB adapter requires also a unique identifier for each MerchantID/StoreID and each request to be sent. This is achieved using a terminal configuration for the connector.
The configuration depends on your setup.
If you have multiple connectors using the same StoreID, follow these steps:
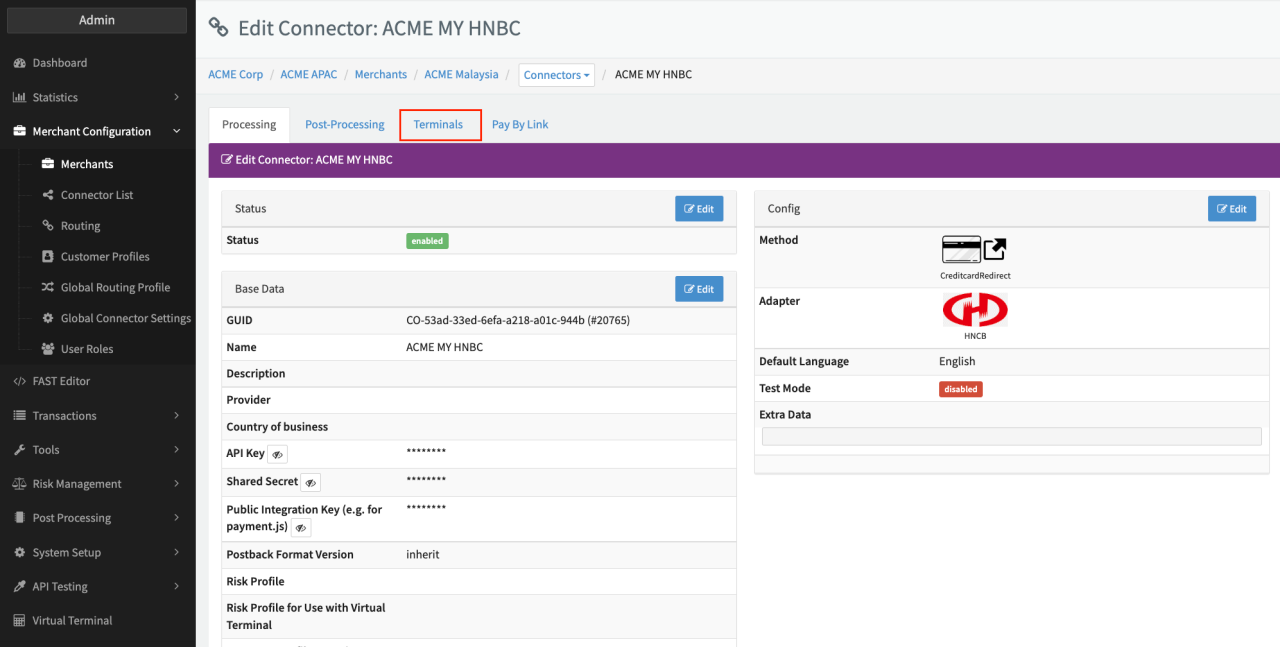
- For the first connector: Go to the Terminals tab in the Connector Details Overview (see Connector Detail Overview - HNCB).
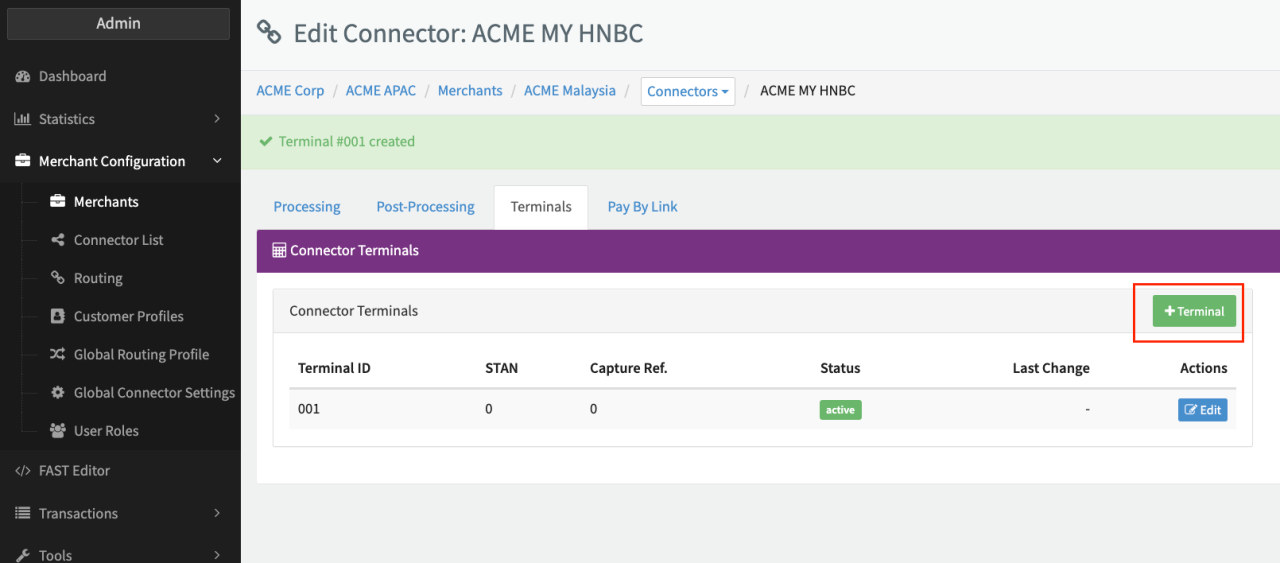
- Click + Terminal to add a terminal (see Terminal Tab).
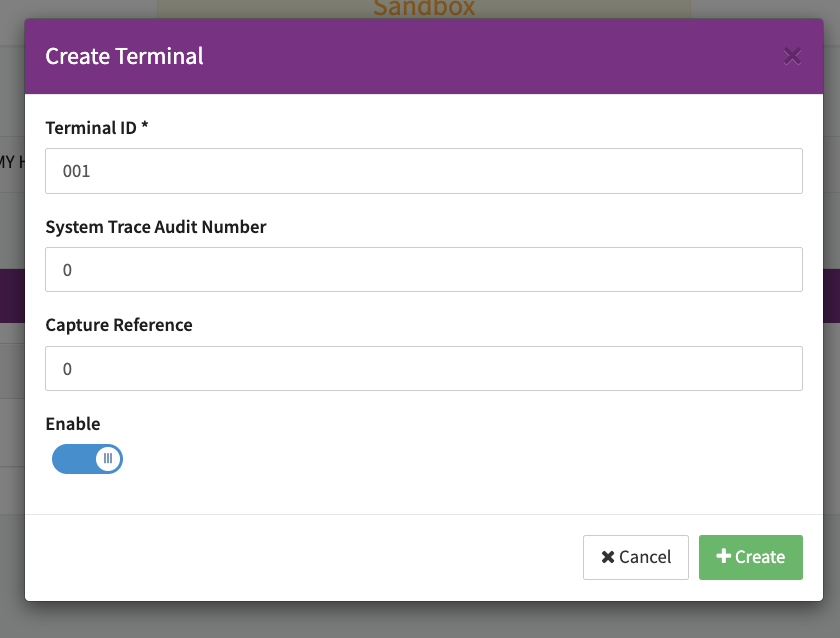
- Enter the Terminal ID "000".
- Check Enable and click + Create (see Terminal Configuration).
- For each additional connector using the same StoreID: Go to the Terminals tab.
- Click + Terminal to add a terminal.
- Enter the Terminal ID "001" for the first additional connector, "002" for the second additional connector and so on.
- Check Enable and click + Create (see Terminal Configuration).
If you only want to set up a single connector with the StoreID, follow steps 1-4.
Data Fetcher Configuration
In contrast to most adapters, settlements for HNCB can only be handled via manual upload of the settlement document. Furthermore , the HNCB settlement files differ depending on the payment method.
The files are divided into settlements that contain "Credit Card"" ("Credit Card Redirect" on the IXOPAY platform) transactions and settlements that contain "QR" ("HNCB QR" on the IXOPAY platform) and "Bank Transfer" transactions. In order for the IXOPAY platform to be able to handle this separation, there are two options:
- Separate the connectors by payment method to individual providers
- Collect all connectors in one provider and add two separate data fetchers
No matter which option you prefer, you need to configure data fetchers (see section Enable and Set Up Reconciliation on the Provider Level) for the provider.
The uploaded file must be in CSV format (.csv), using , (comma) as the separator.
Since HNCB TW only processes full amounts (i.e. without decimal places),
the amounts in the CSV file must not contain a period . as the thousand separator.
This would be interpreted as a decimal point and lead to the value being parsed incorrectly.
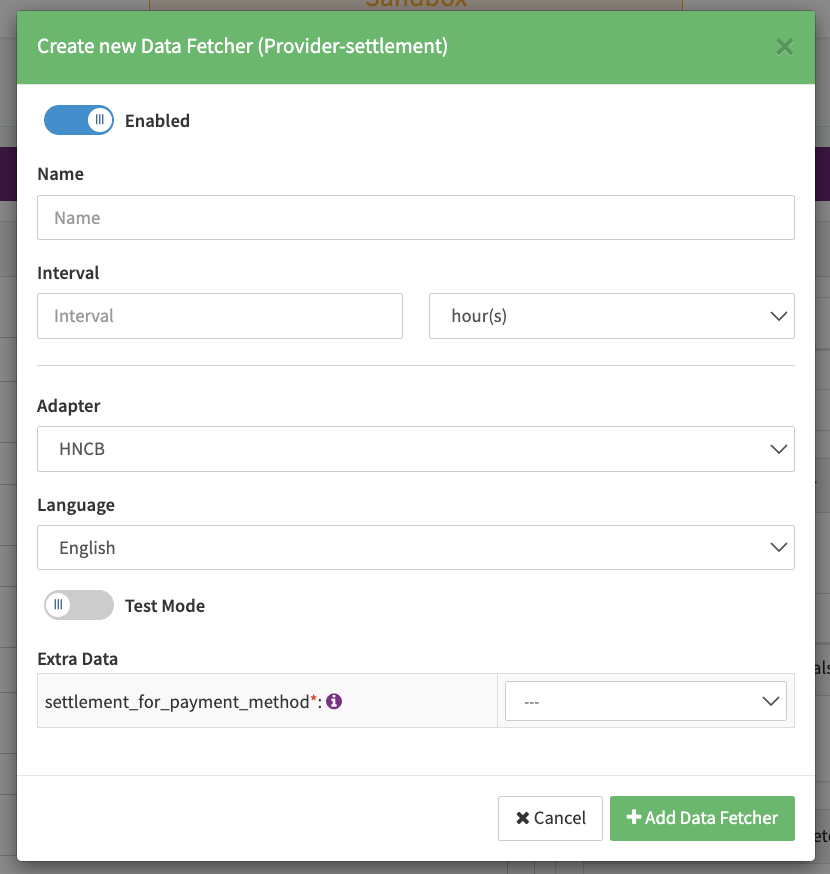
Provider Settlement
Configure the following parameters for the Settlements Provider Data Fetcher to fetch the settlement (JSON format) via the API (see Edit Provider Settlement Data Fetcher Provider Level):
- Enter an optional Name. This is not mandatory but recommended, especially if you add two data fetchers for a single provider, allowing you to better distinguish them.
- Enter the mandatory Interval in which the provider settlement file should be fetched - days, hours. While this step is mandatory, it is not technically required, as the settlements are only uploaded manually. Simply enter a value such as 1 - month.
- Select the HNCB adapter.
- Testmode is not needed since settlements are only uploaded manually.
- Enter the mandatory Extra Data - settlement_for_payment_method used for authentication.
For details on manually uploading the settlement file, see Provider Settlements.