Setting up your account
To start processing online payments with IXOPAY platform, you will need to set up an account. This page will guide you through the steps of creating and configuring your account.
Creating an Account
Starter & Growth
To create an account with IXOPAY platform, click here. You will need to provide some basic information such as your name, email address and company details.
Once you have filled in the required information, you will be asked to verify your email address and company details. Follow the instructions to complete the process.
After your account has been created, you will need to configure some settings before you can start accepting payments.
Enterprise
Please contact IXOPAY sales using the contact form or via [email protected].
Enterprise accounts have access to more features than starter & growth, such as the Reconciliation API, the Settlement API and the Provisioning API.
Configuring your settings
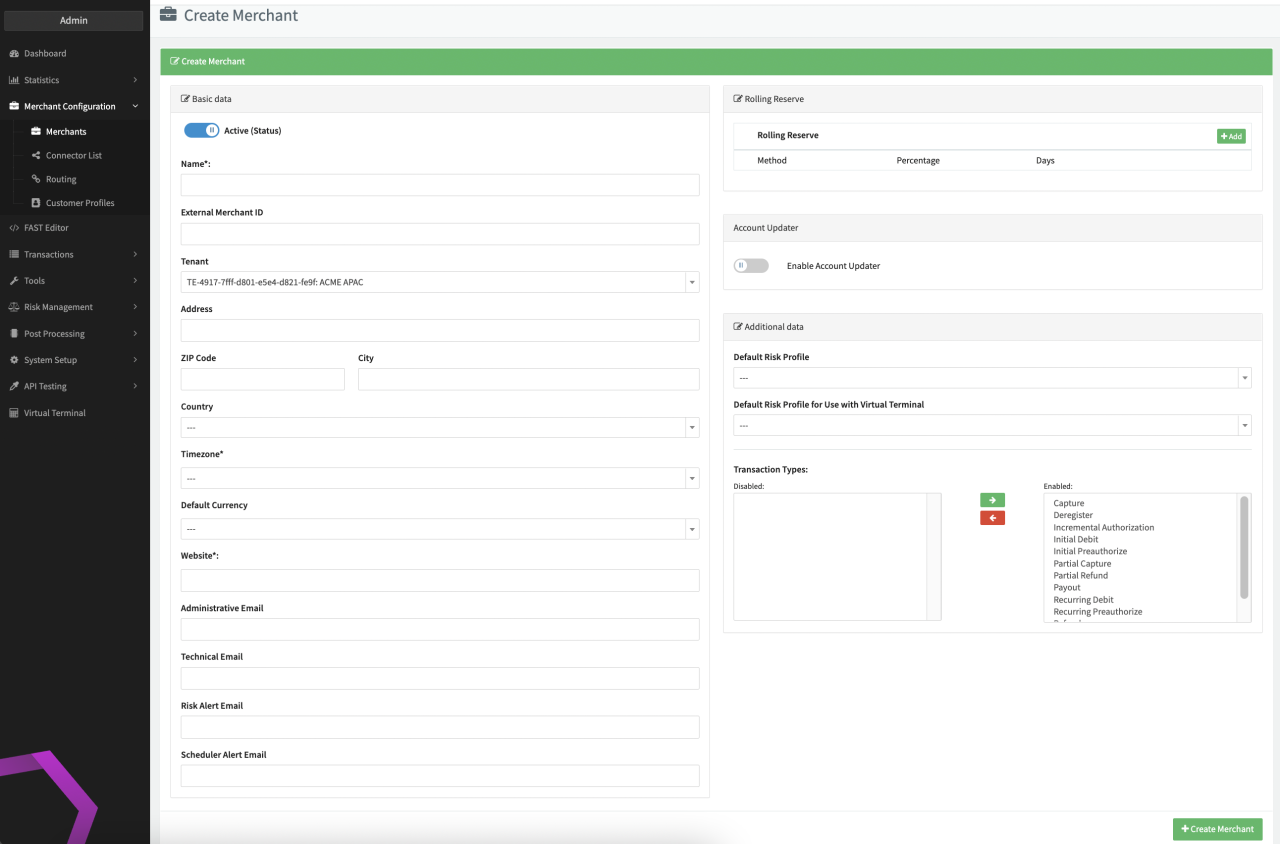
Step 1: Create a merchant profile
Merchants in IXOPAY platform are a central entity. They are the actual operators of a sales channel, selling goods or services to customers and processing transactions via the platform.
- Navigate to Merchant Configuration > Merchants in the left menu.
- Click ➕ New Merchant.
- Fill in the mandatory fields Merchants name, Timezone and Website.
- Fill in additional optional fields in the Basic data, Rolling Reserve and Additional data sections.
- Click ➕ Create Merchant. The newly created merchant is enabled immediately and can be found in the Merchant Overview, where you can edit it and its associated configuration elements.
- Click on Overview to open your newly created merchant in the Merchant Overview.

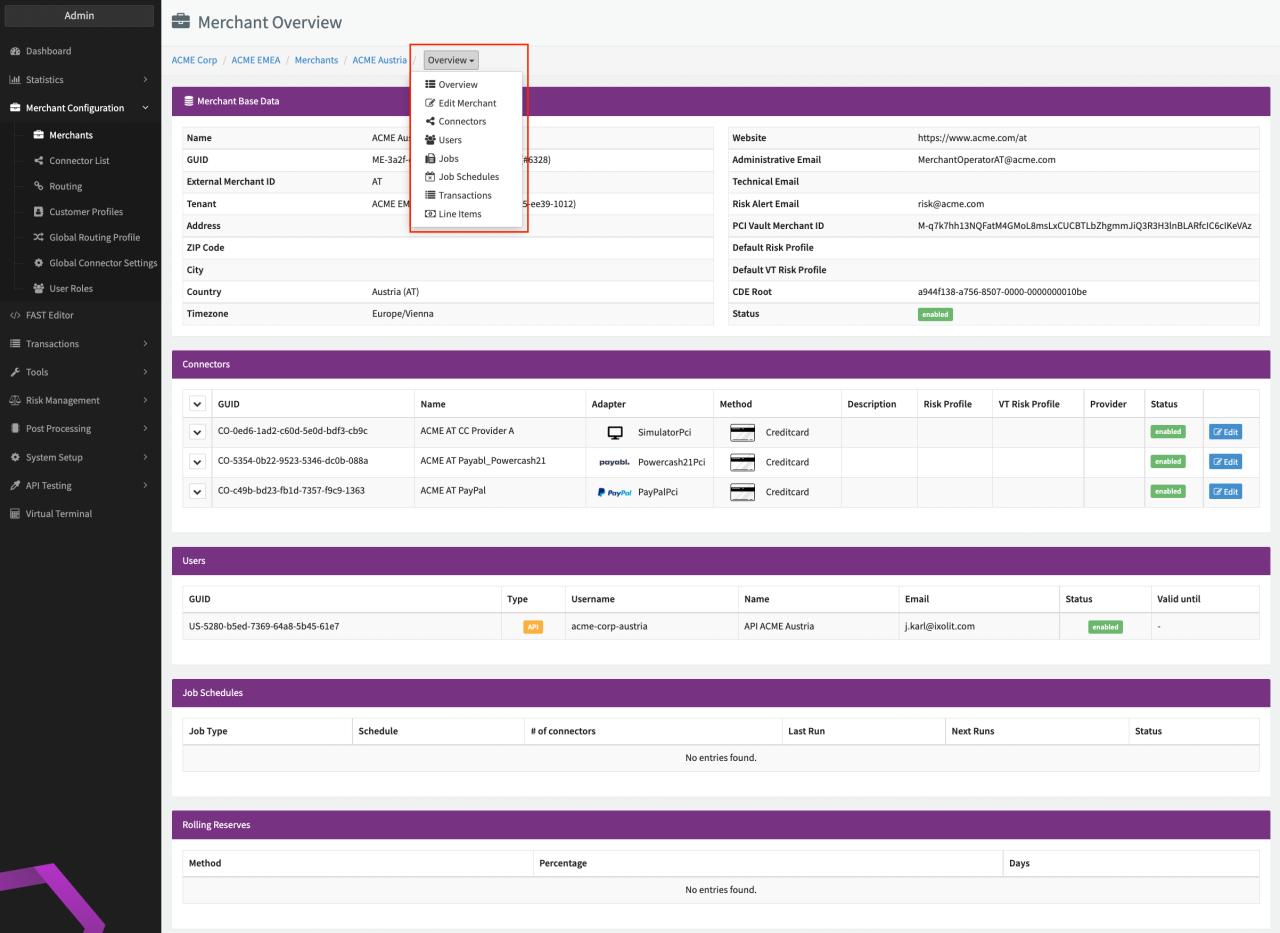
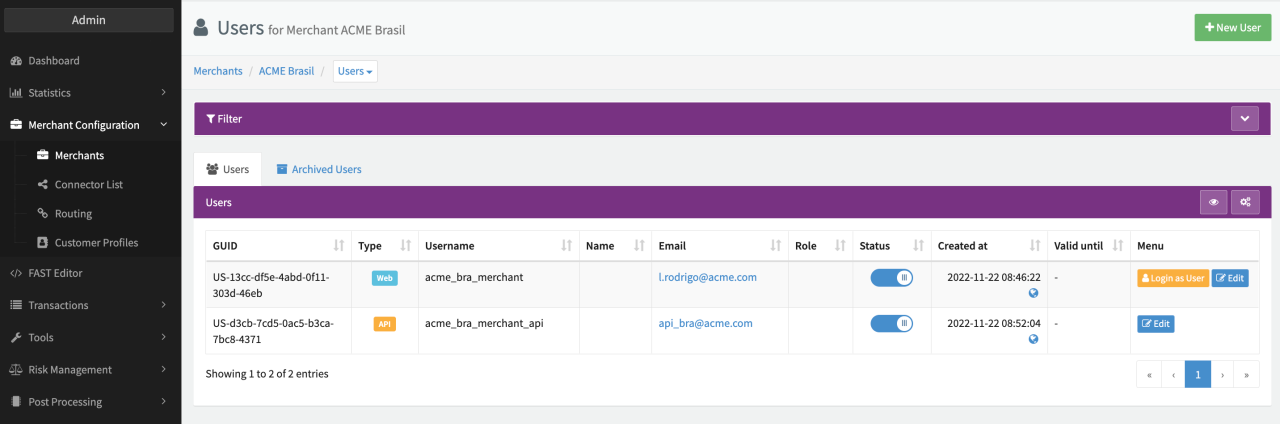
Step 2: Create an API user
- In the Merchant Overview, select Users from the drop-down menu at the top of the page (Overview is selected by default).
- Click on ➕ New User.
- Enter the required Base Data for the User:
- Username,
- Email address
- Select api as the User Type.
- Either type in a Password or click on Generate to let IXOPAY platform generate a random password.
- Click on ➕ Create User to confirm your entries and add the user.
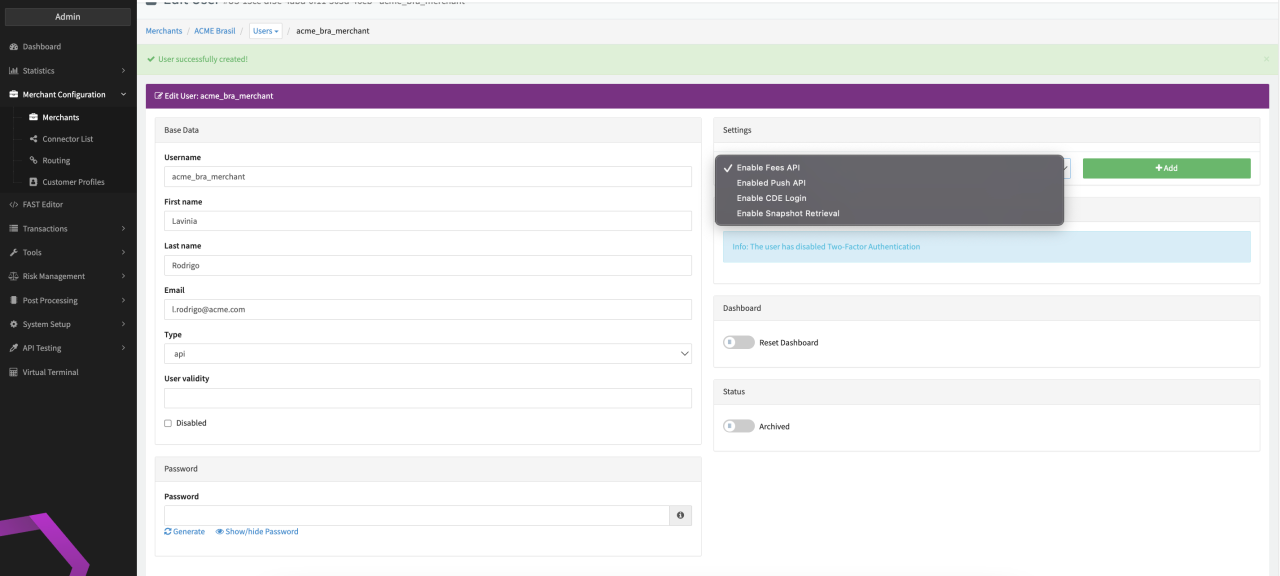
Make a copy of the username and password as you'll need it to access the API.
We will refer to these as $USERNAME and $PASSWORD in this guide from now on.
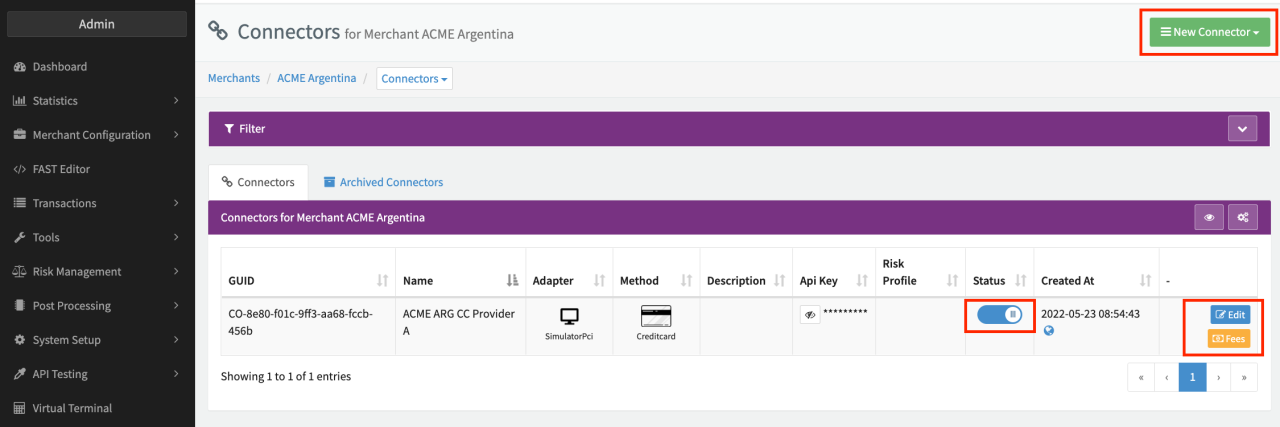
Step 3: Create a connector
In order to process transactions through a PSP/acquirer, connectors need to be configured for each merchant. A connector connects to the PSP/acquirer and handles all communication between IXOPAY platform and the PSP/acquirer. The IXOPAY platform offers a wide range of adapters for different PSPs/acquirers that you can use to access and manage various payment methods from within the platform. This allows your merchants to integrate multiple providers and payment methods.
A new connector needs to be created per merchant for each unique combination of end-point, account/credentials (from your PSP/acquirer) and payment method.
-
Select Connectors from the drop-down menu at the top of the page.
-
Click on New Connector ⬇️ and select ➕ New Connector from the drop-down menu.
-
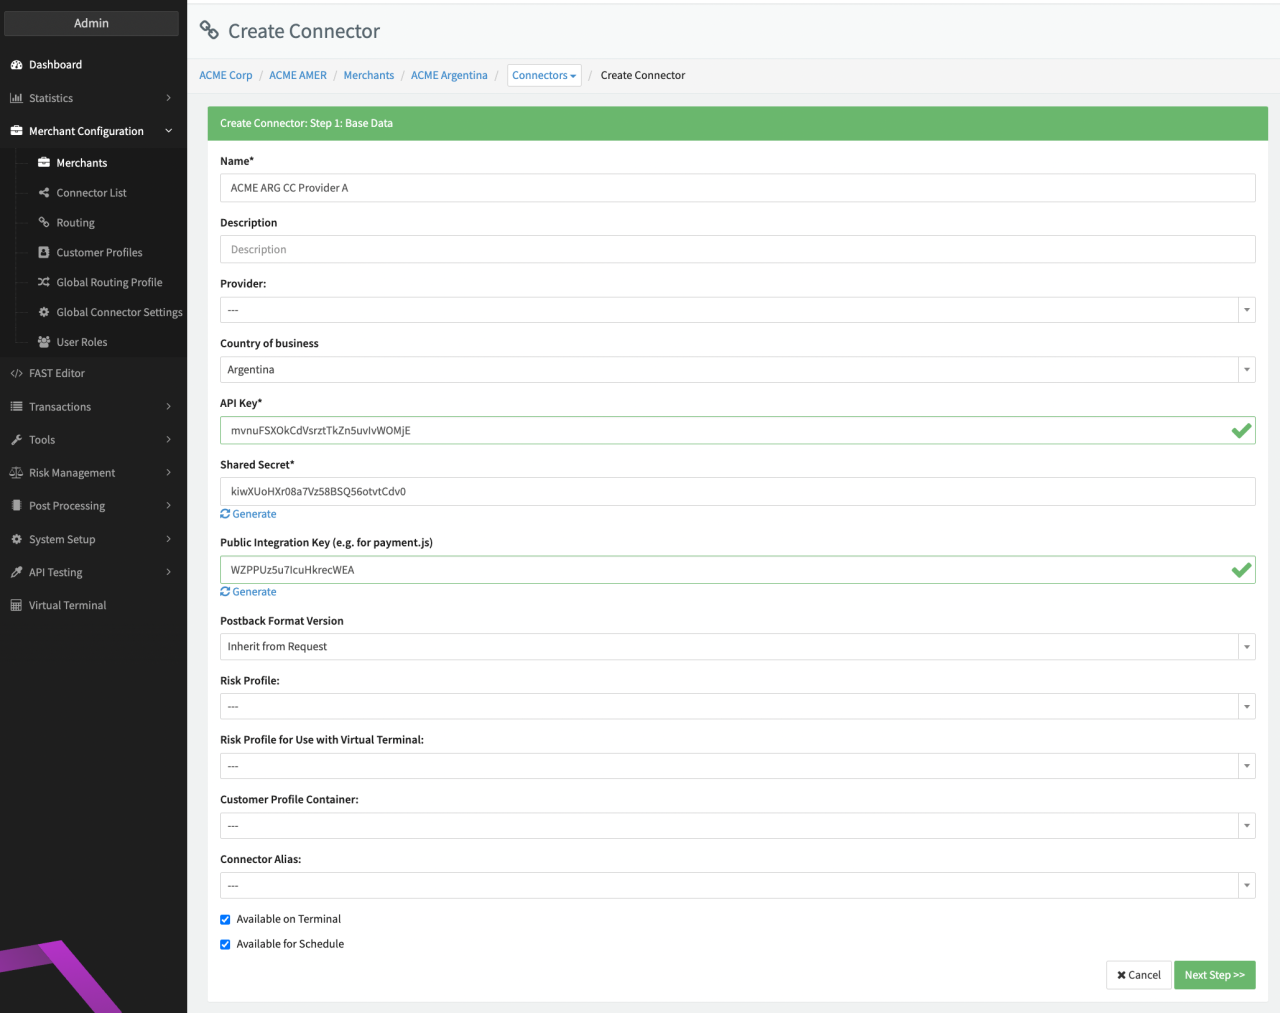
Enter the Base data:
The base data includes data required to access your connector via the Transaction API and metadata used to identify the connector.
-
Name - Enter a descriptive name
Tip: Use a naming conventionWe recommend using a consistent naming convention to make connectors easy to recognize, e.g.
<Merchant> <CC Provider> <description>. -
API Key - Enter a unique key without blank spaces
Info: Save thisYou need this key to select the connector via the API. We will refer to this as
$API_KEYin this guide from now on. -
Shared secret and Public Integration Key - Either enter a secret key manually or click on Generate to generate a unique key.
infoYou need the shared secret to validate incoming callbacks and the public integration key to integrate payment.js. We will refer to these as
$SHARED_SECRETand$INTEGRATION_KEYin this guide from now on. -
Leave the default values for the other fields.
-
Click on Next Step to save your entries.
-
-
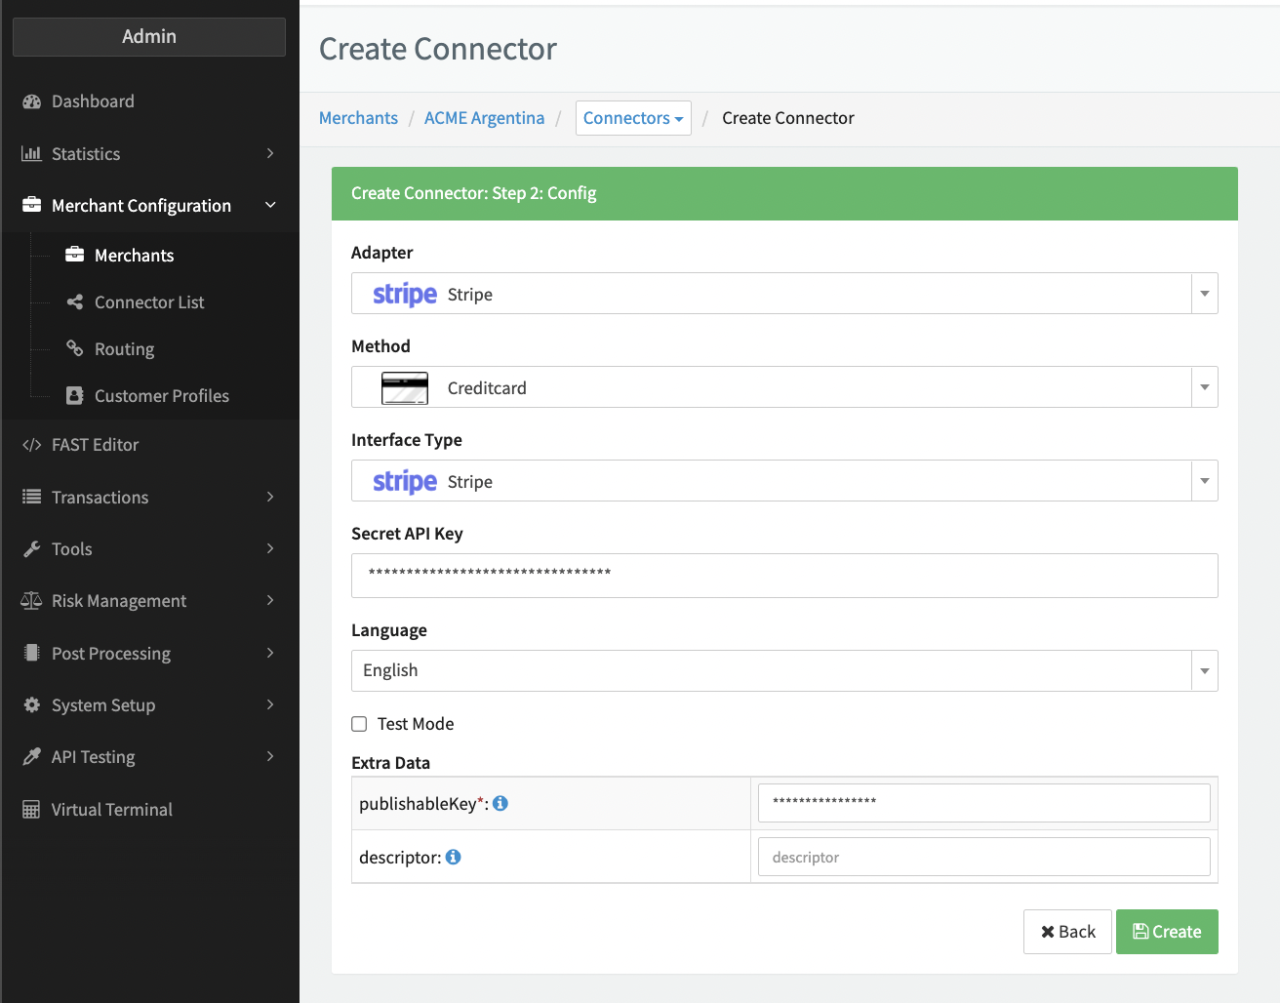
Enter the Configuration:
Info: QuickstartTo try out the API integration without connecting to a real-world PSP, choose:
- Adapter - Simulator (use the search function to quickly locate this entry).
- Method - Creditcard.
- Interface Type - Simulator (this field is only displayed after selecting Creditcard as the method).
- Leave the default value for the other fields.
- Click on 💾 Create to save your settings.
Enter your credentials to use your connector with your PSP/acquirer's API.
- Adapter: Choose the adapter you want to configure from the list.
- Method: Select the payment method you want to configure.
- Interface Type: This field is only displayed if the chosen adapter and payment method offer multiple API connections. Select your chosen API.
- Enter the credentials needed to connect with the PSP/acquirer to process transactions. Each adapter needs its own individual settings. To find out which settings to enter for your connector, refer to the information about your adapter on the Adapters page.
- Click 💾 Create to save your settings.
You have now set everything up to start accepting payments in your application.